How to Access Your Homeowner Portal for the First Time
Getting into your homeowner portal takes just a few minutes. Here's how to get set up.
Step 1: Navigate to the Homeowner Portal
Open your web browser and go to portal.community.solume.com.
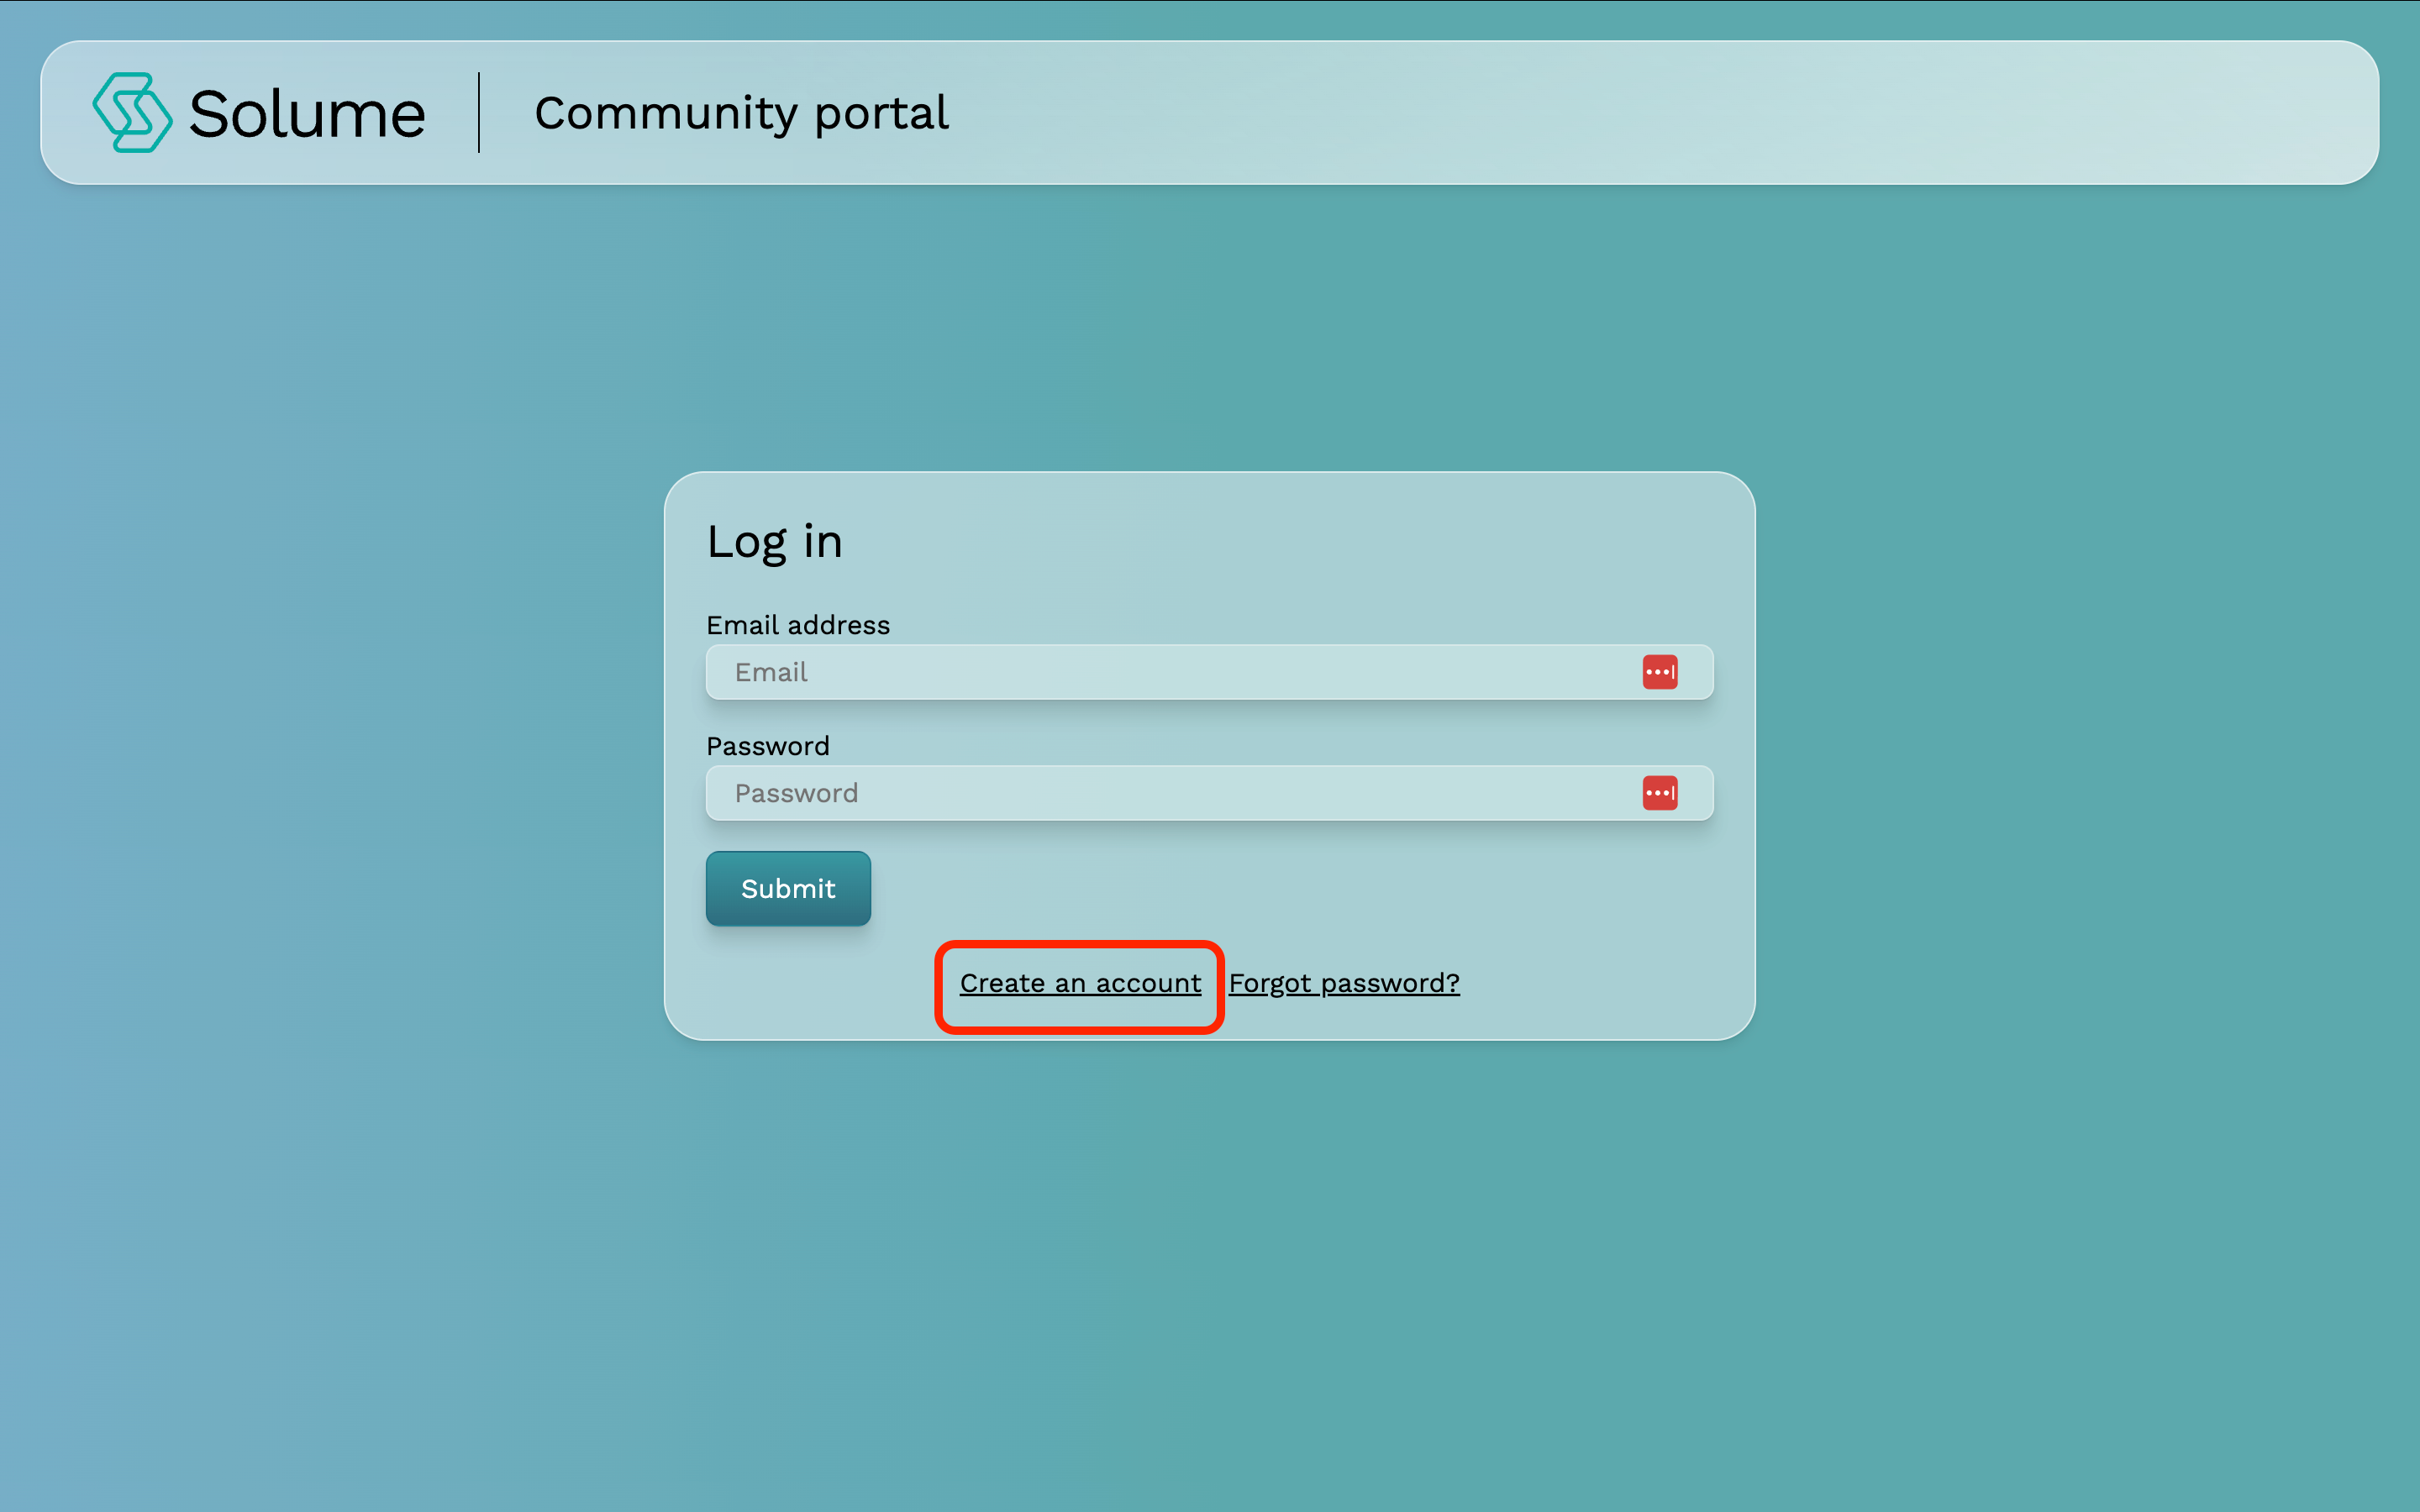
Step 2: Click Create an Account
On the login screen, click the Create an Account button.
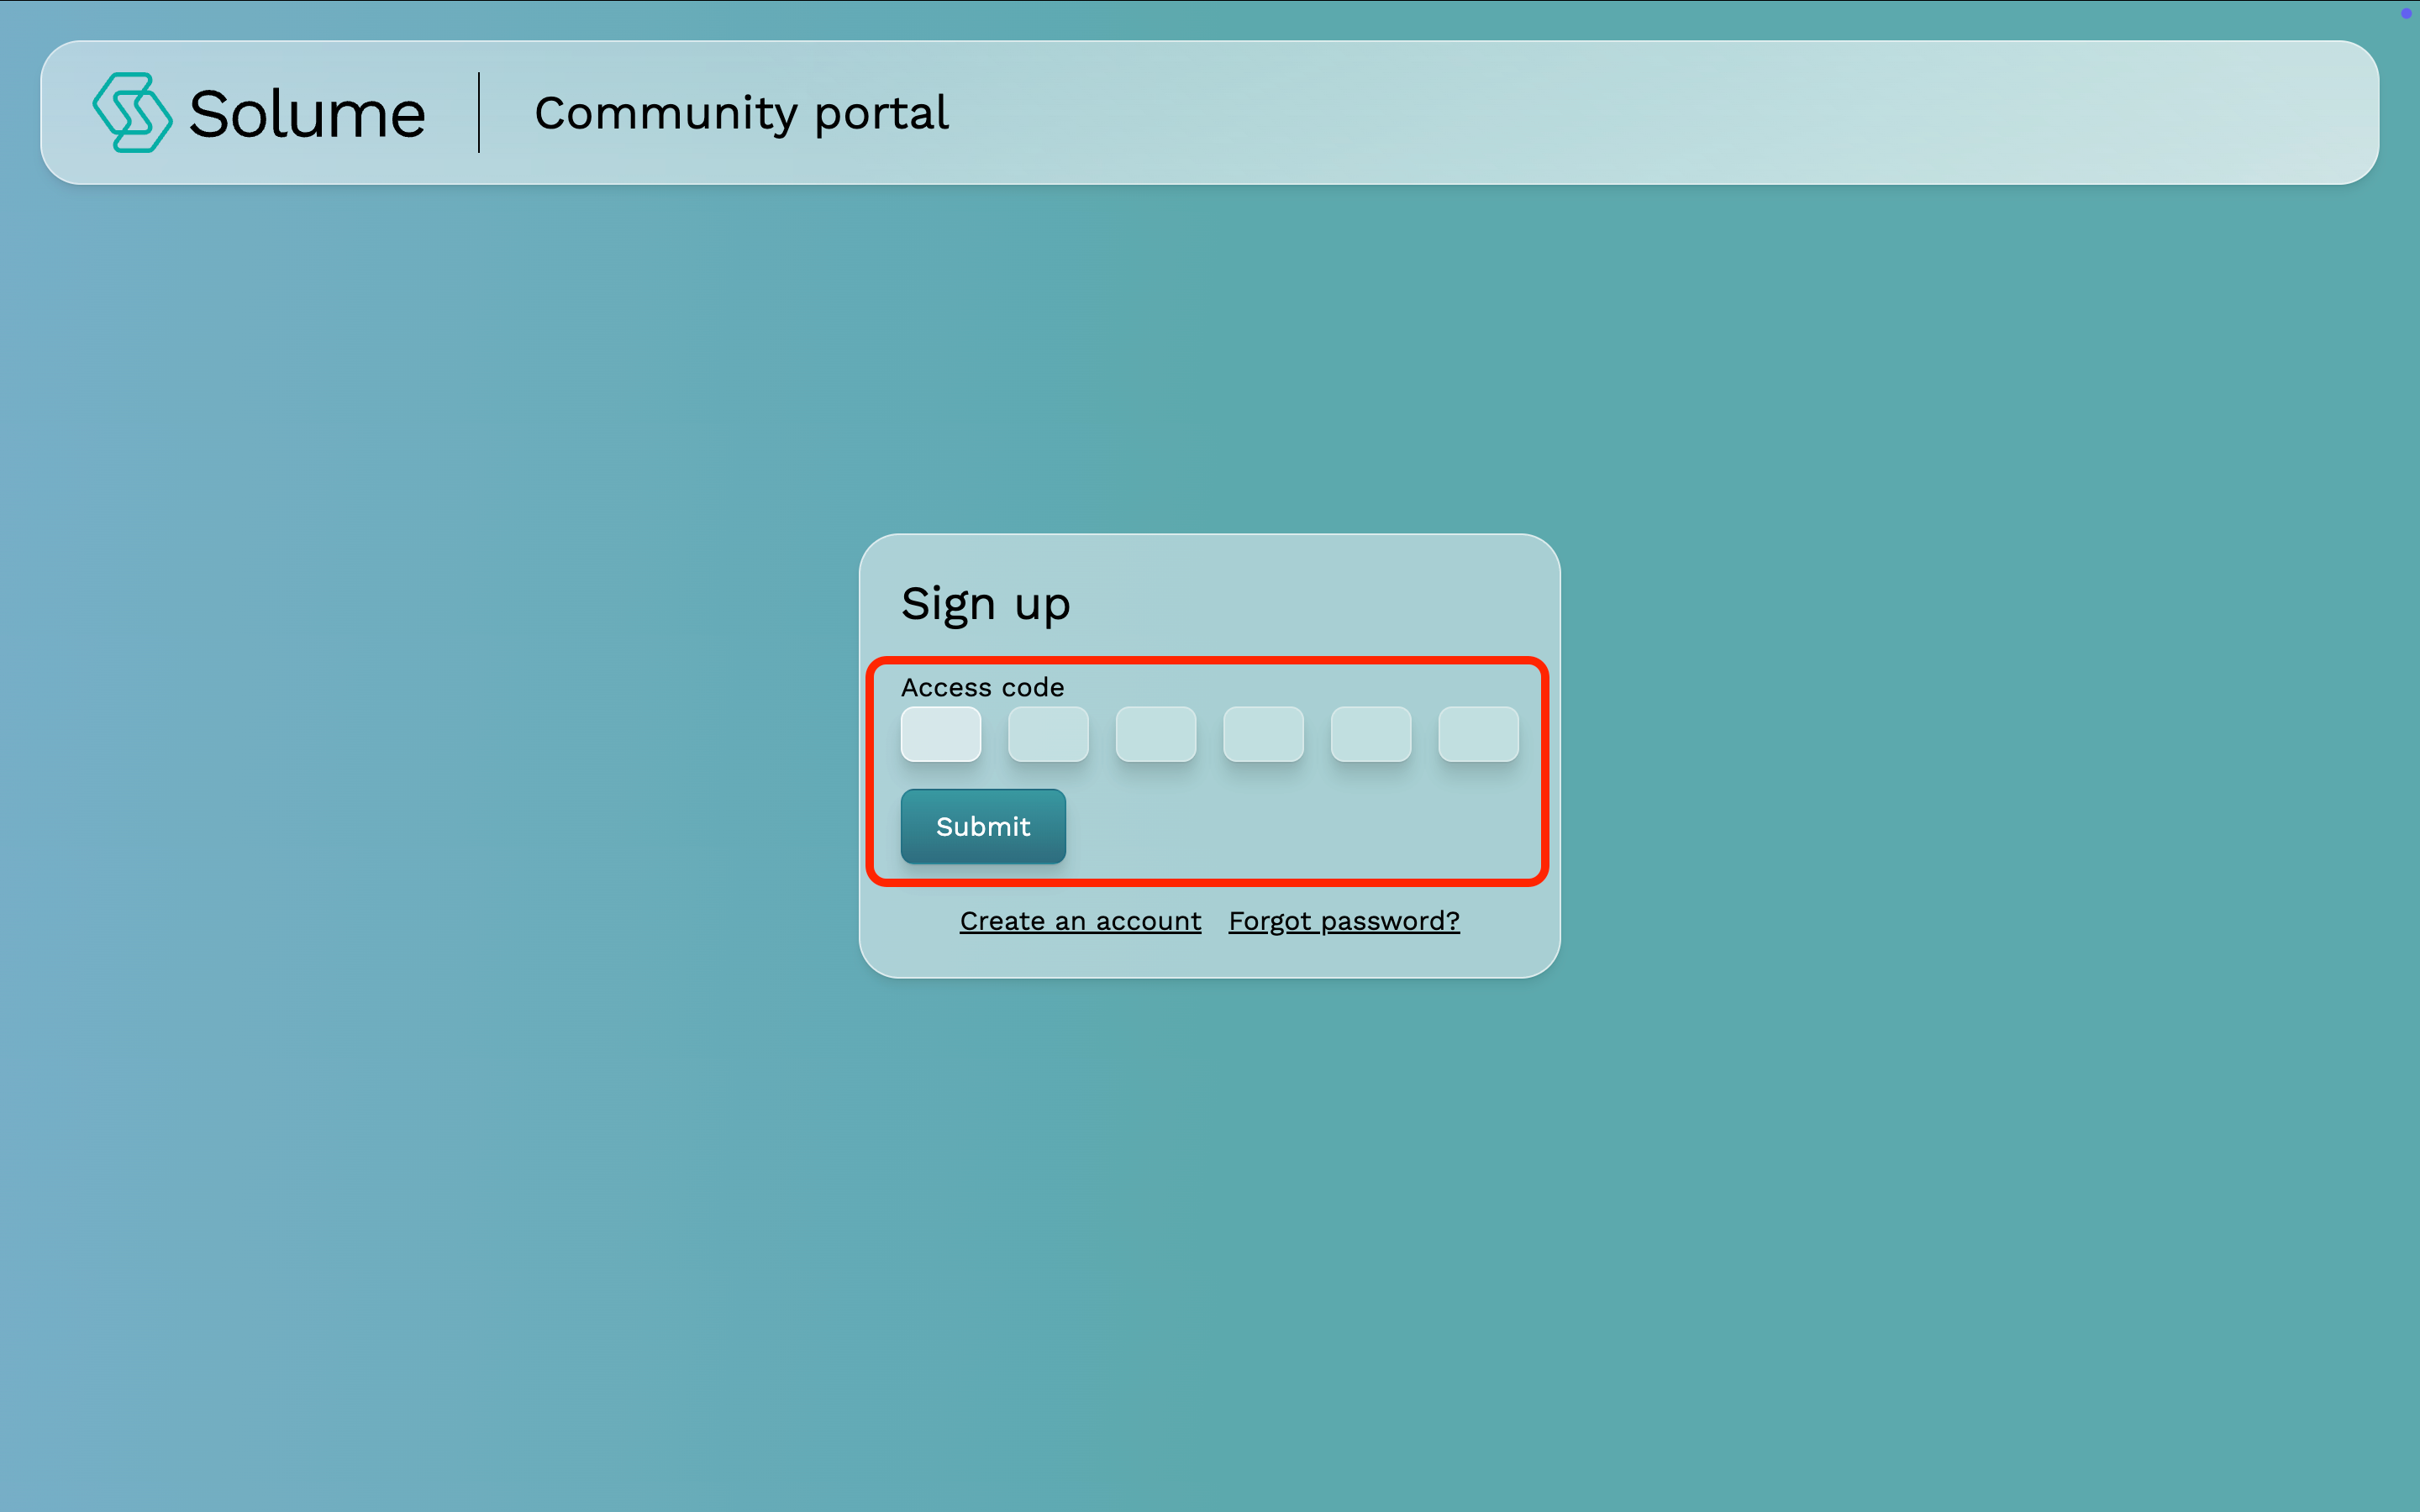
Step 3: Enter Your Access Code
You will be prompted to enter a six-digit access code. This code is provided by your community's board. Enter it and click Submit.
Step 4: Set Up Your Login Credentials
You will then be asked to create your account by entering the following:
- Email Address
- Password
- Confirm Password

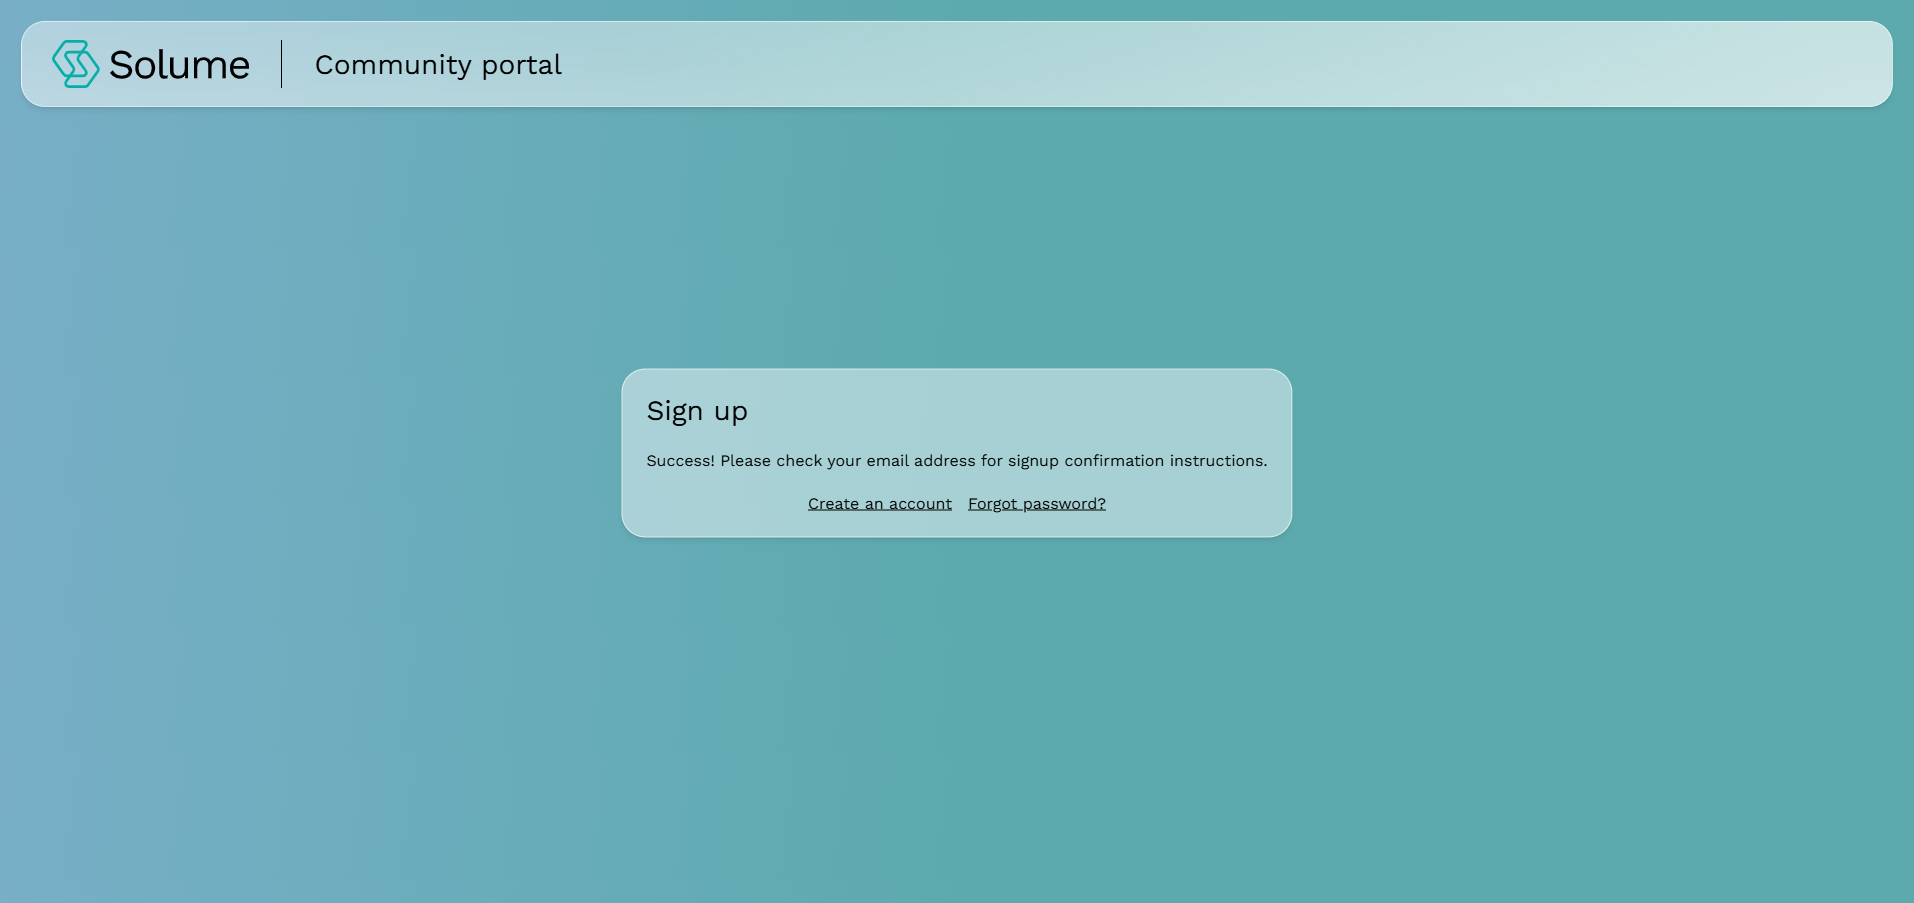
Step 5: Verify Your Email Address
Once you click Submit, you will receive an email asking you to verify your email address. Open that email and click the verification link to authenticate your account.
Step 6: Log Into Your Portal
After verifying your email, return to portal.community.solume.com and log in using the email address and password you just created.
You're now ready to access your homeowner portal.
Note: If you have not yet received your six-digit access code, reach out to your community board before attempting to create your account. If you are denied access to the community portal, it may be because your board does not have your email address on file or has restricted access to your account. Please reach out to your board for further instructions.
How to Pay Your Dues in the Homeowner Portal
Paying your dues through the Solume homeowner portal takes less than two minutes. Here's how to do it.
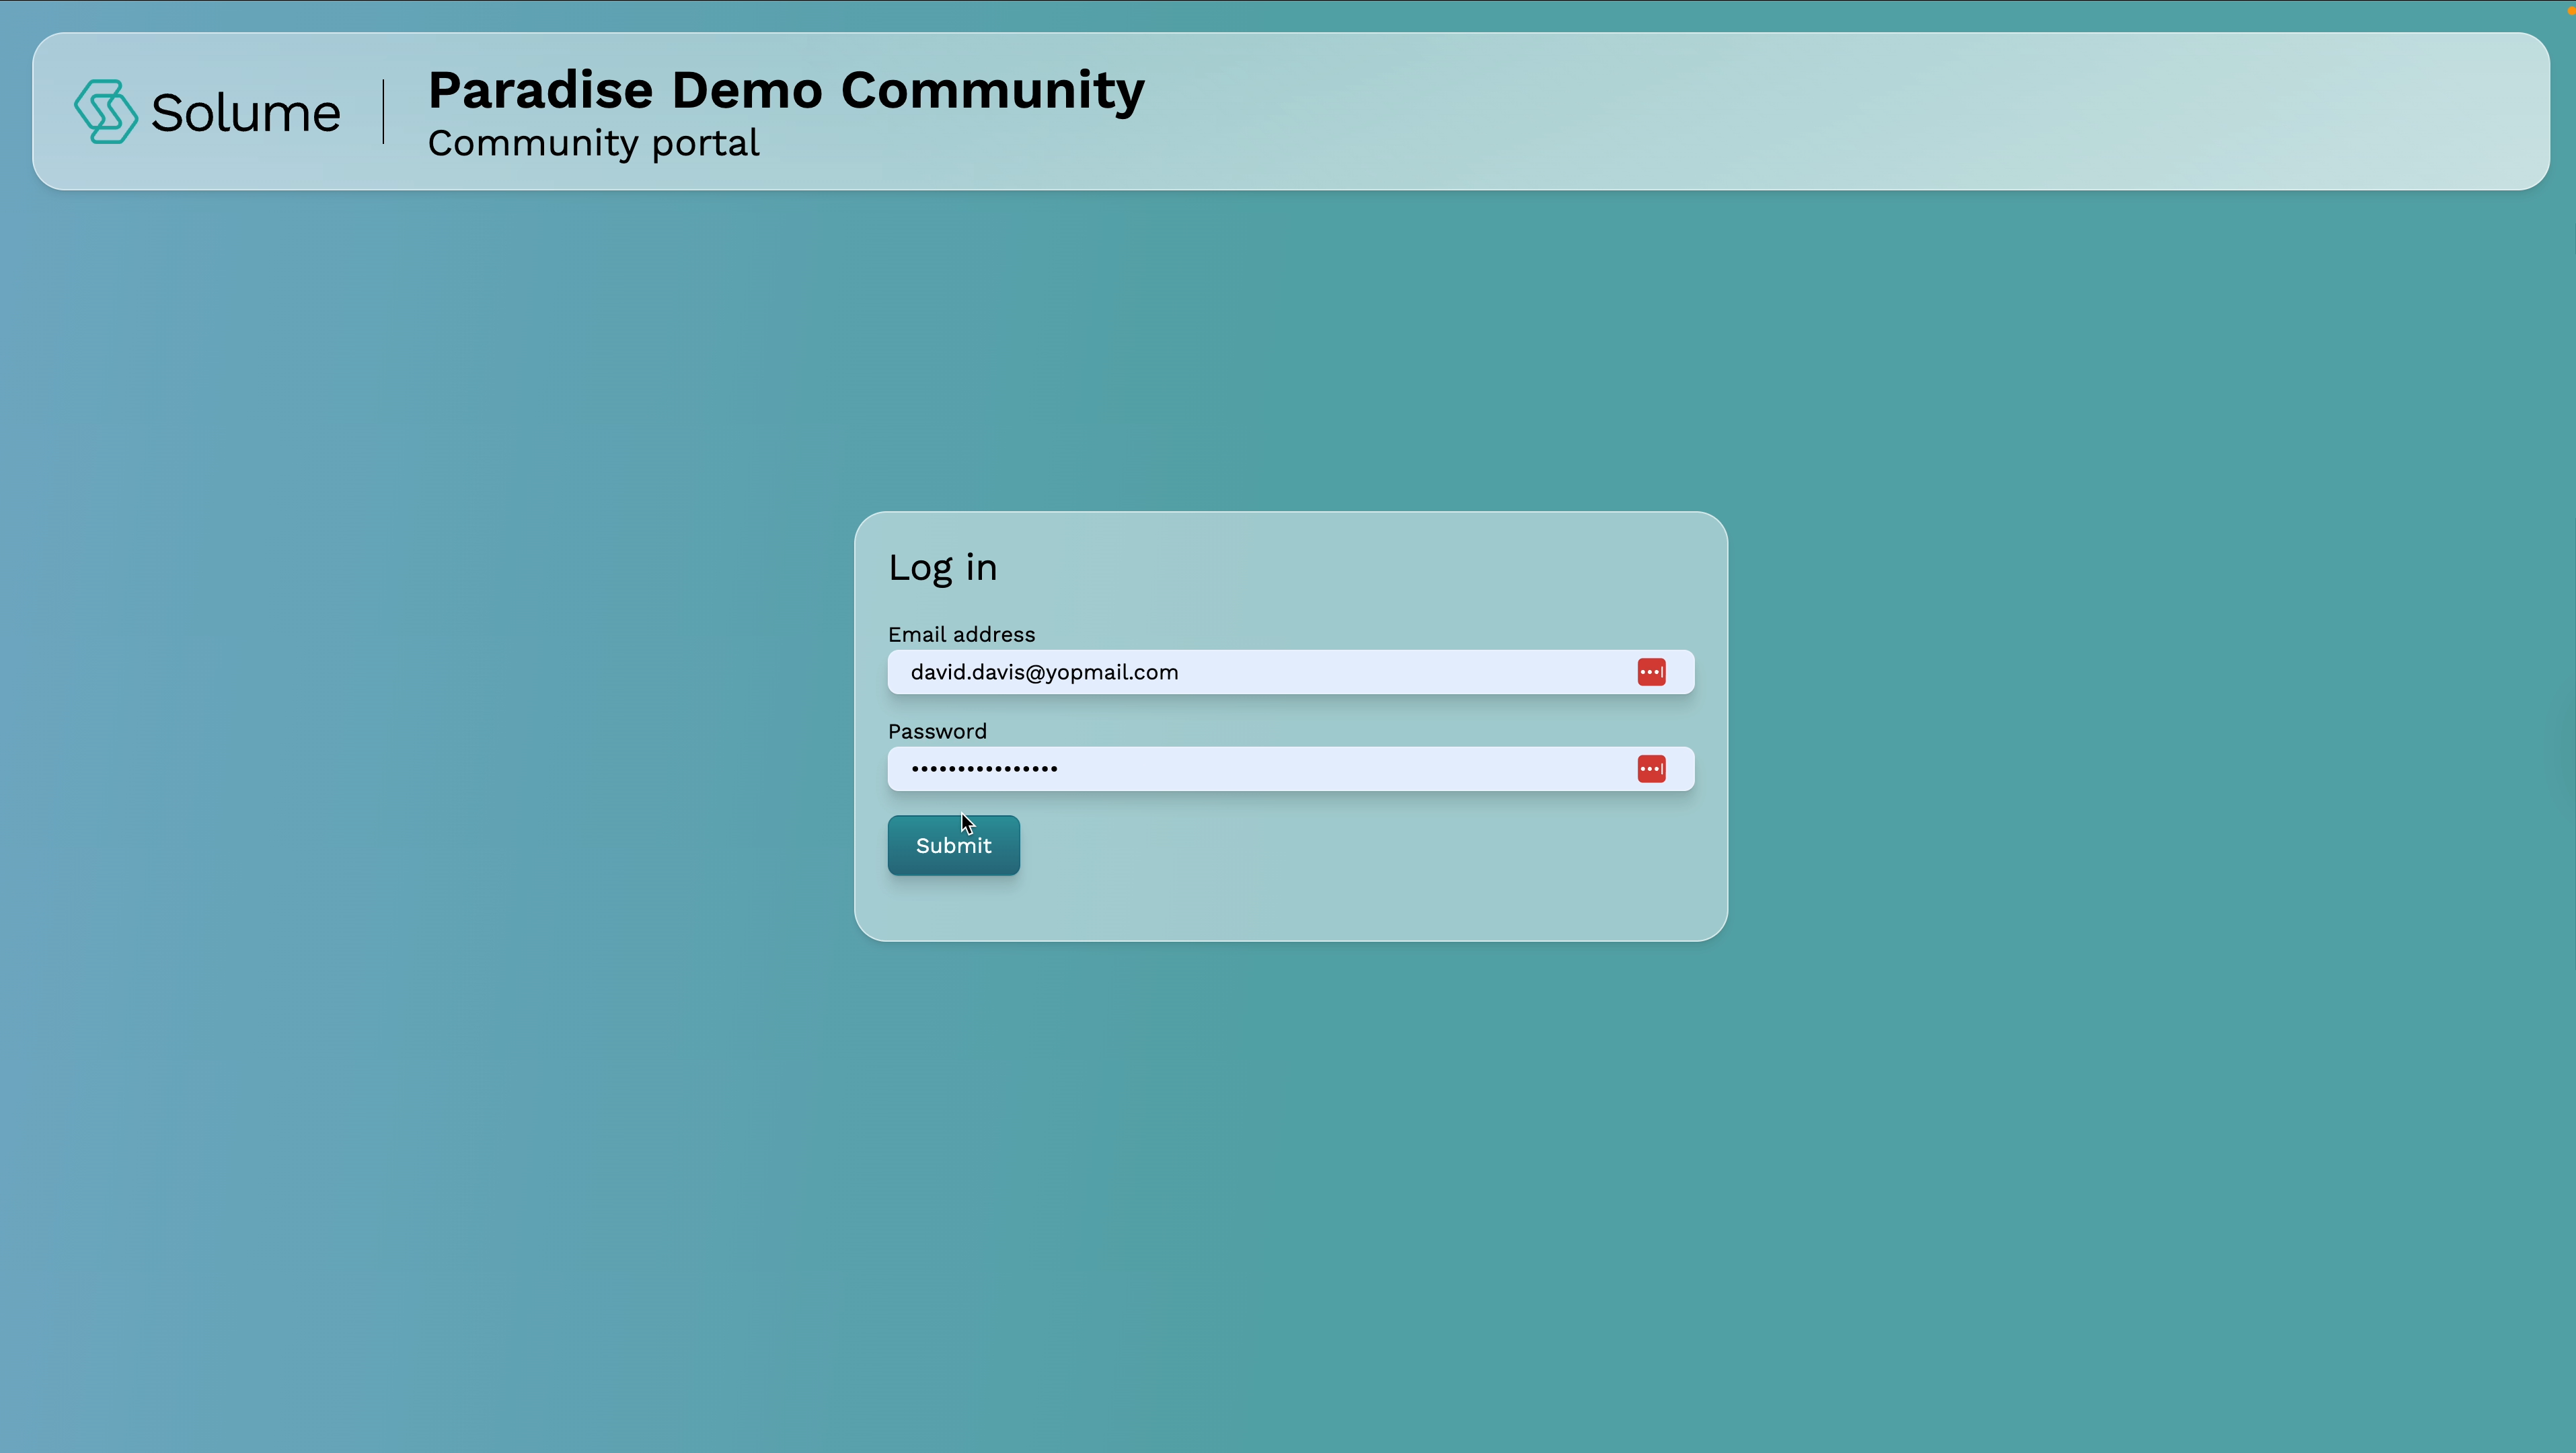
Step 1: Log in to the Portal
When you receive your access code, open the portal and enter your email address and password. Click Submit to log in.
Step 2: Go to Your Dues Overview
After logging in, you'll land on your dashboard. Locate the Dues section — this is where all of your invoices live.
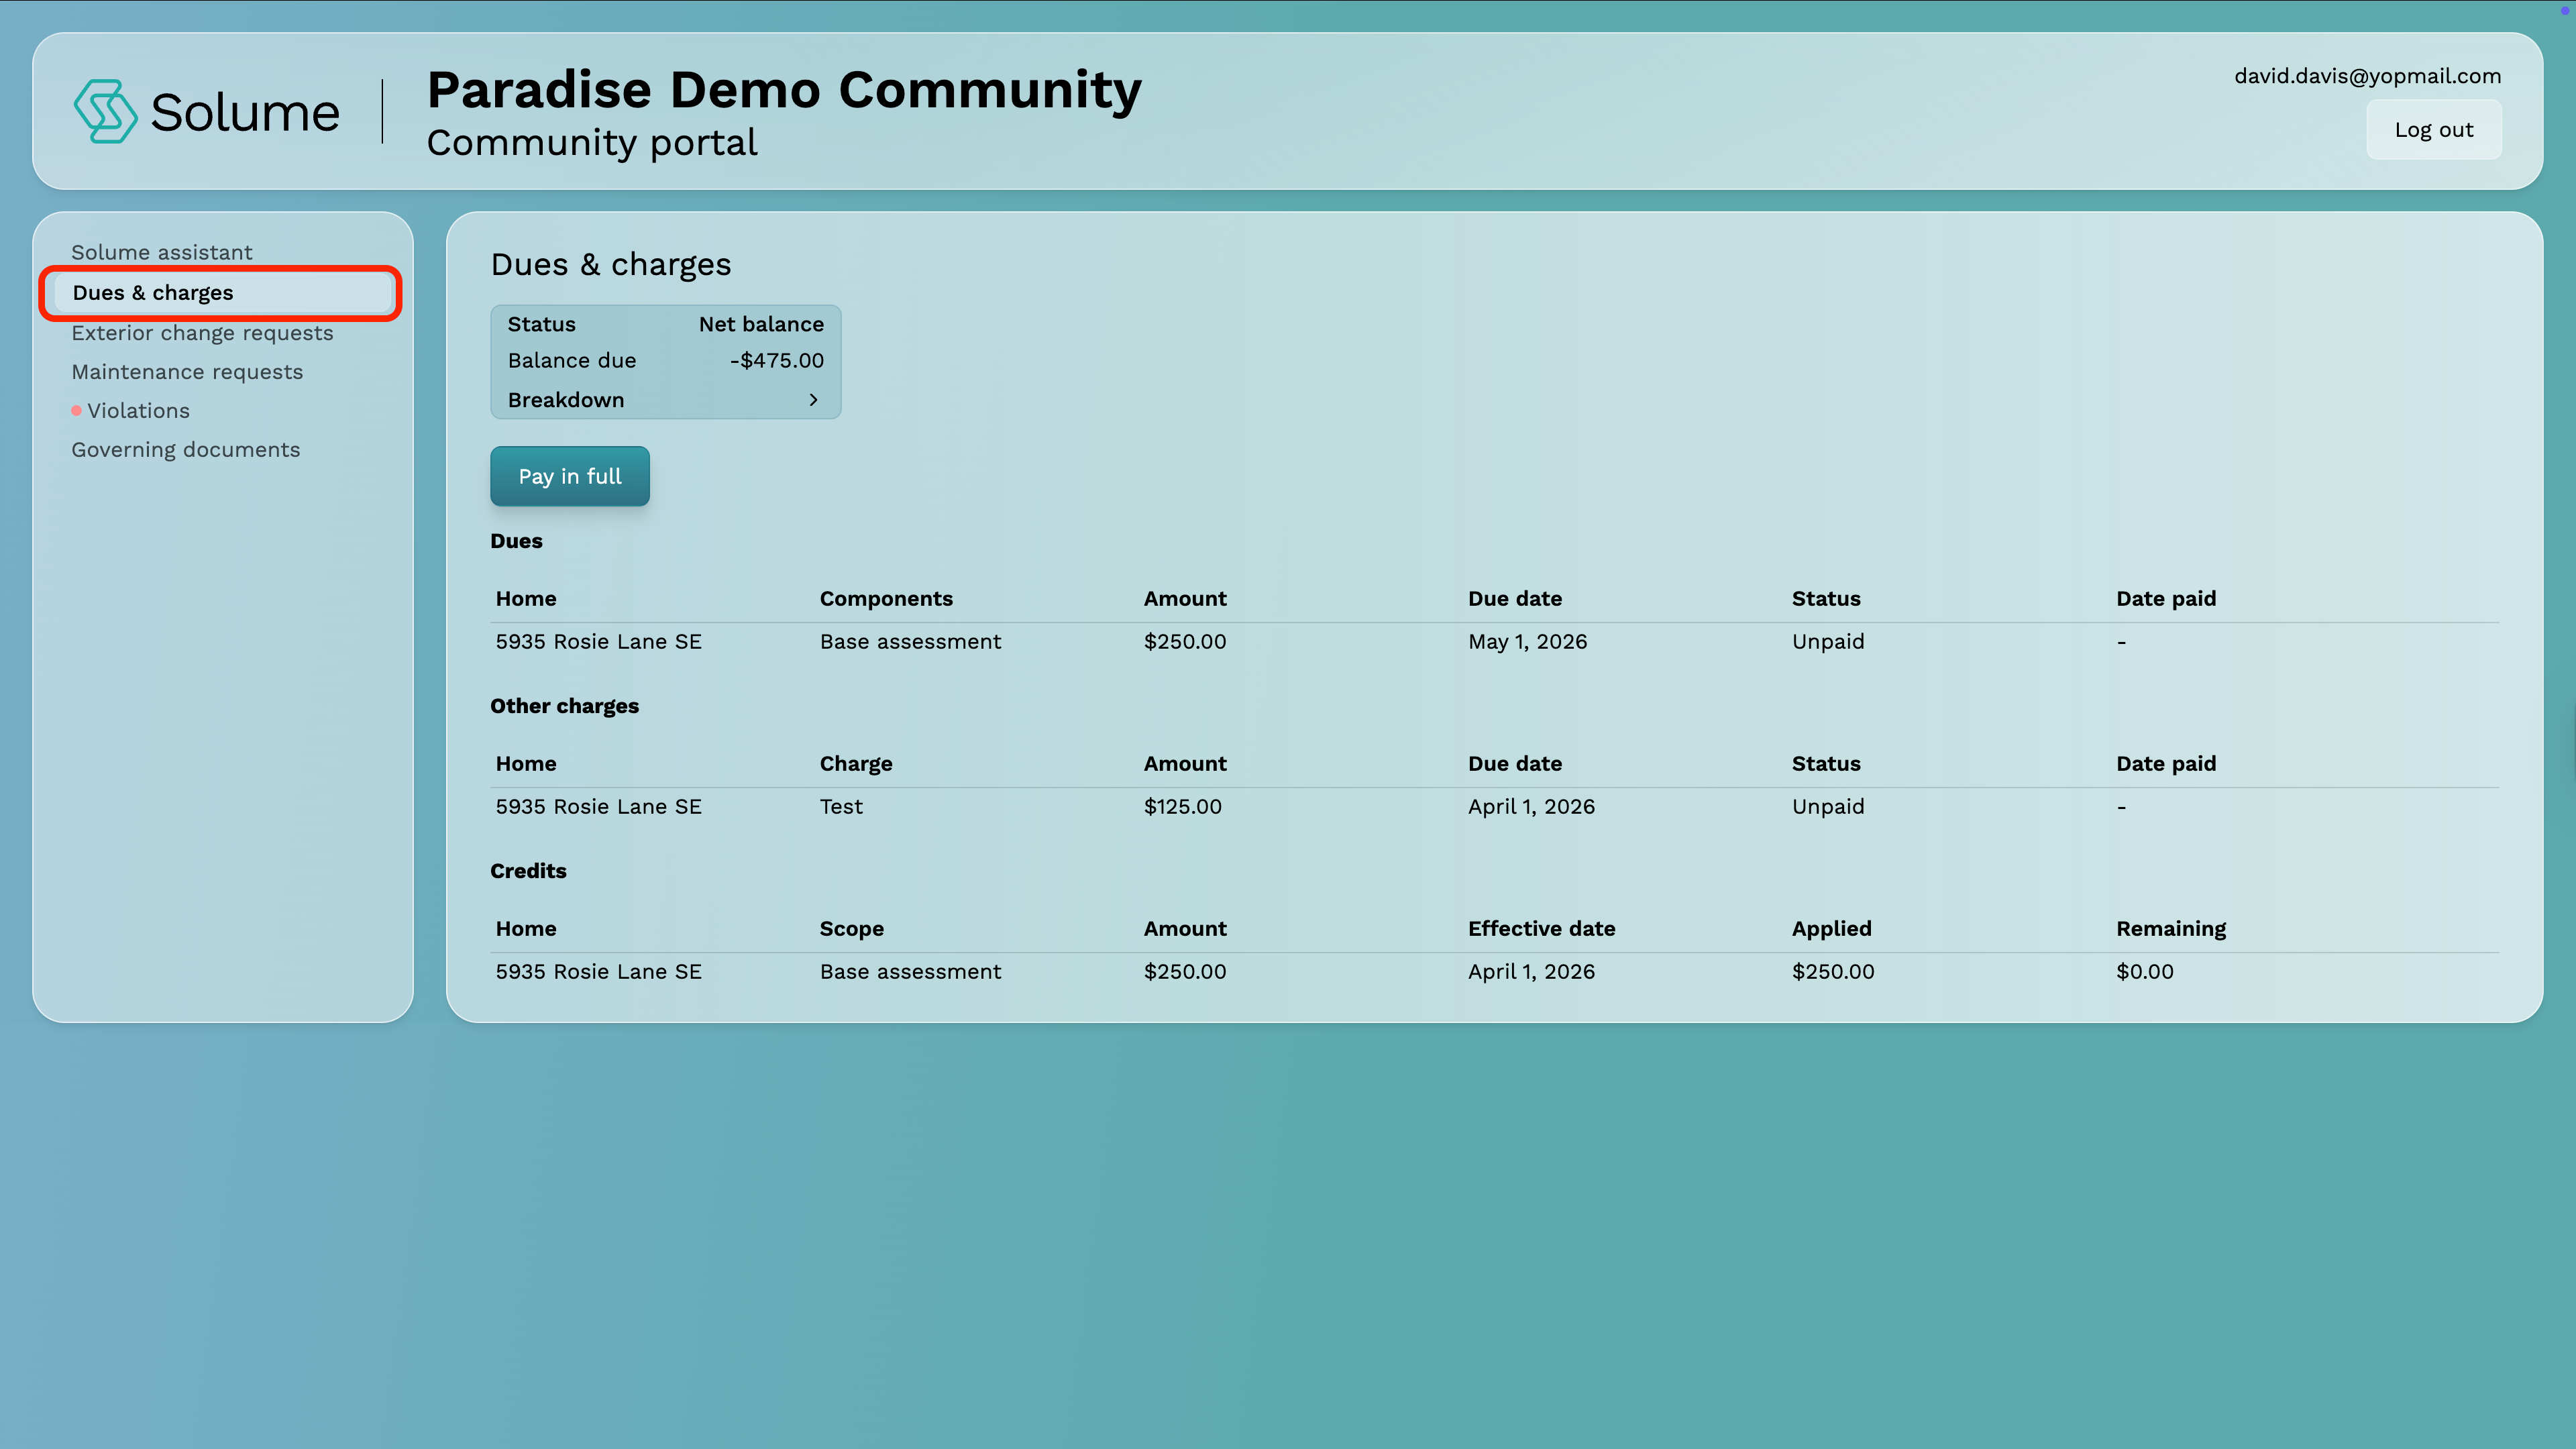
Step 3: Review Your Balance
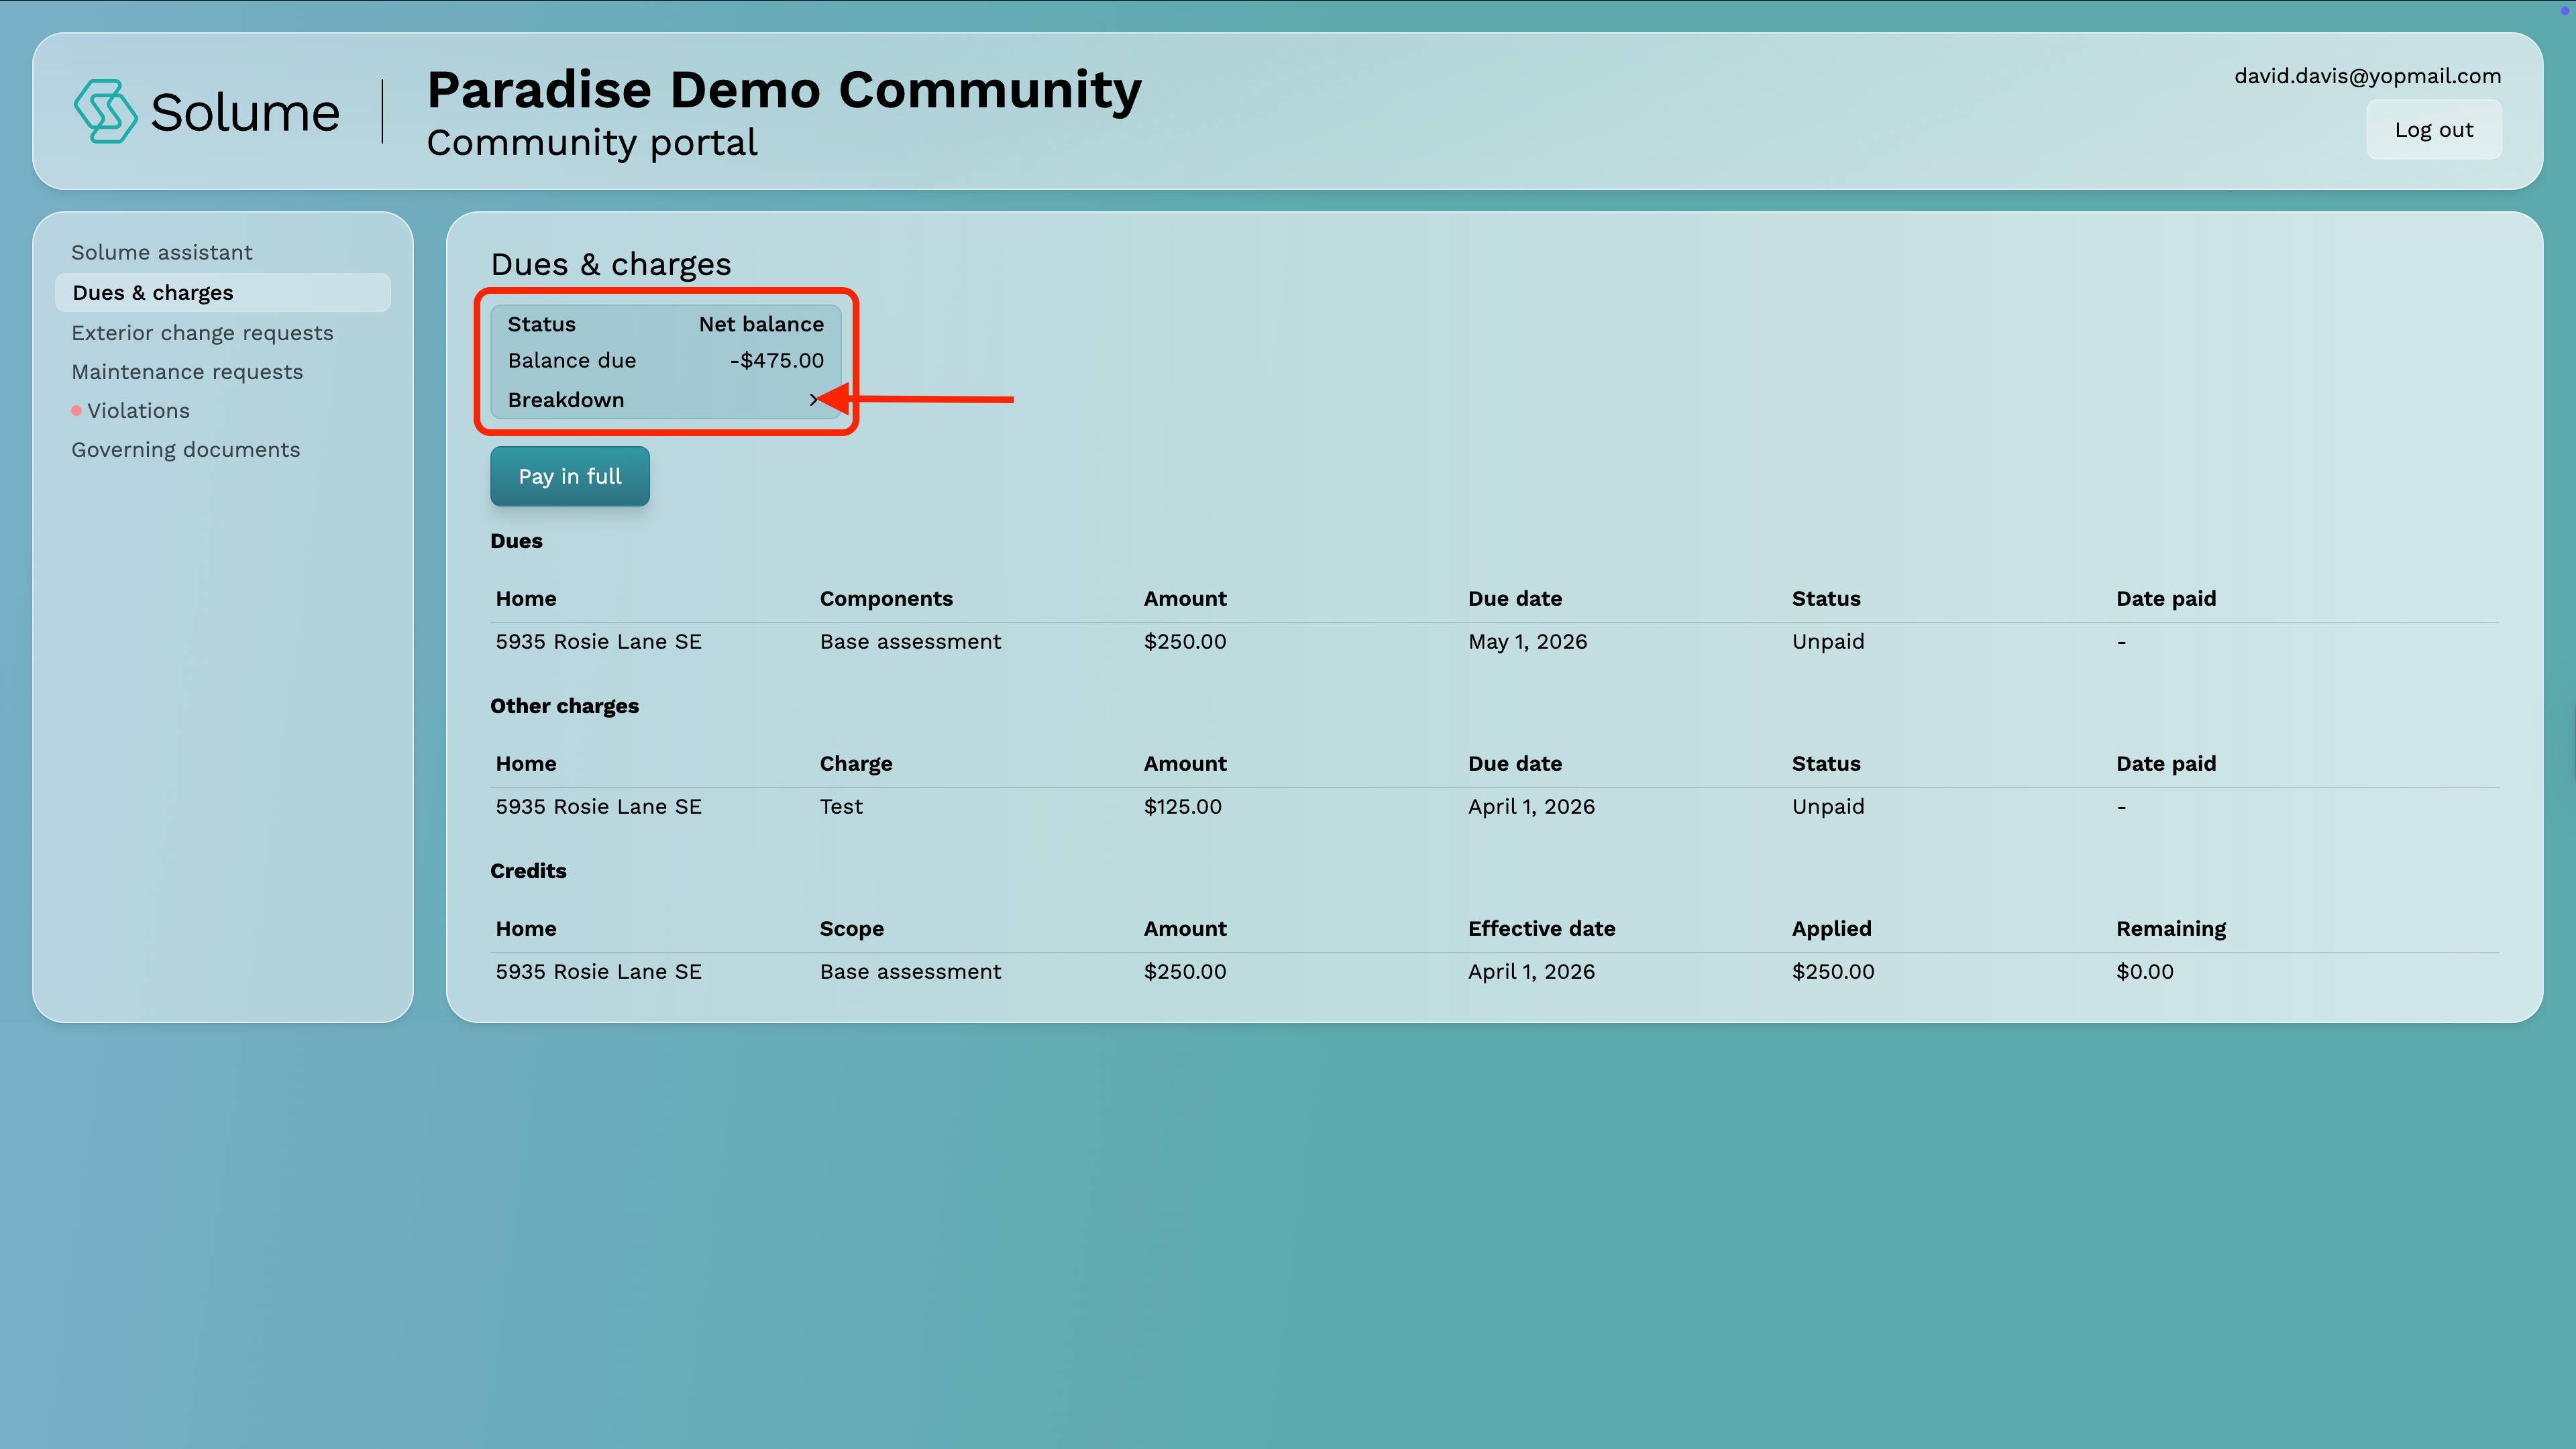
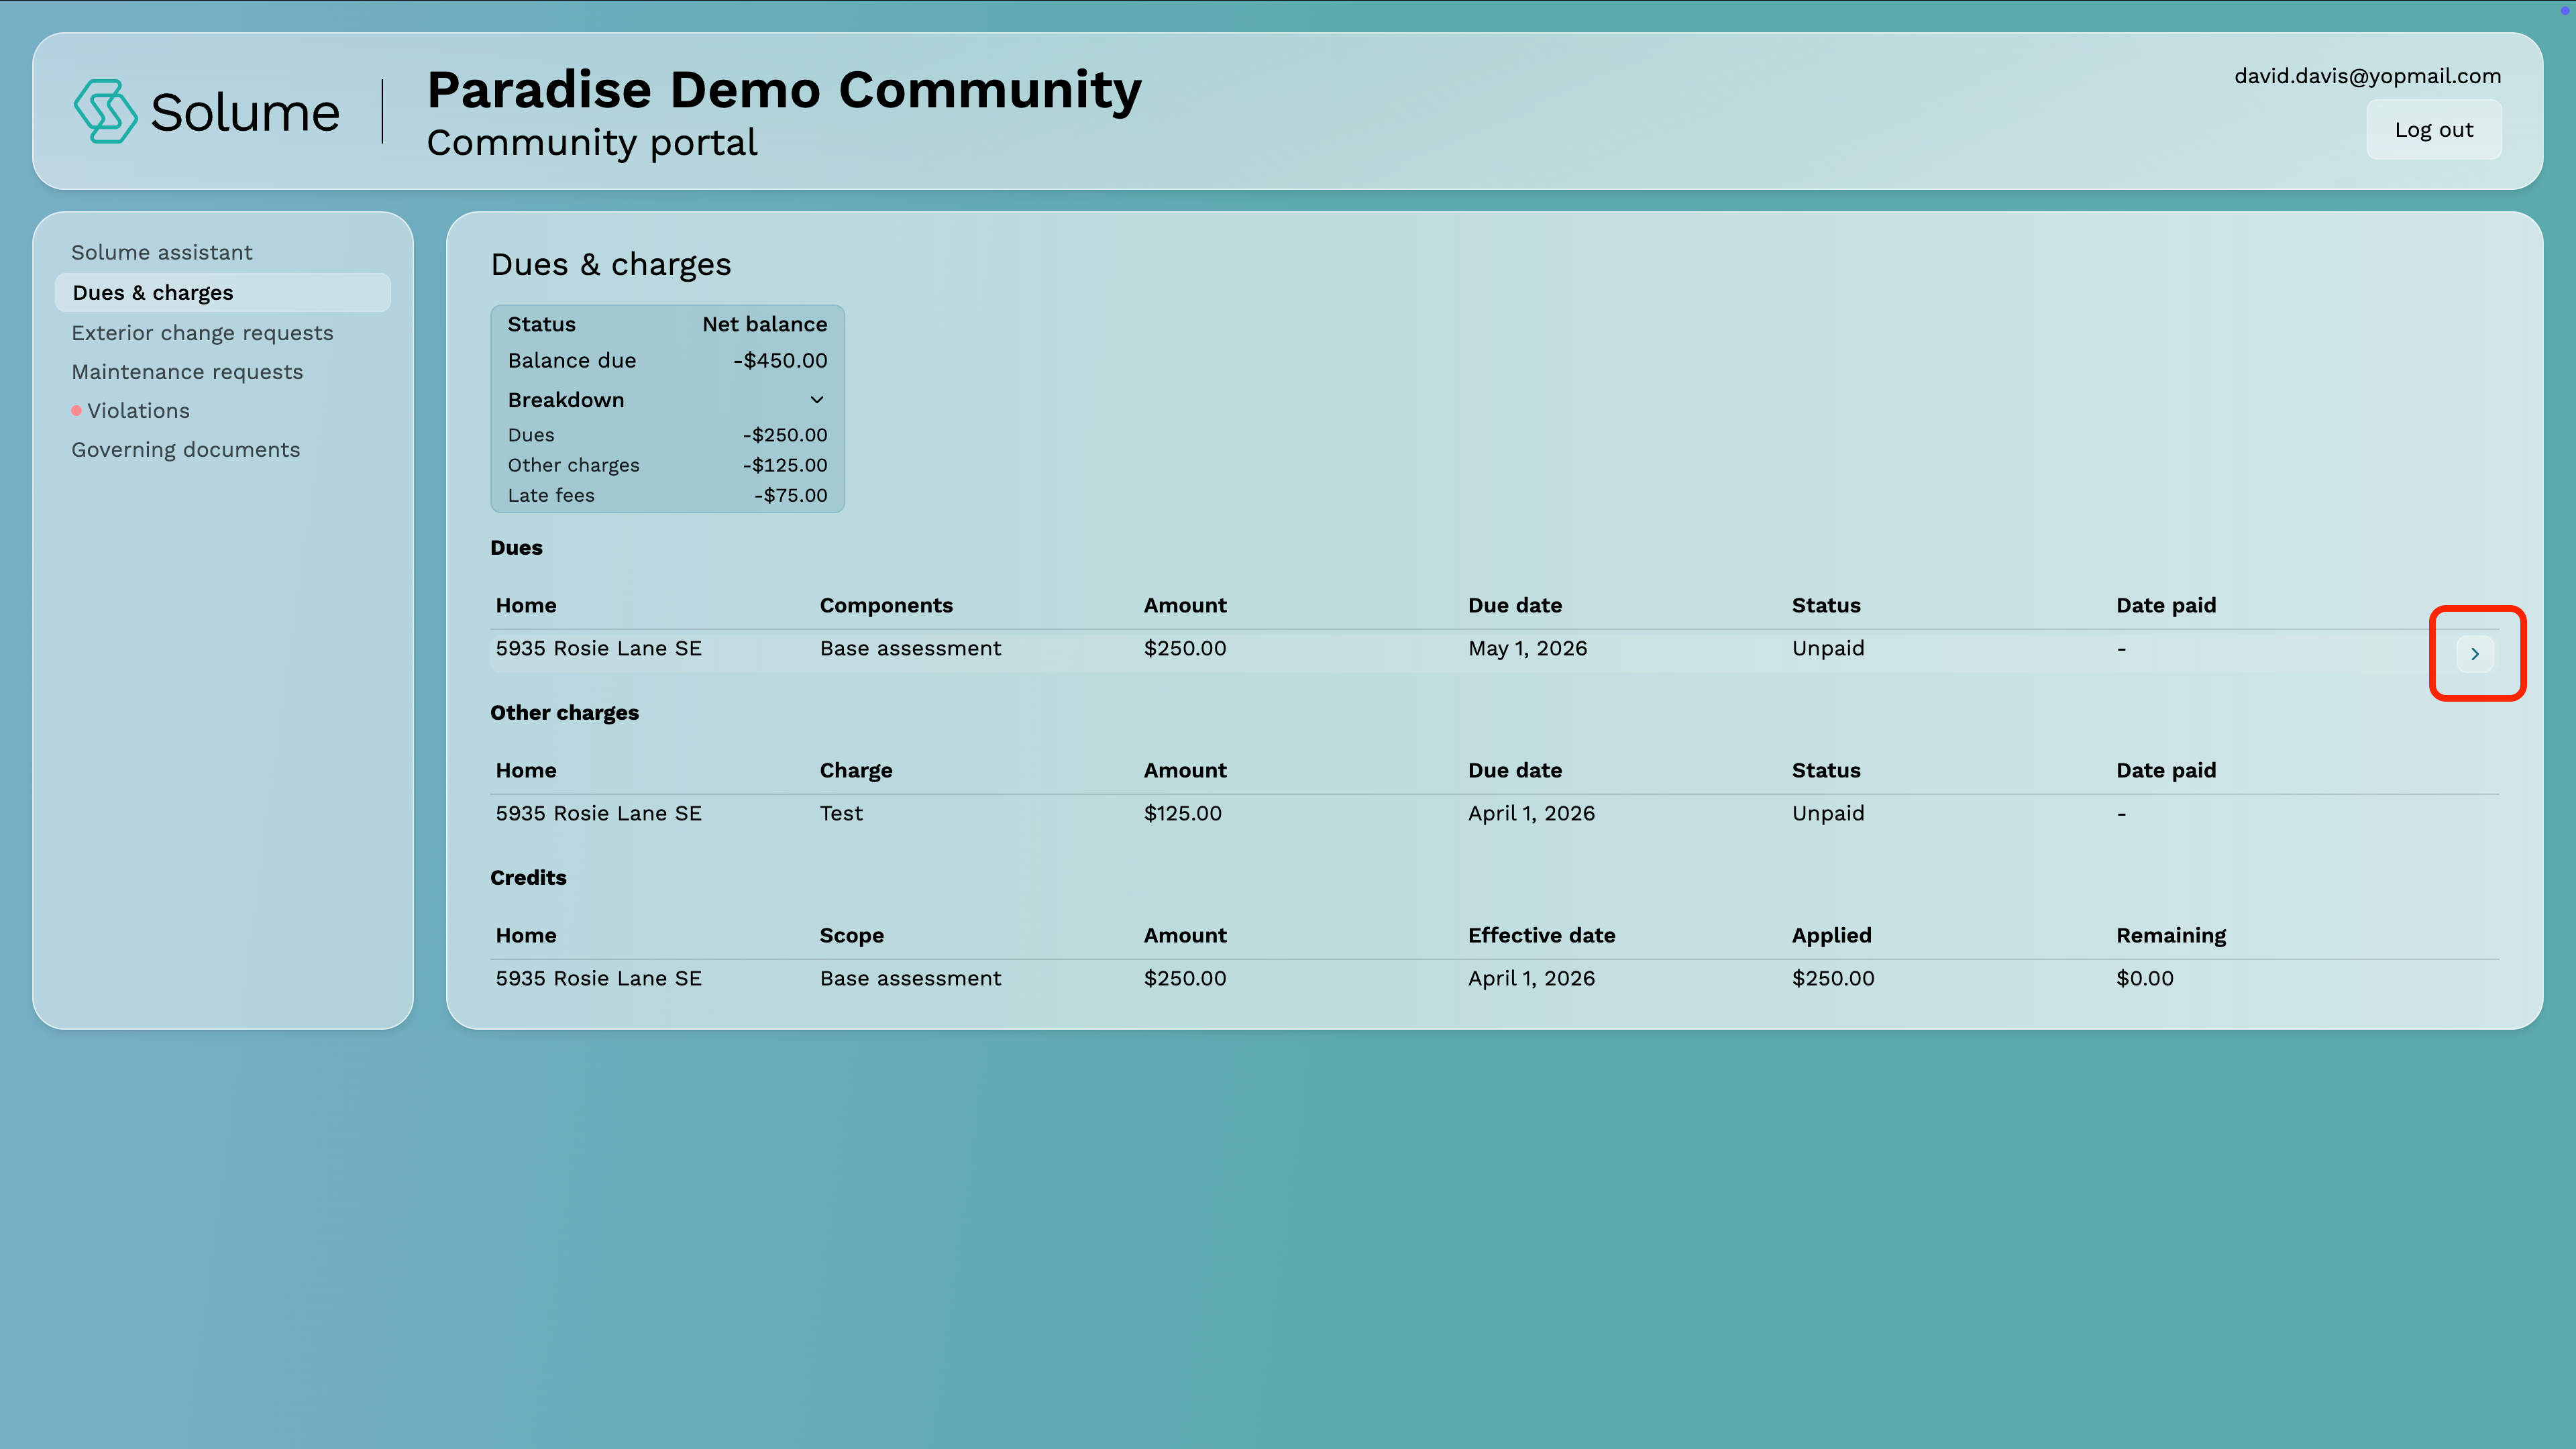
You'll land on a screen that displays your current net balance along with a breakdown of all charges associated with your account.
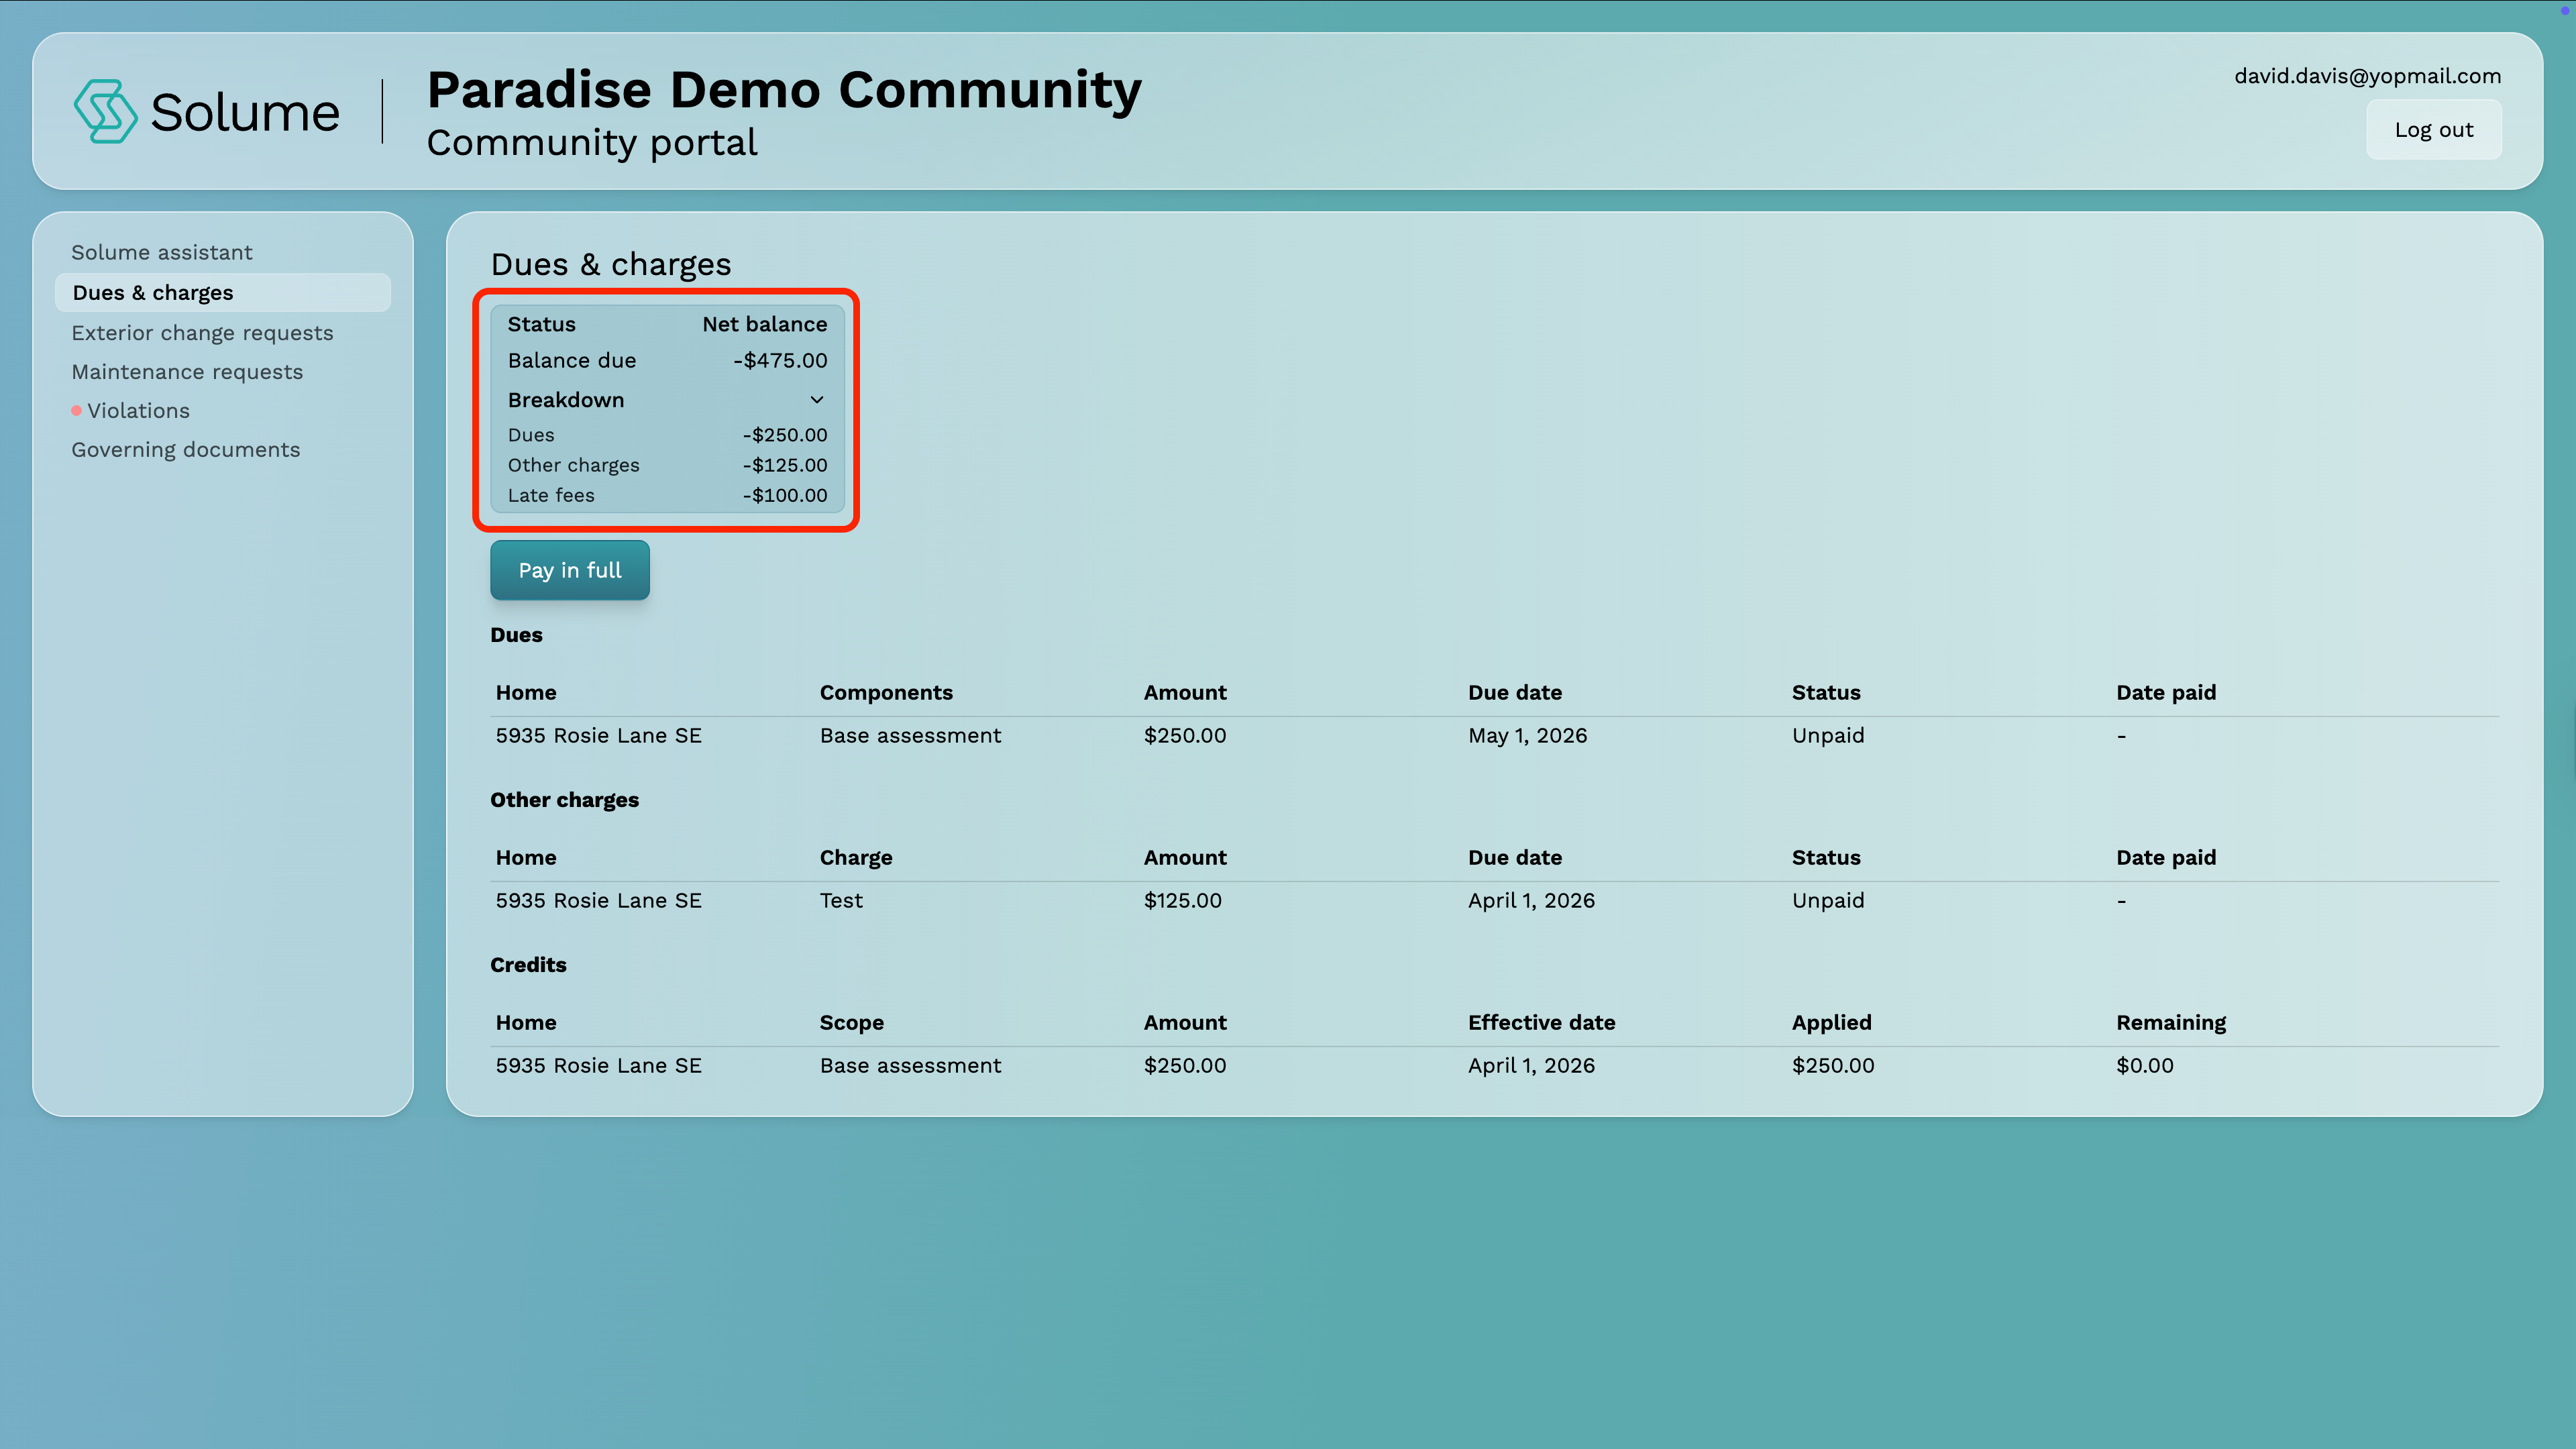
Click the Breakdown chevron to expand the detailed view of your balance. Here you'll see an itemized list of everything that makes up your balance, which may include:
- Your base dues amount
- Late fees
- Water bills
- Any other charges and credits added by your community
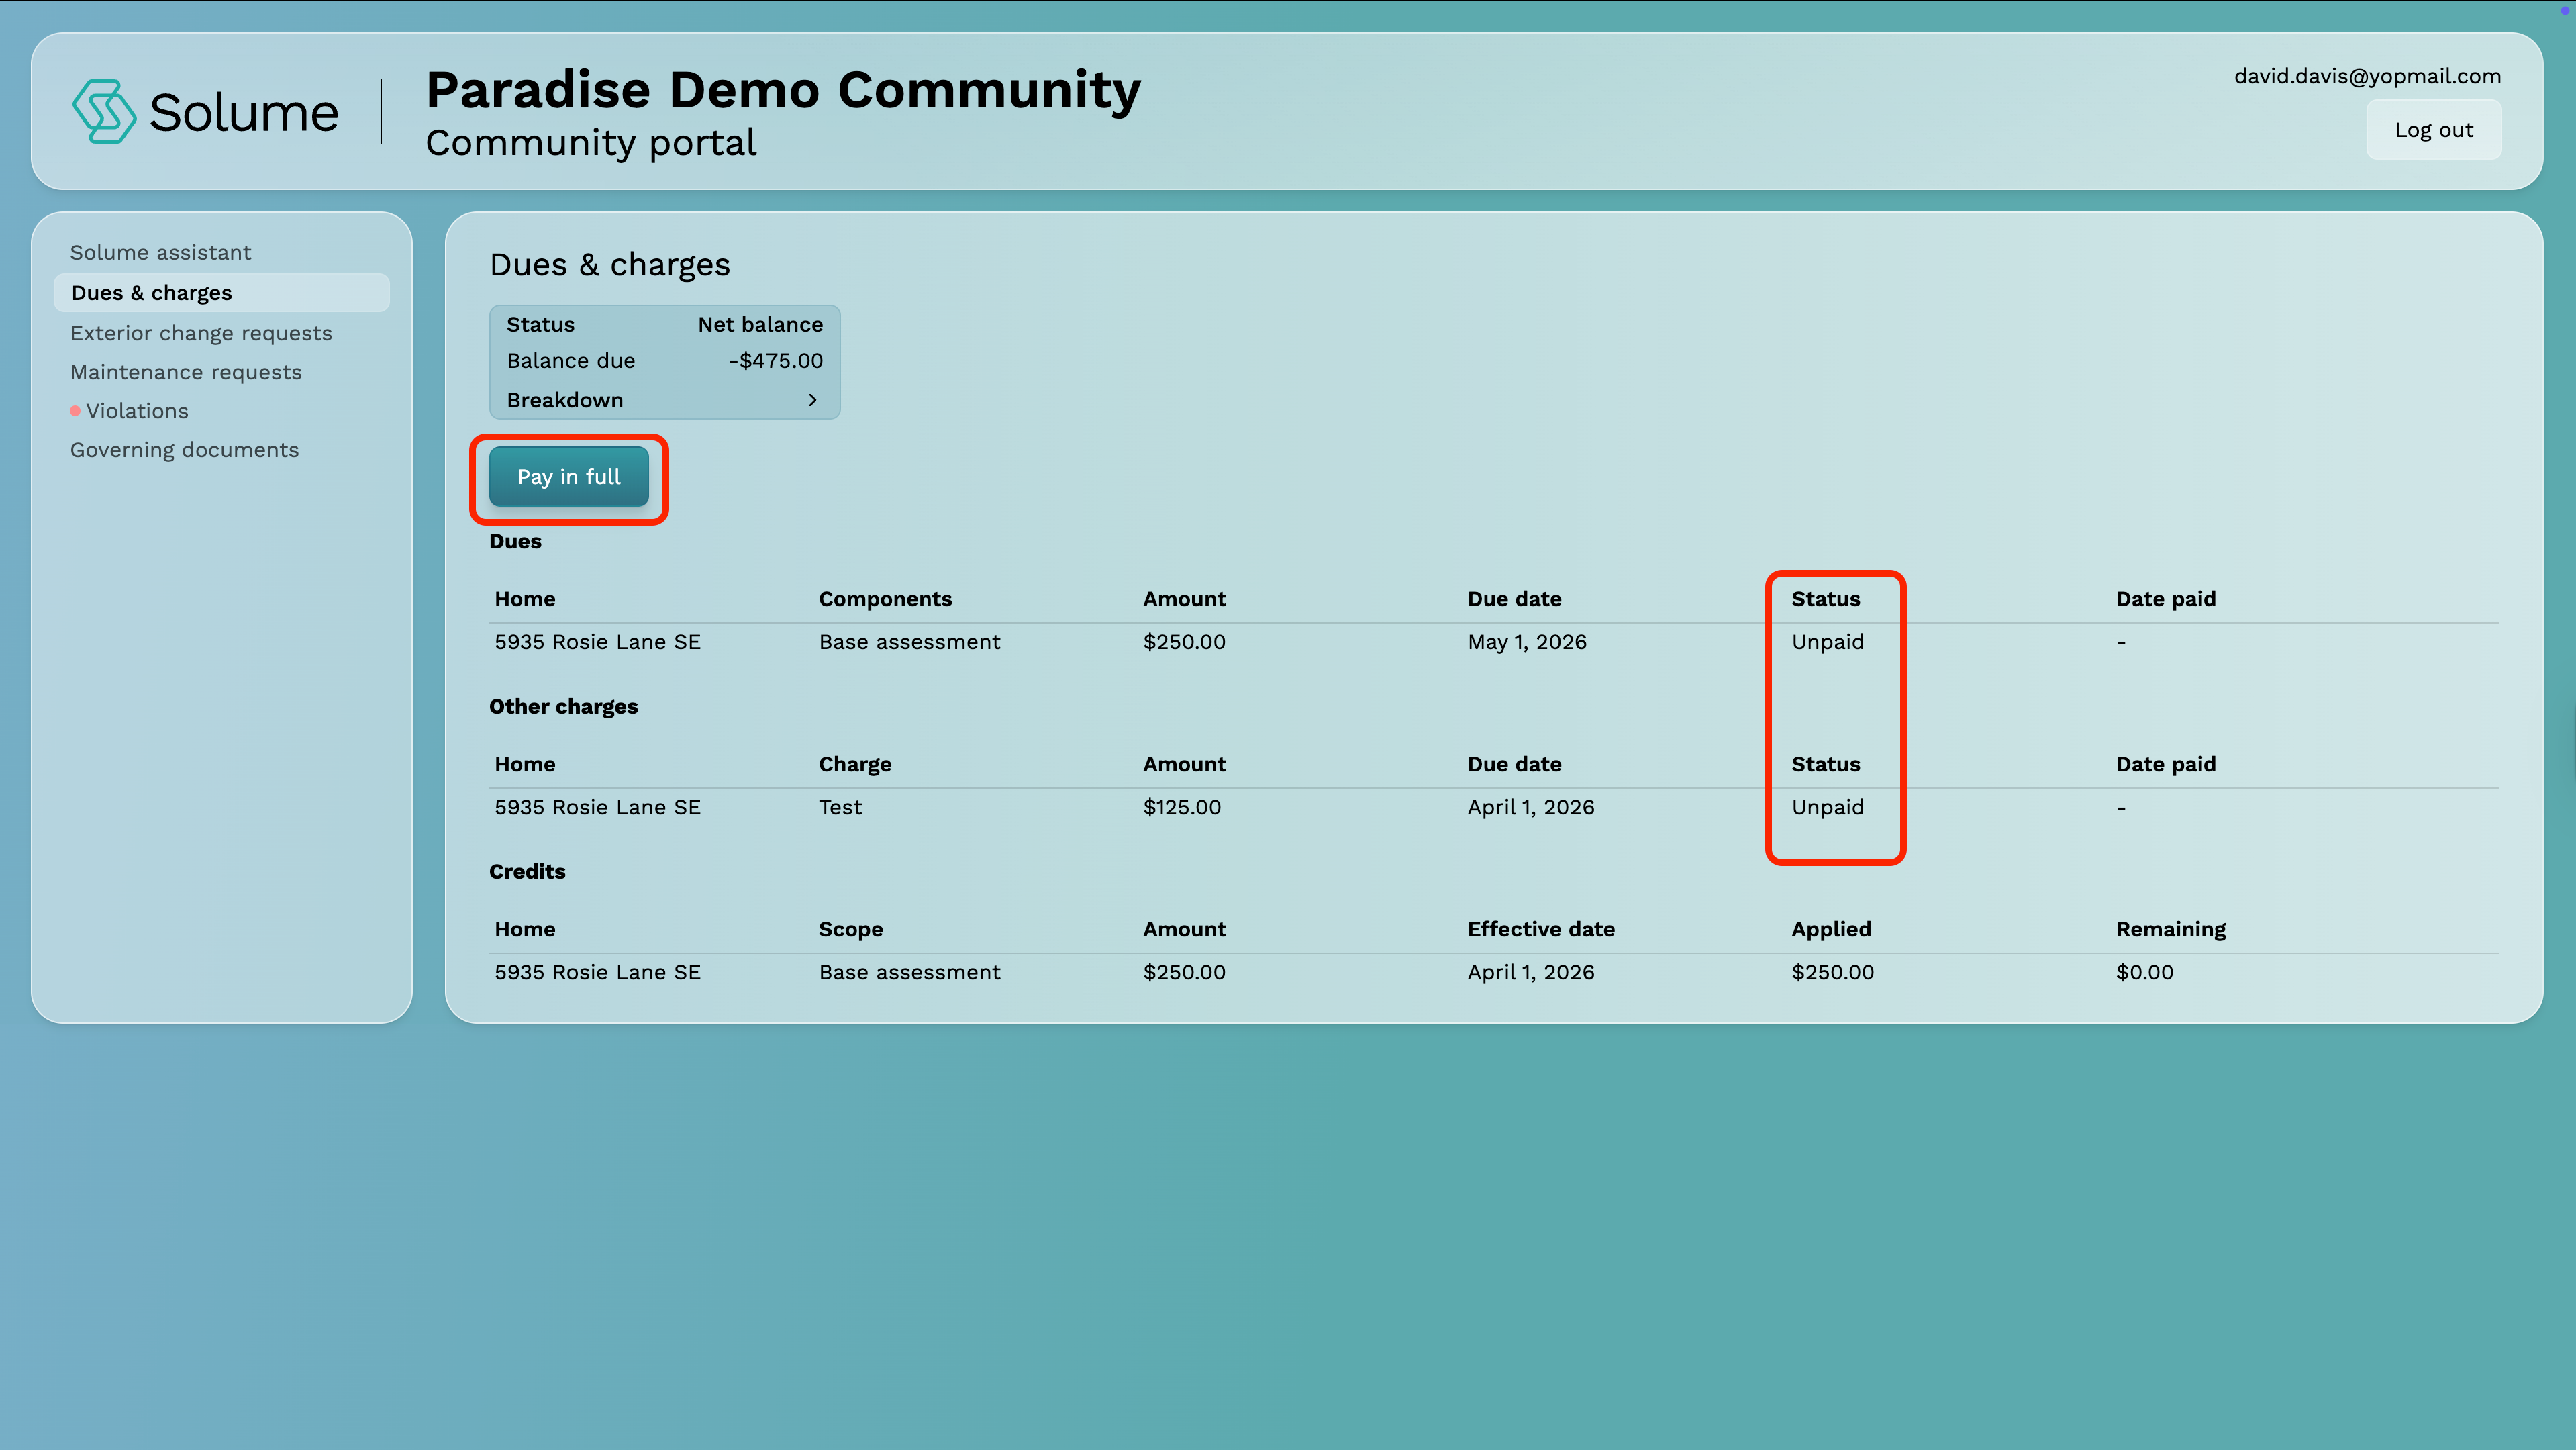
Step 4: Pay in Full or Identify Itemized Unpaid Invoices
You'll see a list of invoices with their current status. Any invoice marked Unpaid requires payment. Depending on your community, dues may be billed monthly, quarterly, or annually.
You can either pay in full by clicking the "Pay in full" button, or click on the itemized payment to pay a specific charge.
Step 5: Open the Invoice Detail
Click the Detail View button next to the unpaid invoice. This will open a full breakdown of what's owed, including your base dues amount and any additional charges your community has added — such as a water bill or other assessments.
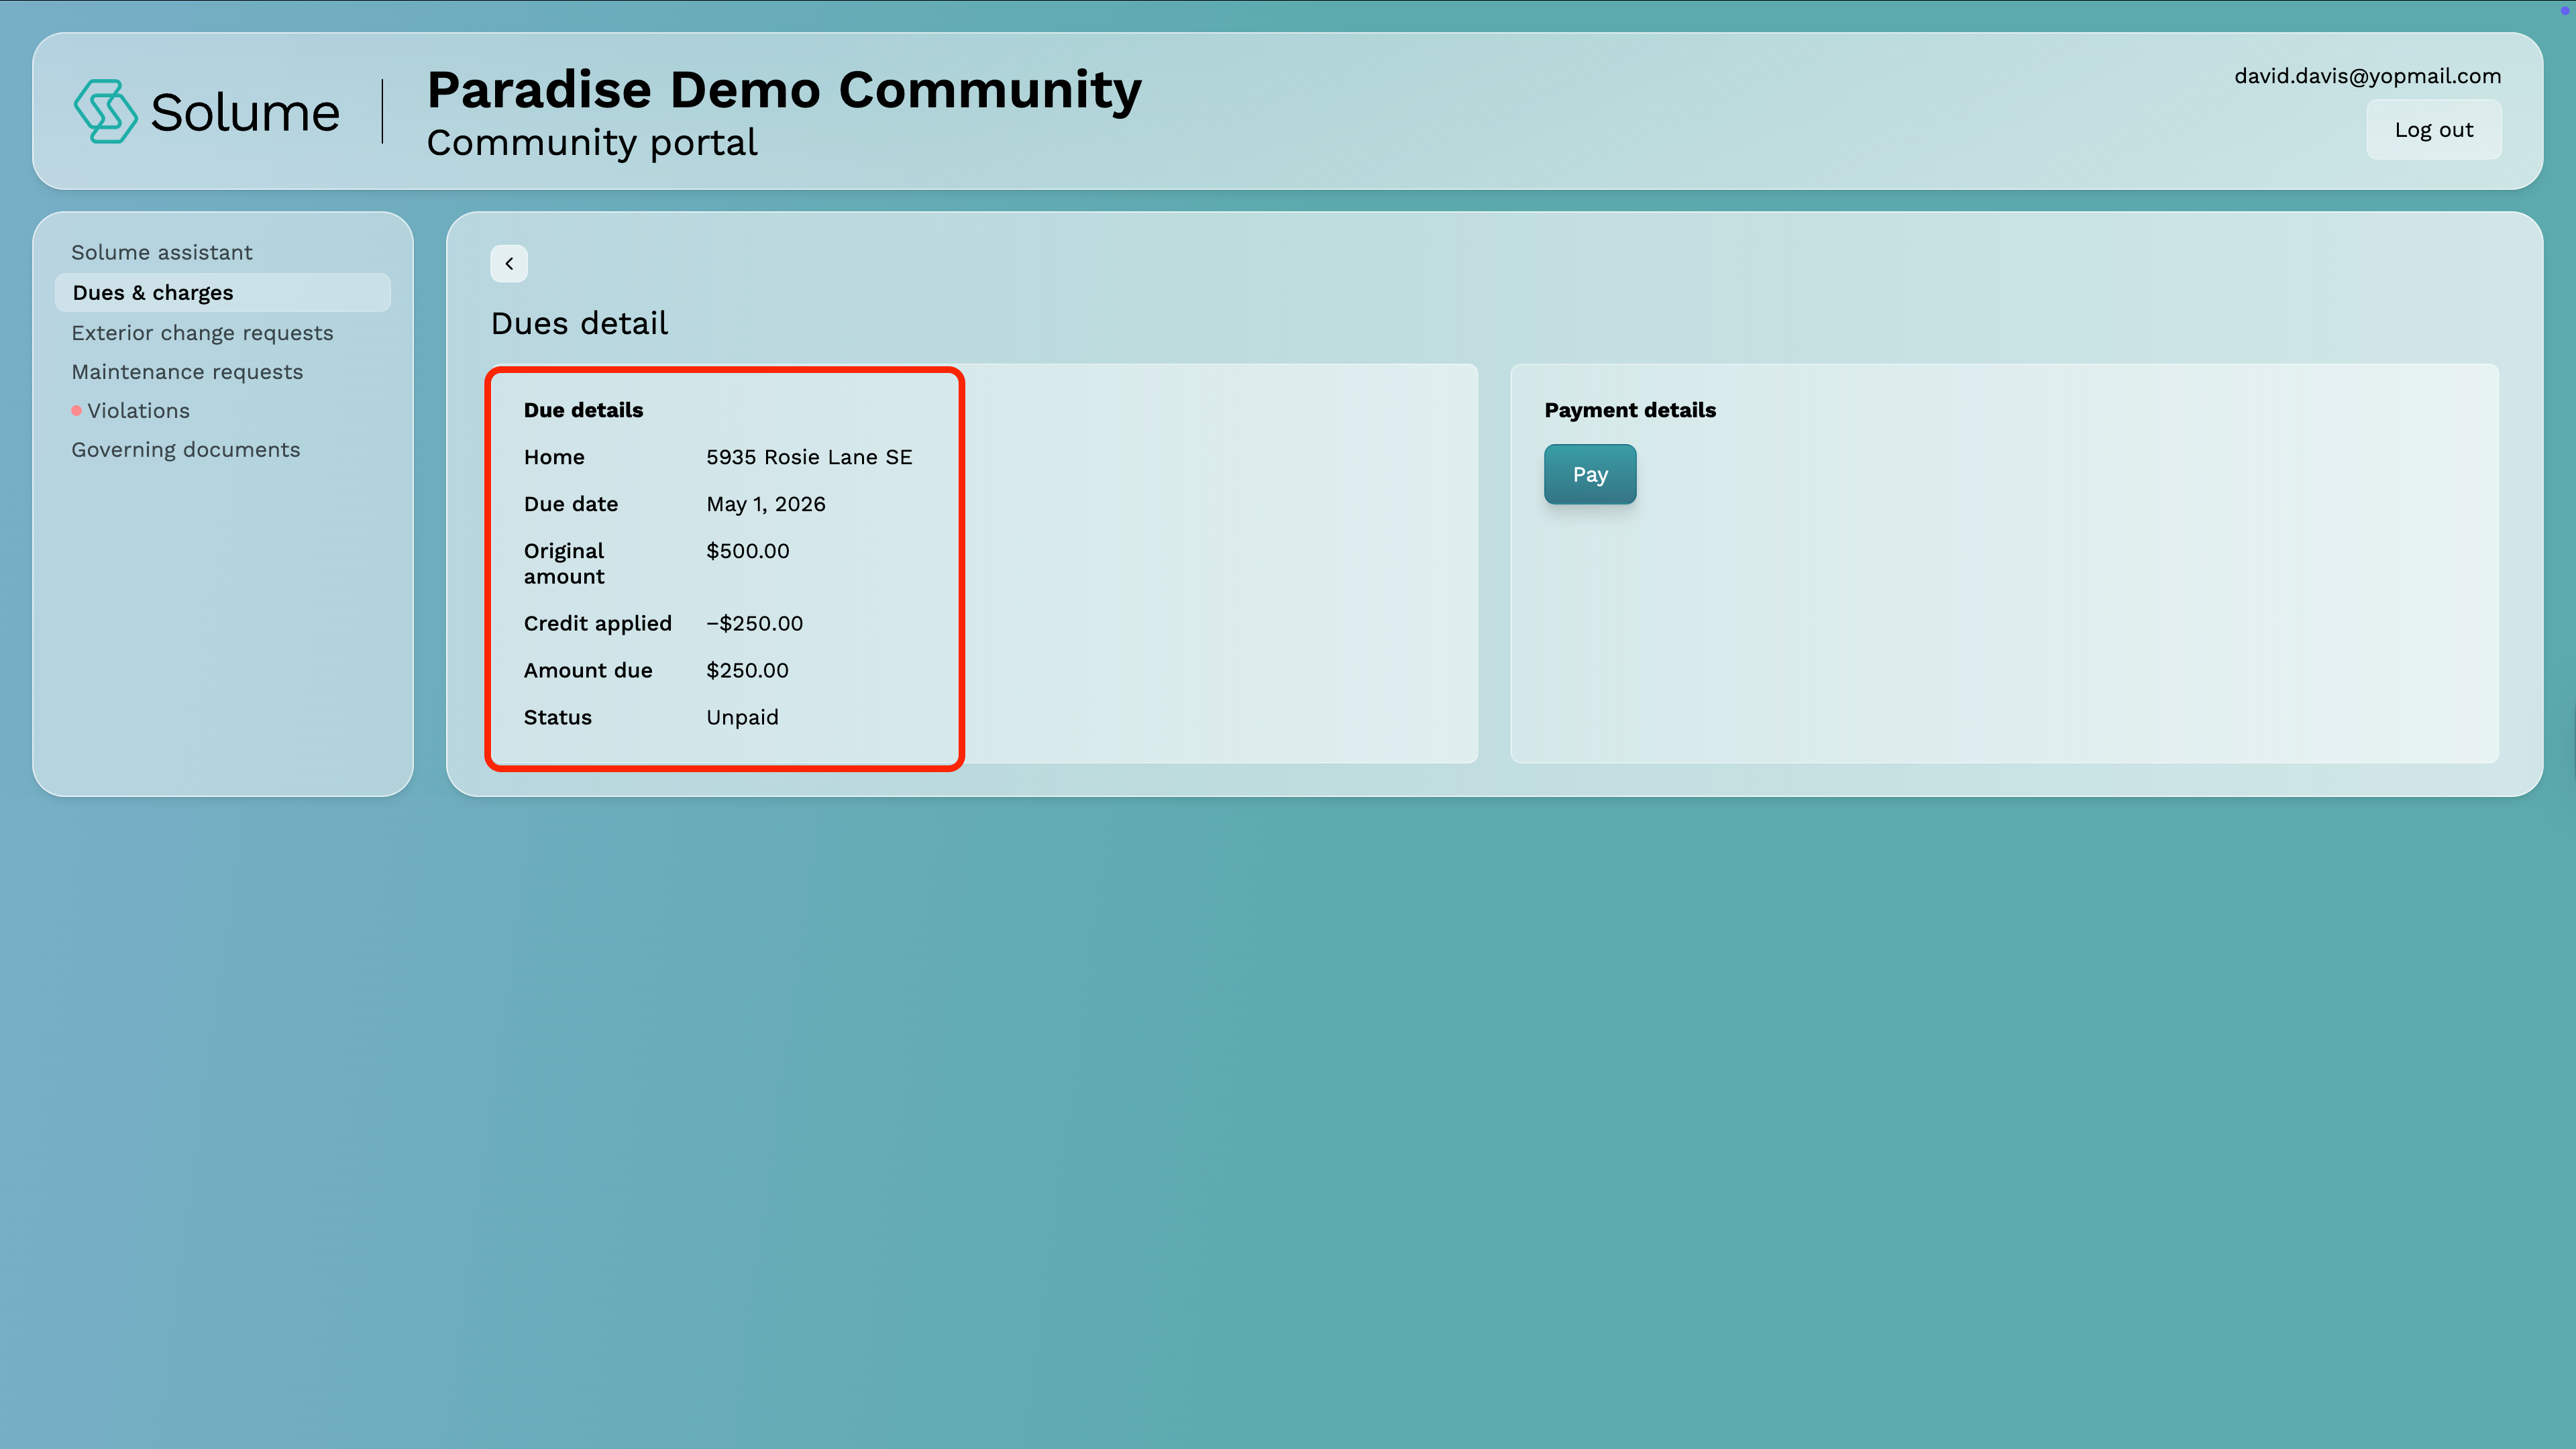
Step 6: Review the Charge Details
Click the chevron to open the full details of the charge. This view gives you a complete picture of what is owed, including:
- Due Date — When the payment is expected
- Original Amount — The full amount of the charge before any adjustments
- Credits Applied — Any credits that have been applied to your account
- Total Amount Due — The original amount minus any credits applied
- Status — Whether the charge is currently marked as Paid, Pending or Unpaid
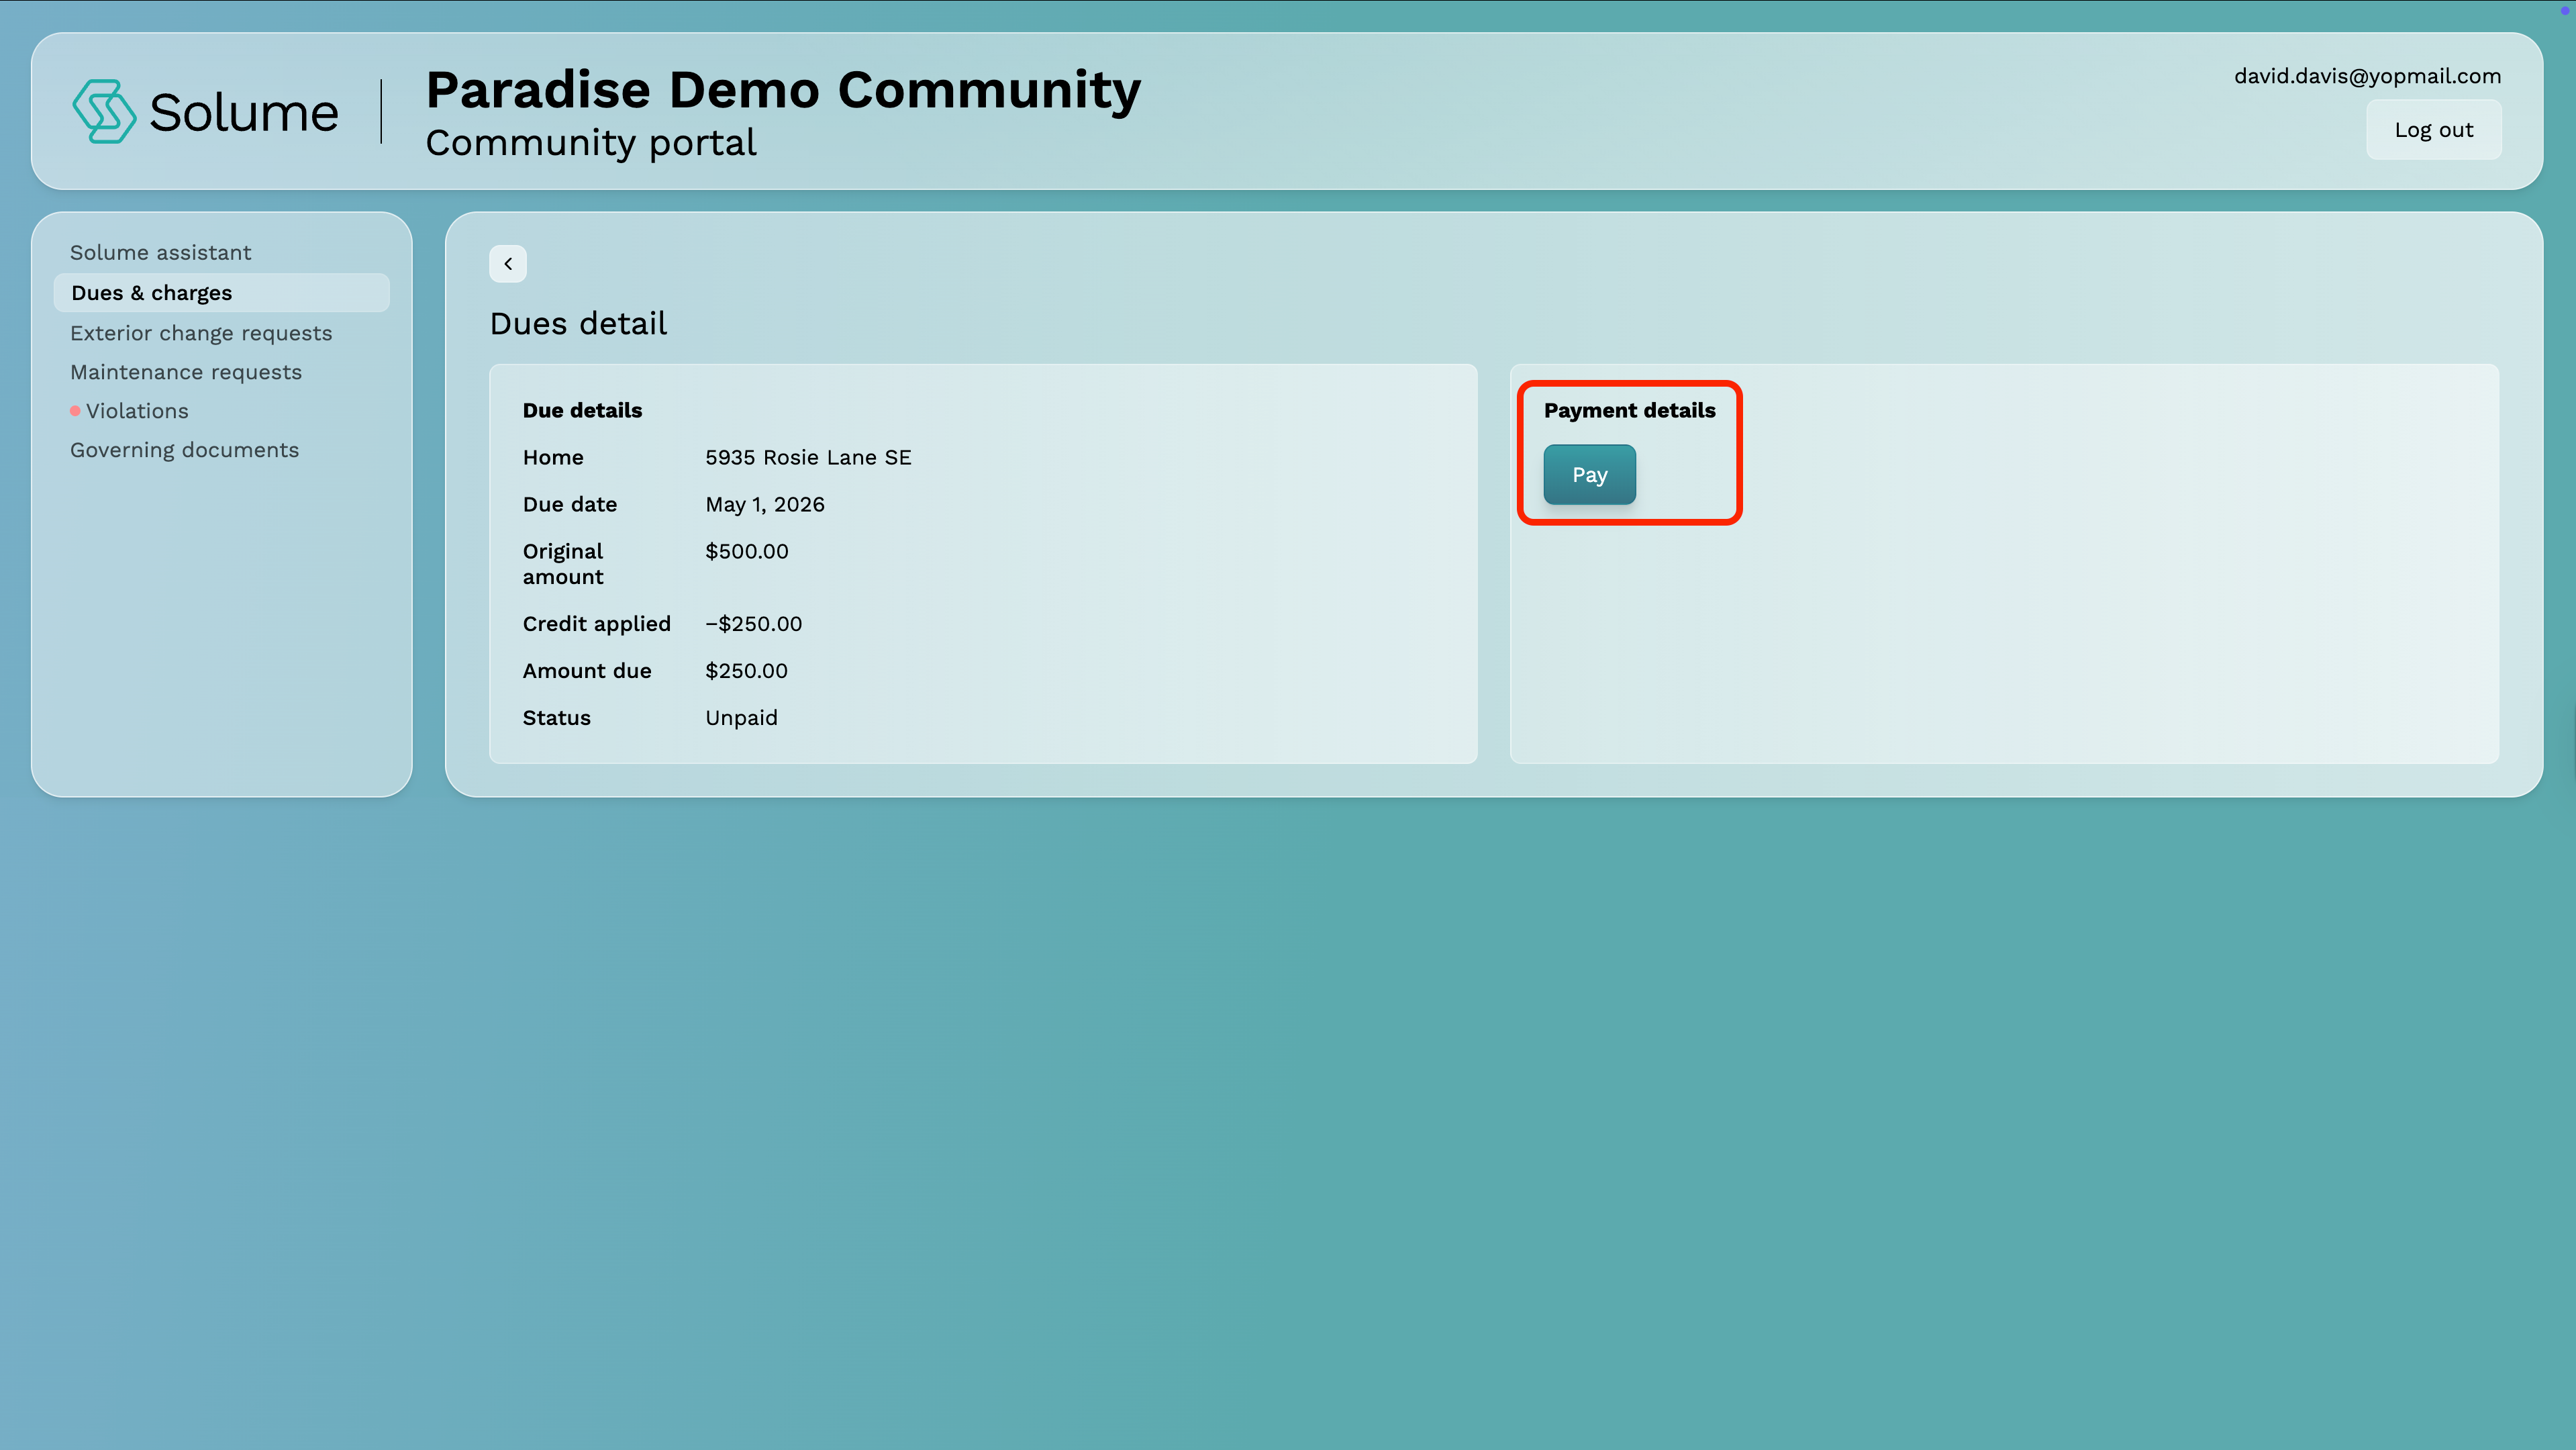
Step 7: Click Pay
Inside the detail view, click the Pay button. A payment form will appear.
Step 8: Select Your Payment Method
You'll be given the option to pay using:
- Credit or Debit Card
- ACH Transfer (direct bank transfer)
Convenience fees will be displayed based on the amount due and the payment method selected (fee charged by Stripe, the payment processor, not your community or Solume).
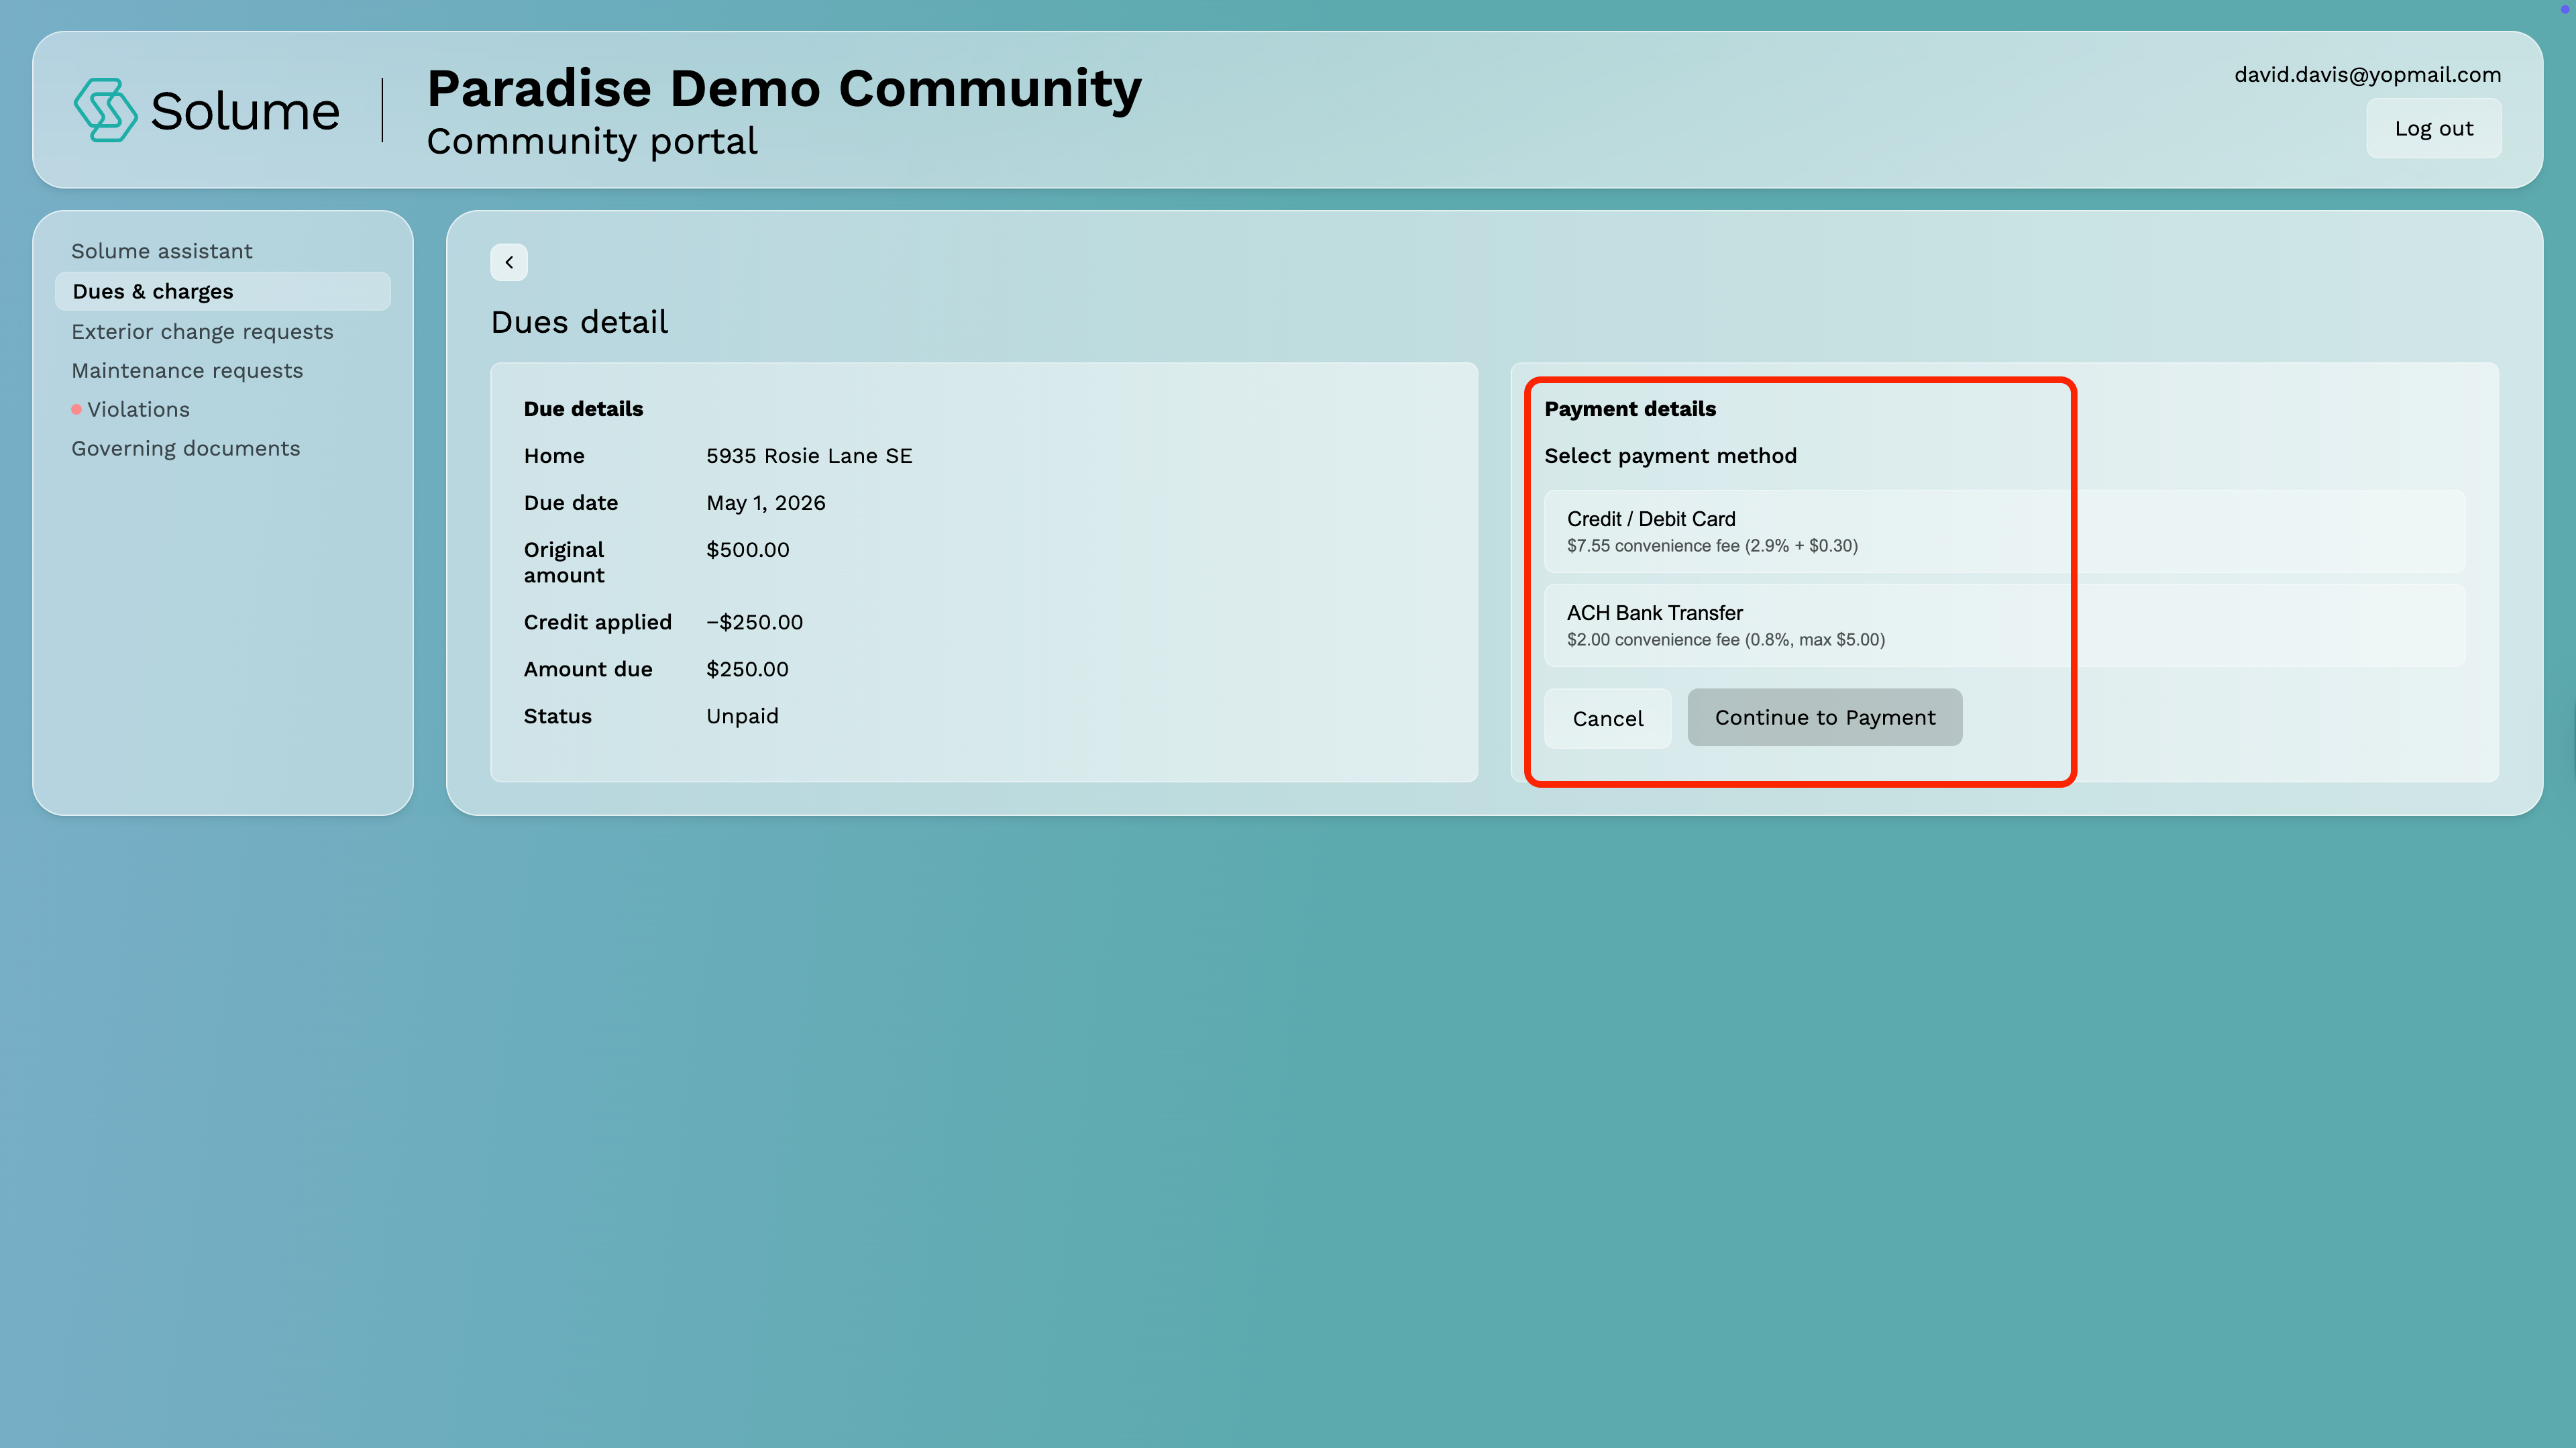
Step 9: Continue to Payment
Once you've selected your preferred payment method, click Continue to Payment and follow the remaining prompts to complete your transaction.

Step 10: Submit Your Payment
Click Pay to complete the transaction. The system will instantly update your account to reflect the payment, and your board will be notified automatically — no follow-up needed on your end.
Note: You never need to manually enter your address or unit number. The portal identifies your property based on your login credentials.
How to Submit an Exterior Change Request
An exterior change request (sometimes called an architectural request) is how you get board approval before making any modifications to the outside of your home or unit. Here's how to submit one.
Step 1: Log Into the Portal
Enter your email address and password on the login screen and click Submit.
Step 2: Navigate to Exterior Change Requests
From your dashboard, locate and click on Exterior Change Request.
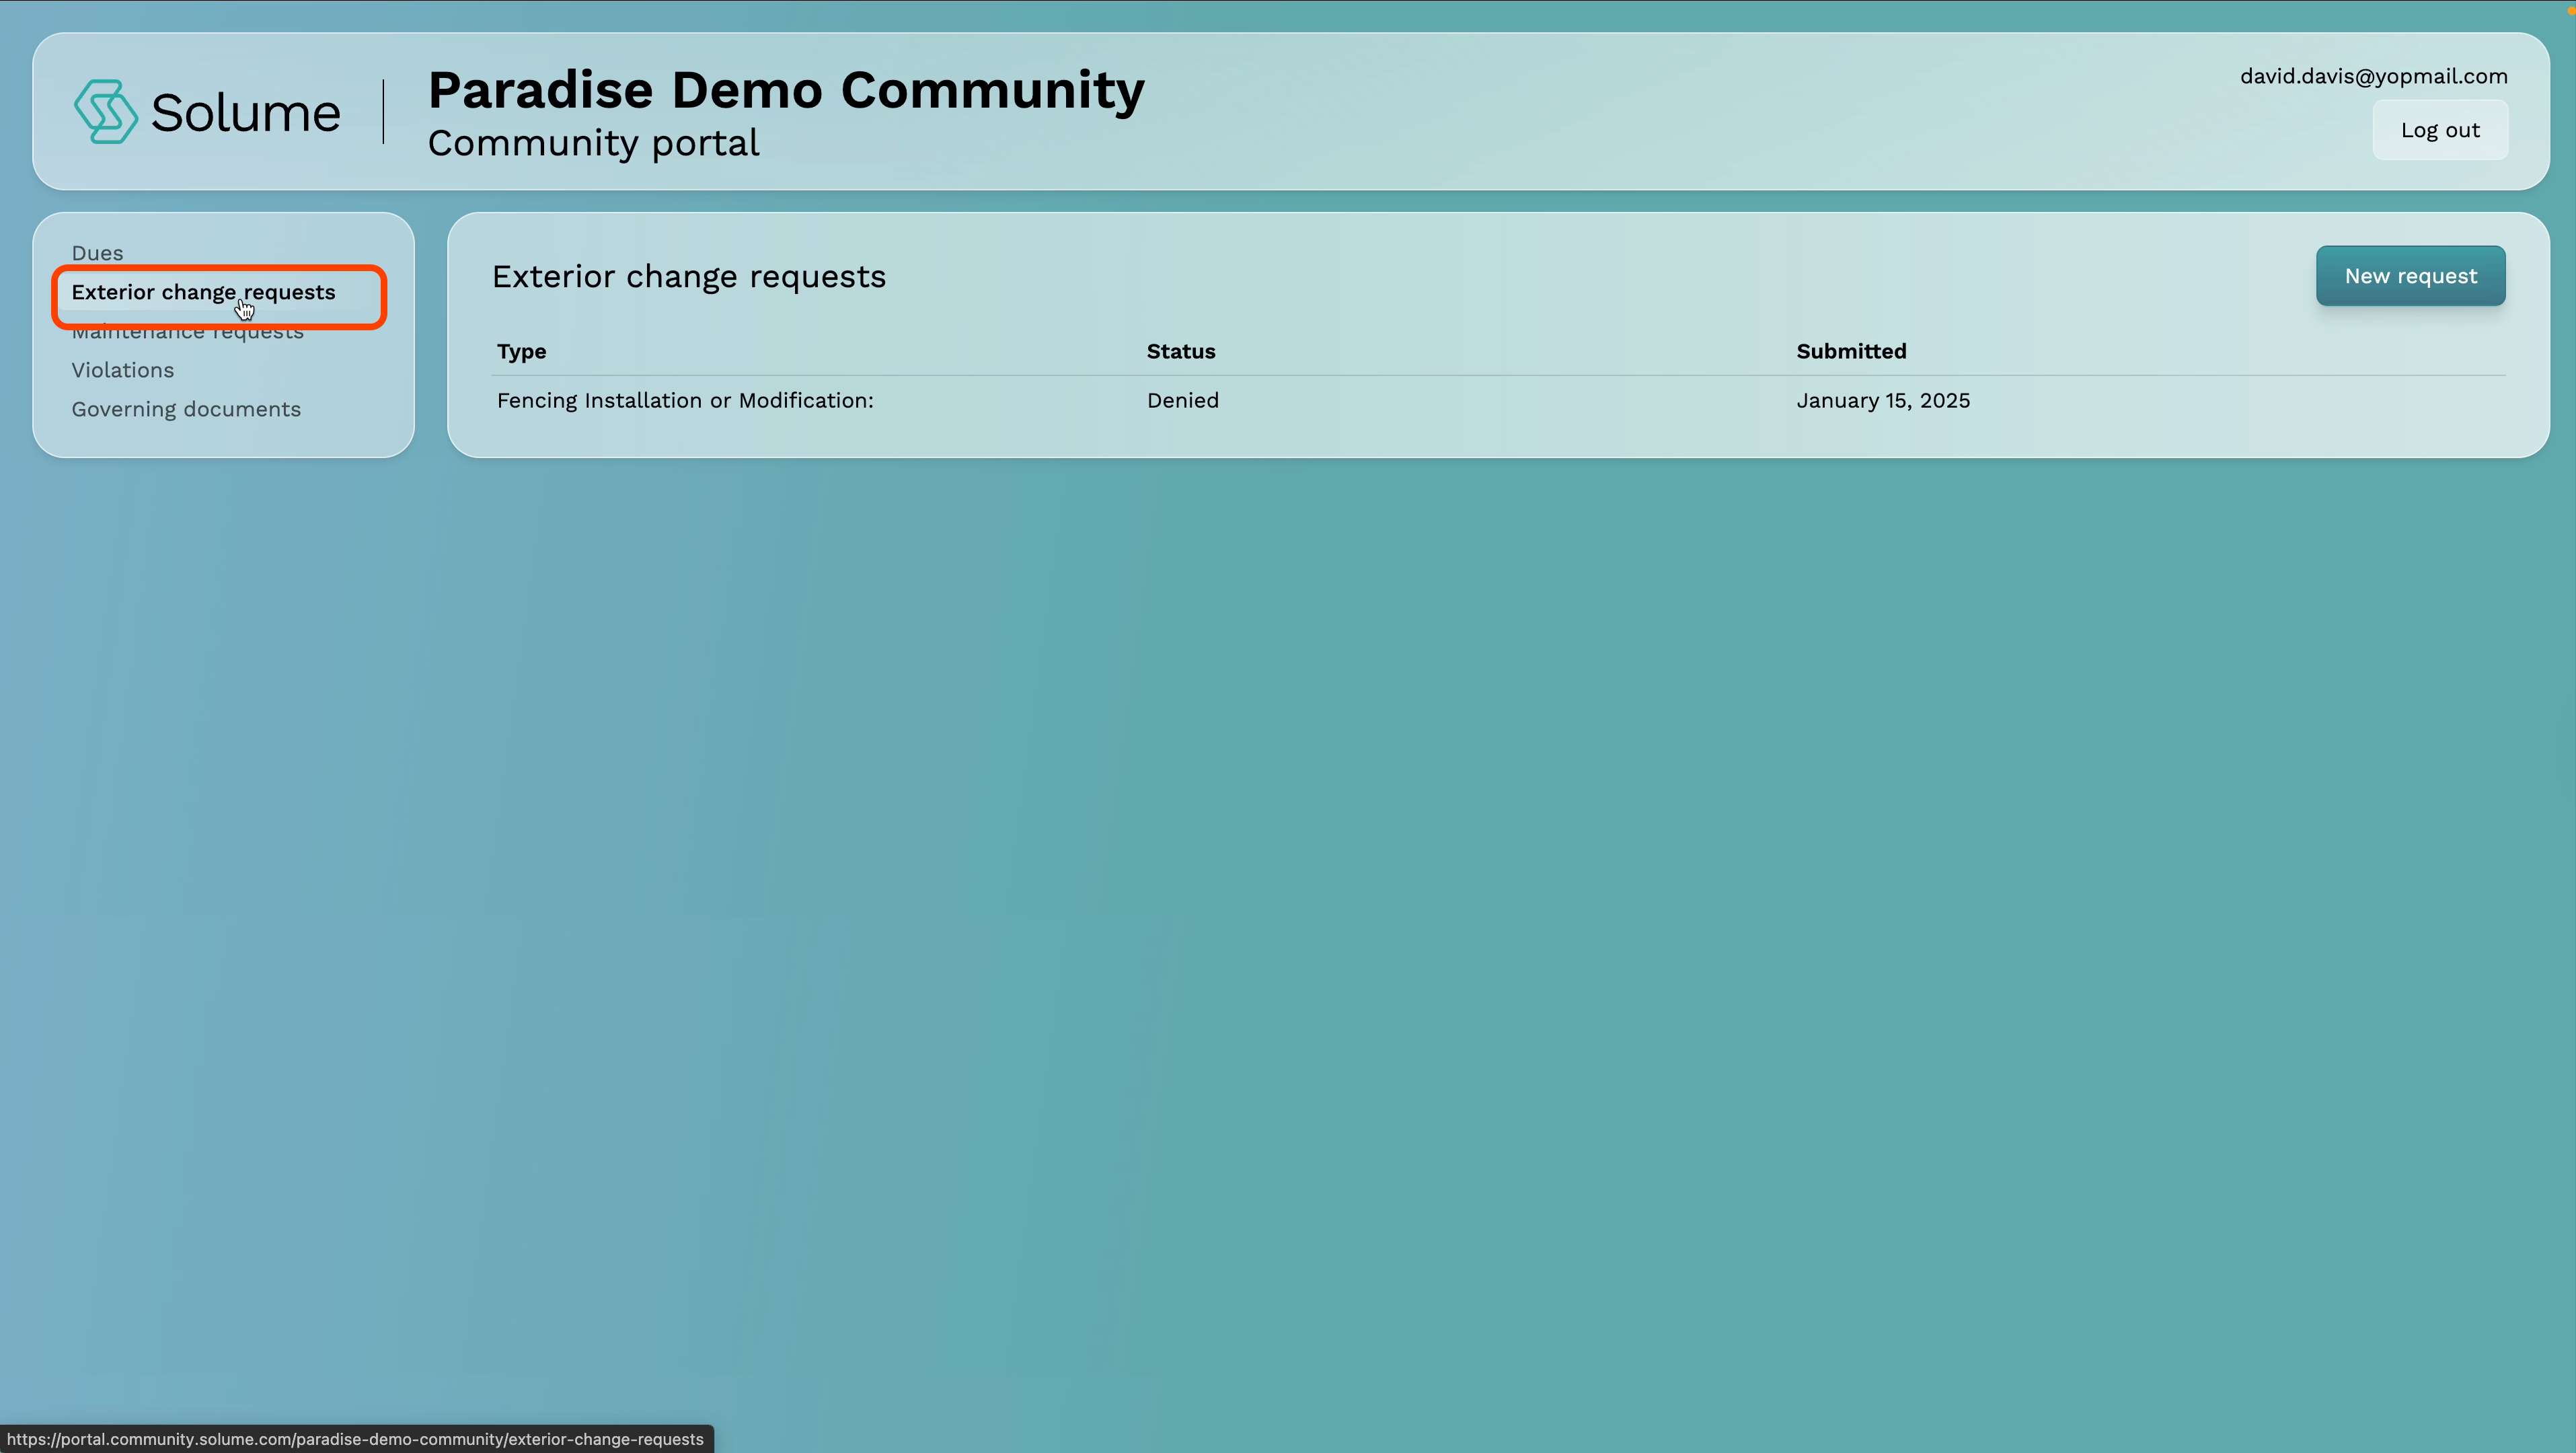
Step 3: Start a New Request
Click the New Request button to open the submission form.
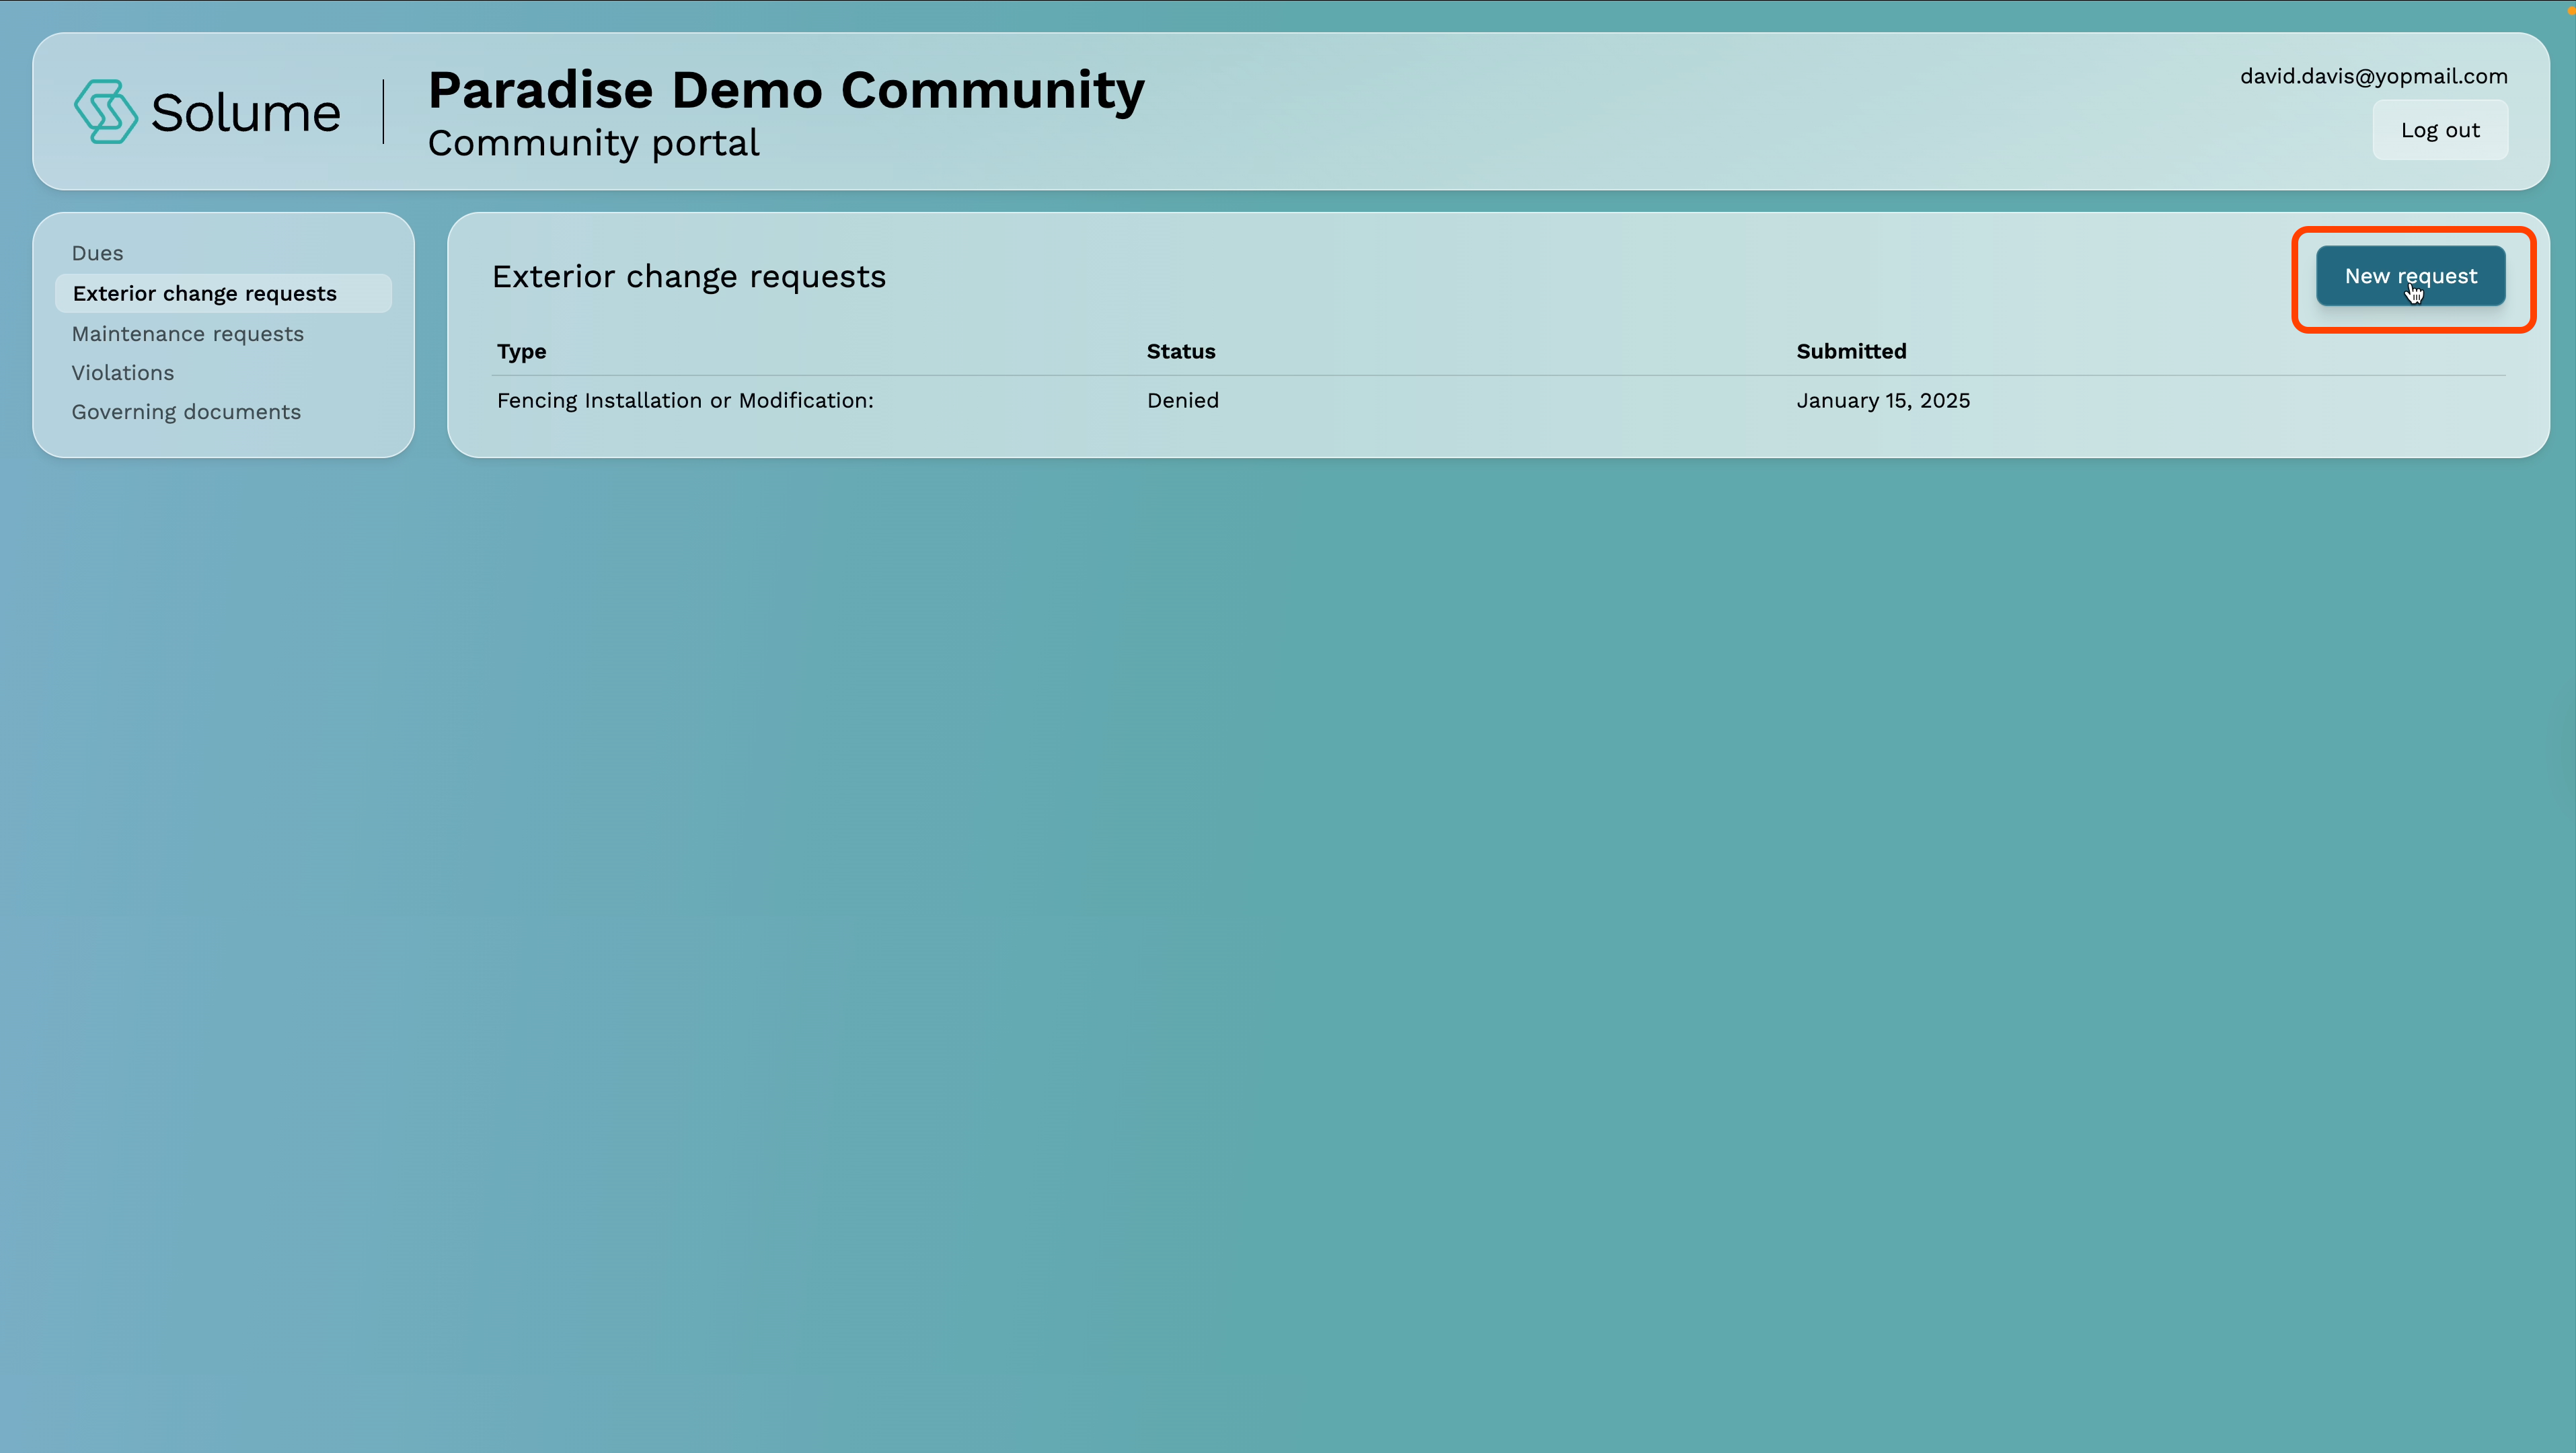
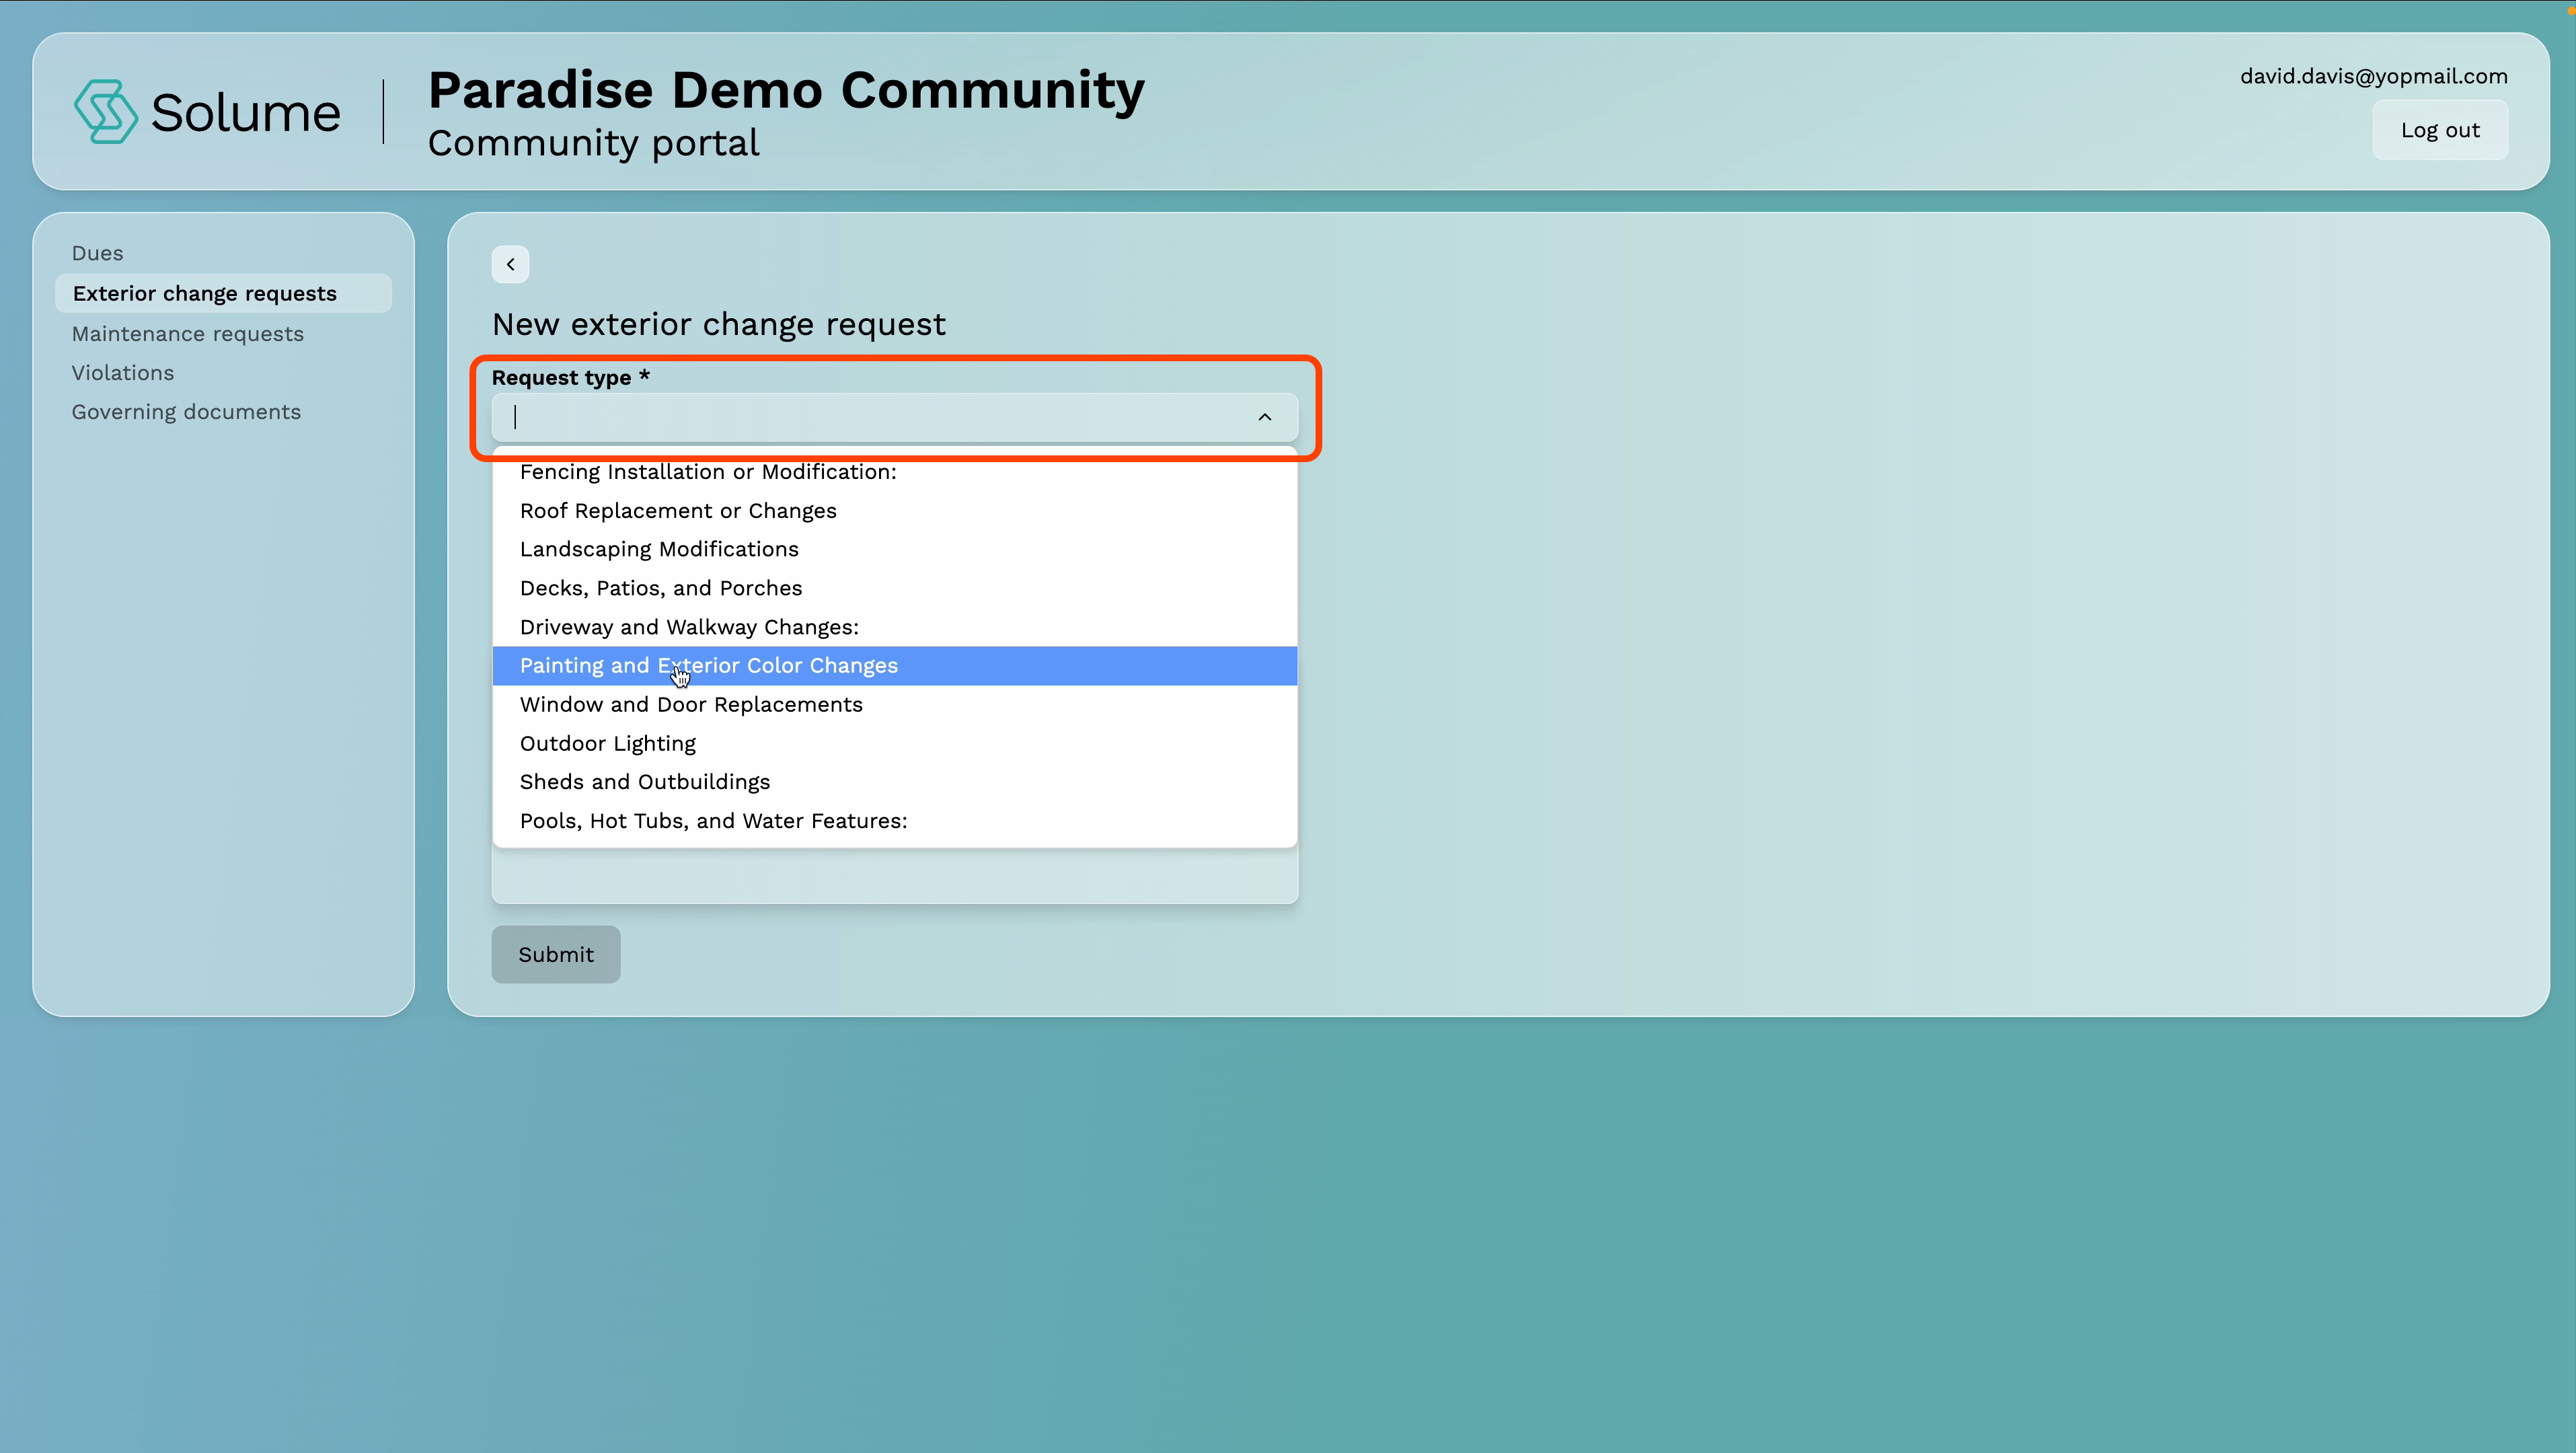
Step 4: Select Your Request Type
You'll be presented with a category list specific to your community. Select the category that best describes the change you're making — for example, a fence installation, landscaping modification, paint color change, etc.
Note: This list is configured by your community, so the options you see may differ from another community's list.
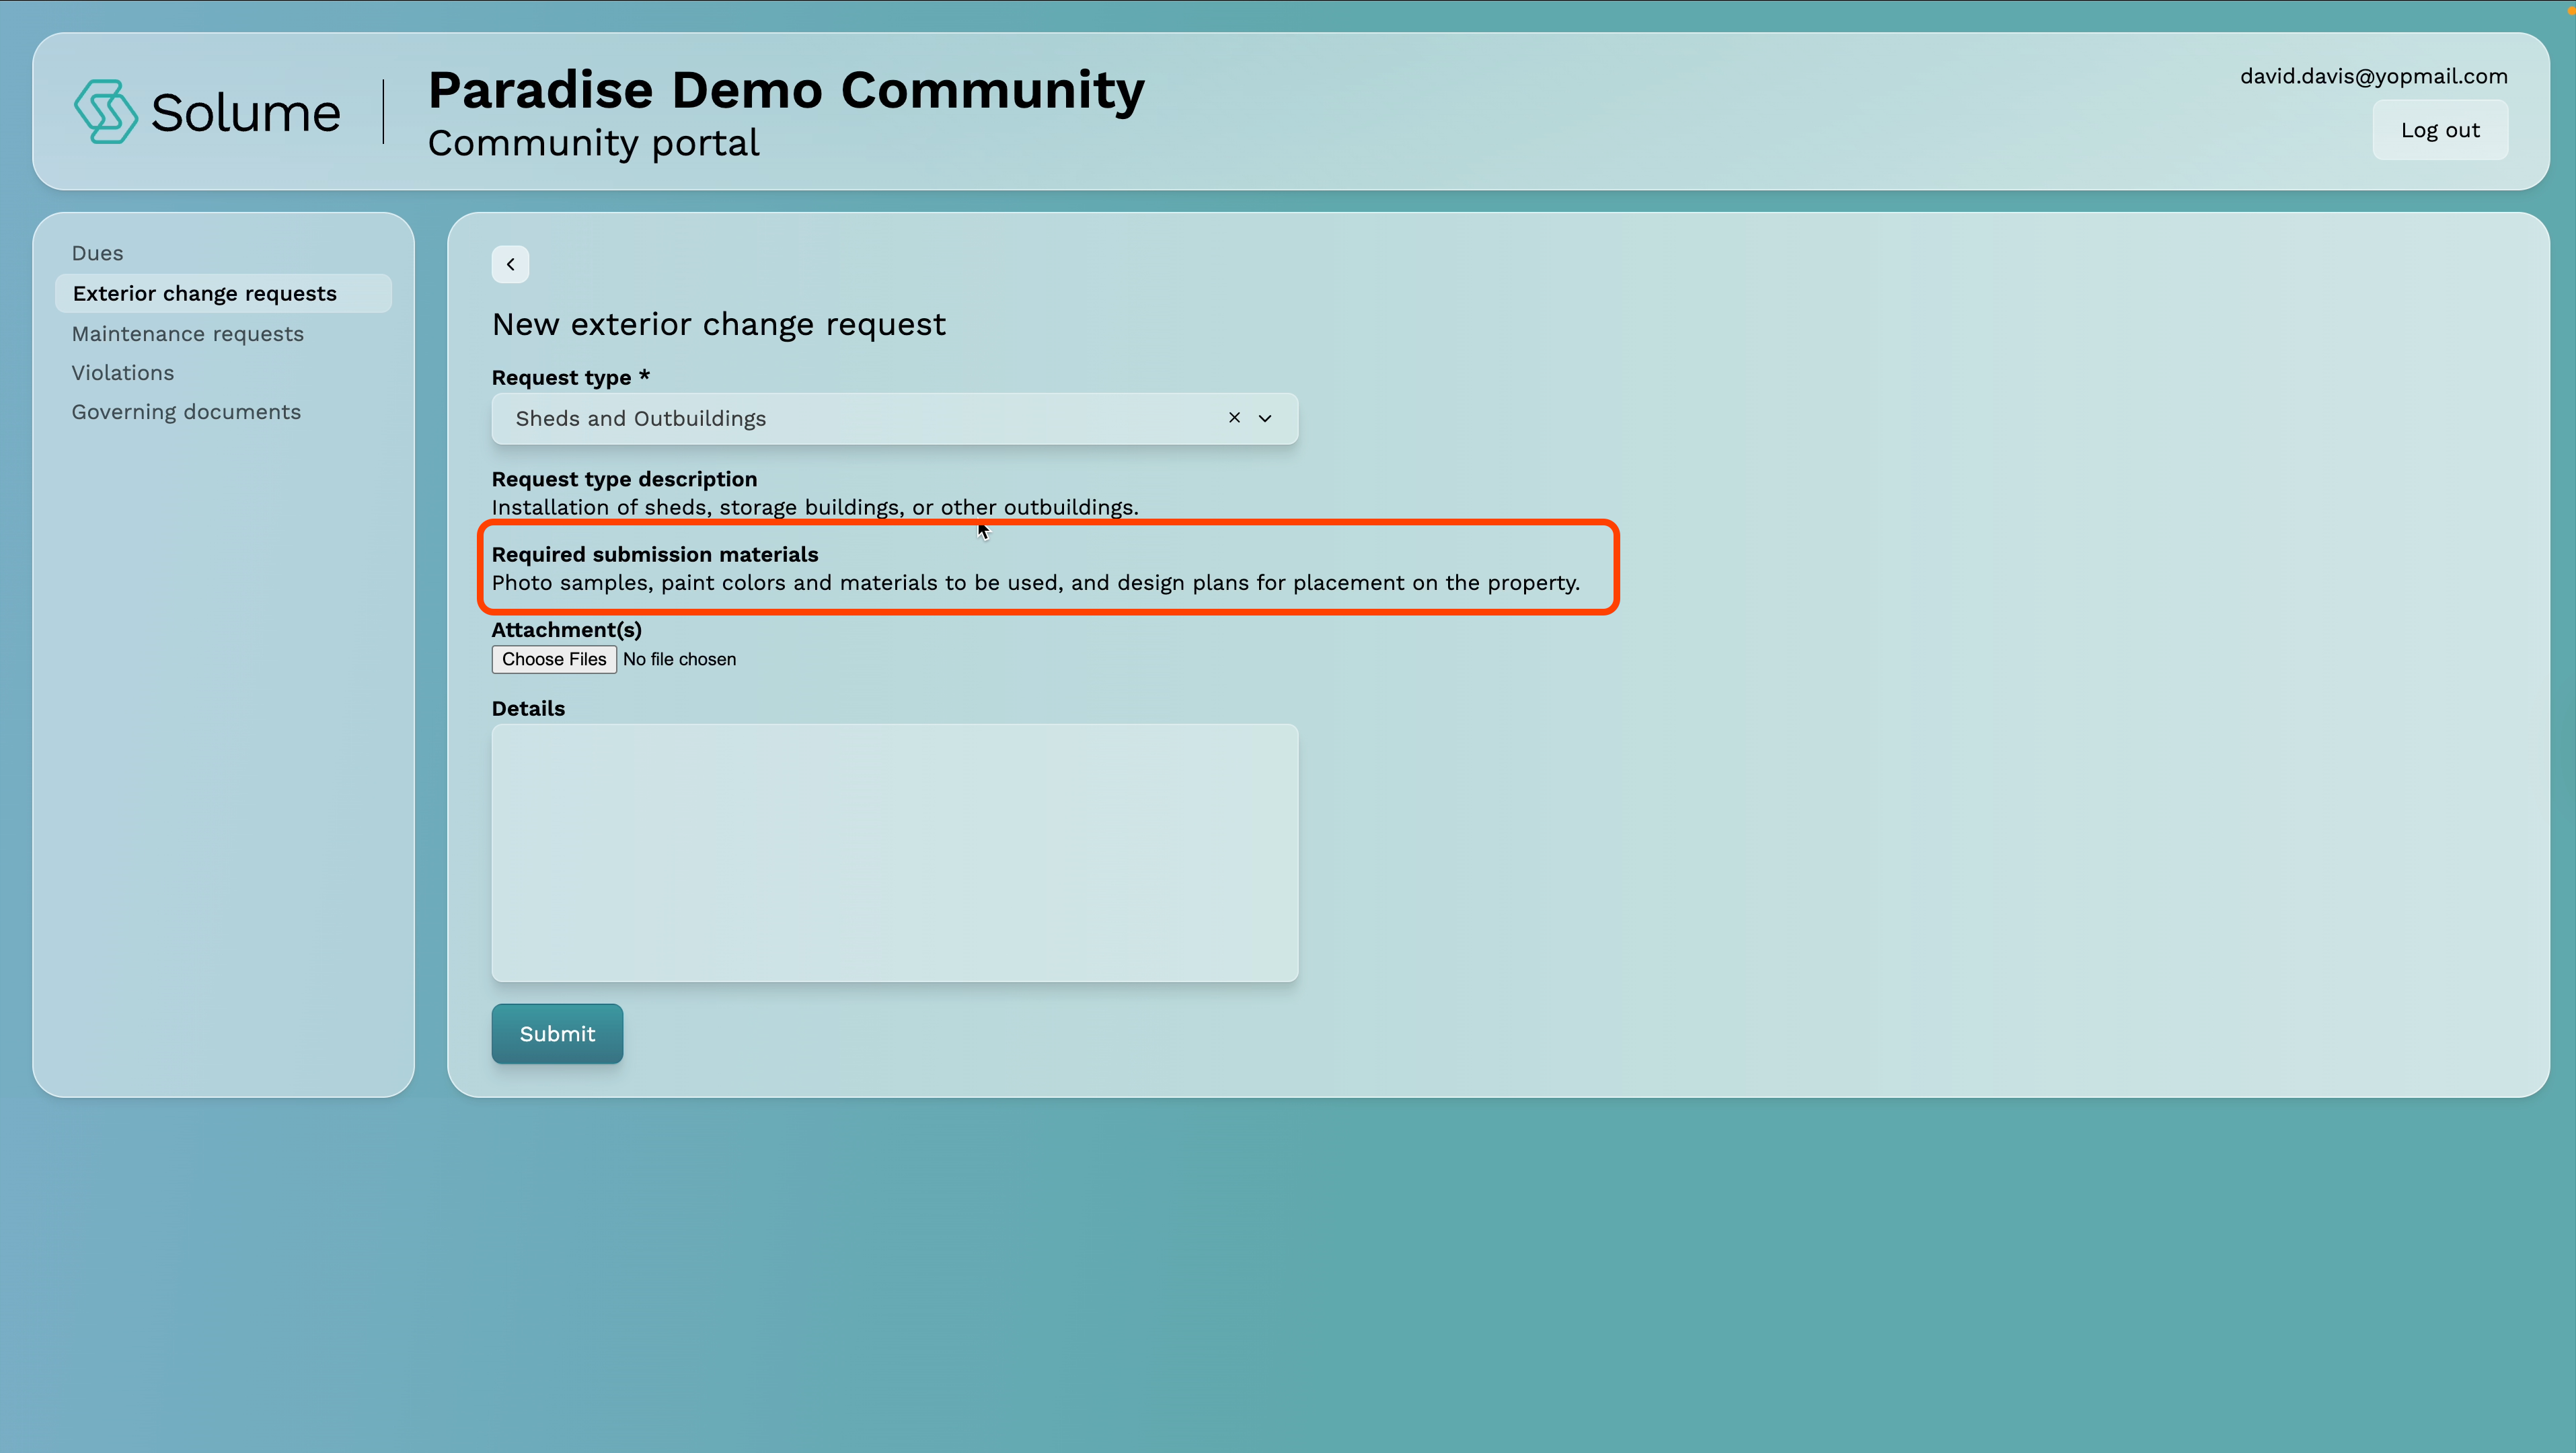
Step 5: Review the Submission Requirements
Once you select a category, the portal will display exactly what your community requires in order to review and approve your request. This may include:
- Blueprints or drawings
- Photographs
- Contractor licenses
- Material lists
- Other supporting documents
Read this carefully before proceeding — incomplete submissions can delay your approval.
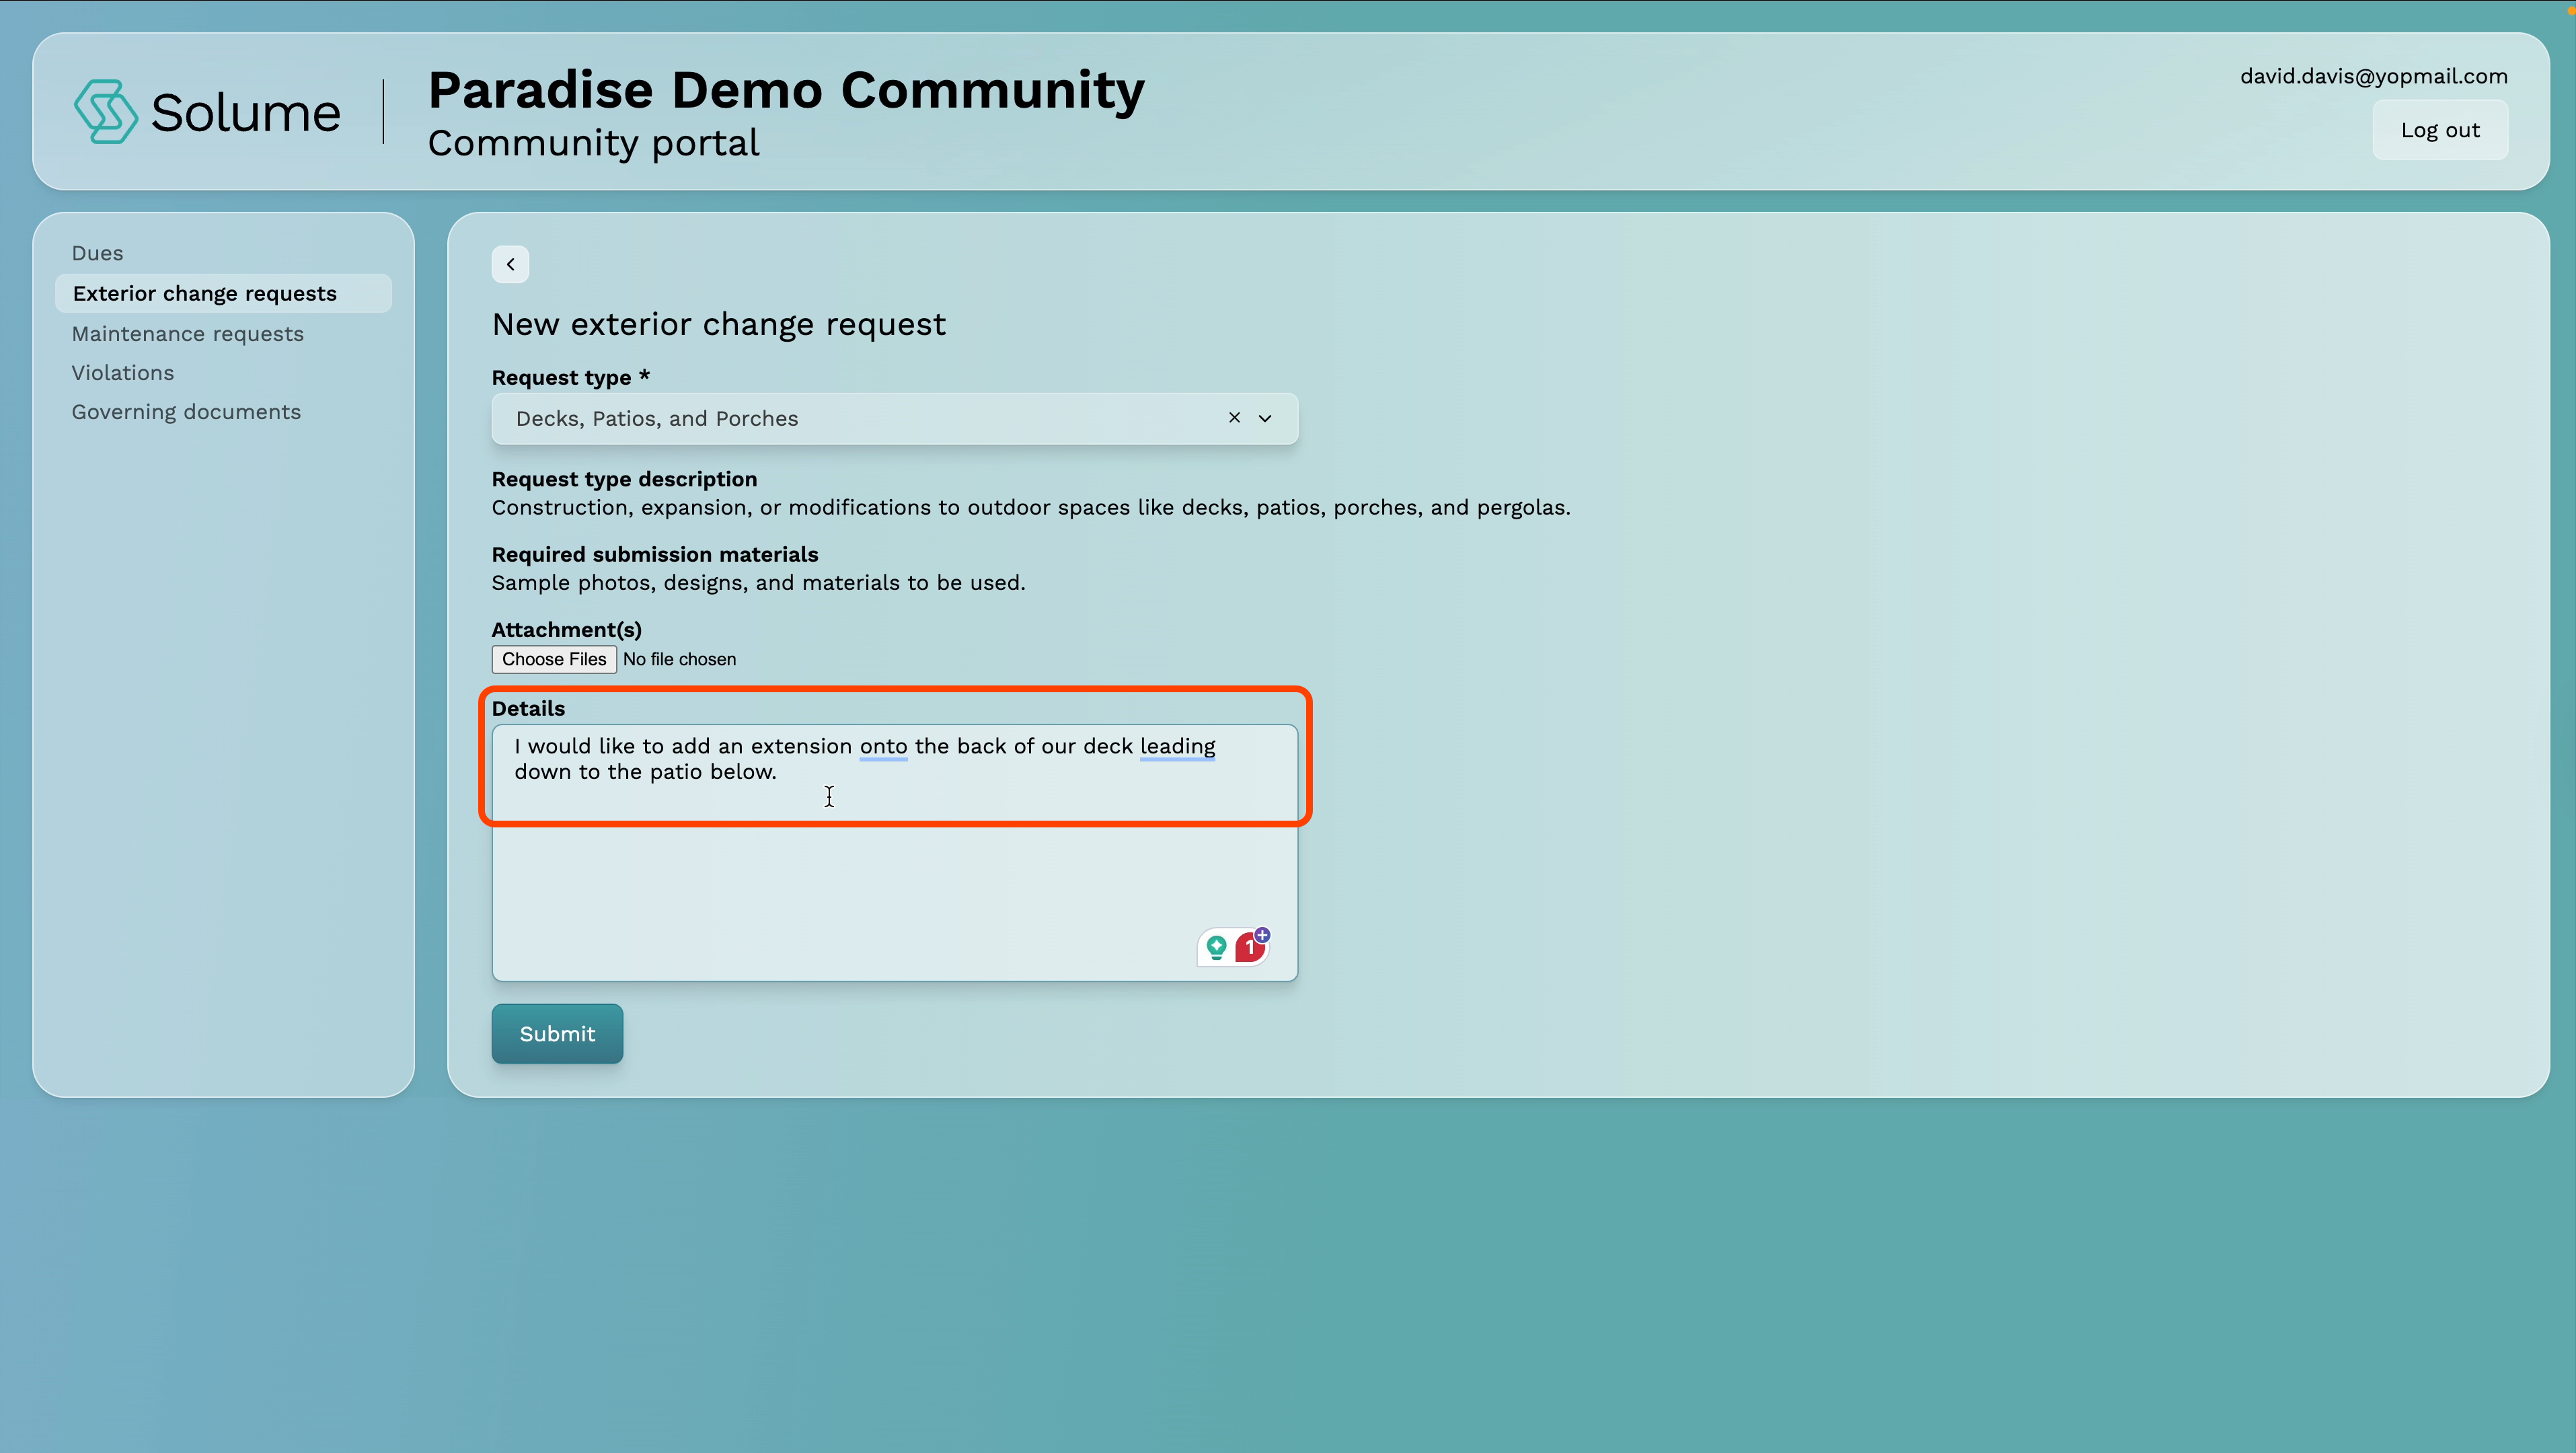
Step 6: Describe Your Request
In the details field, type a clear description of what you are proposing to do.
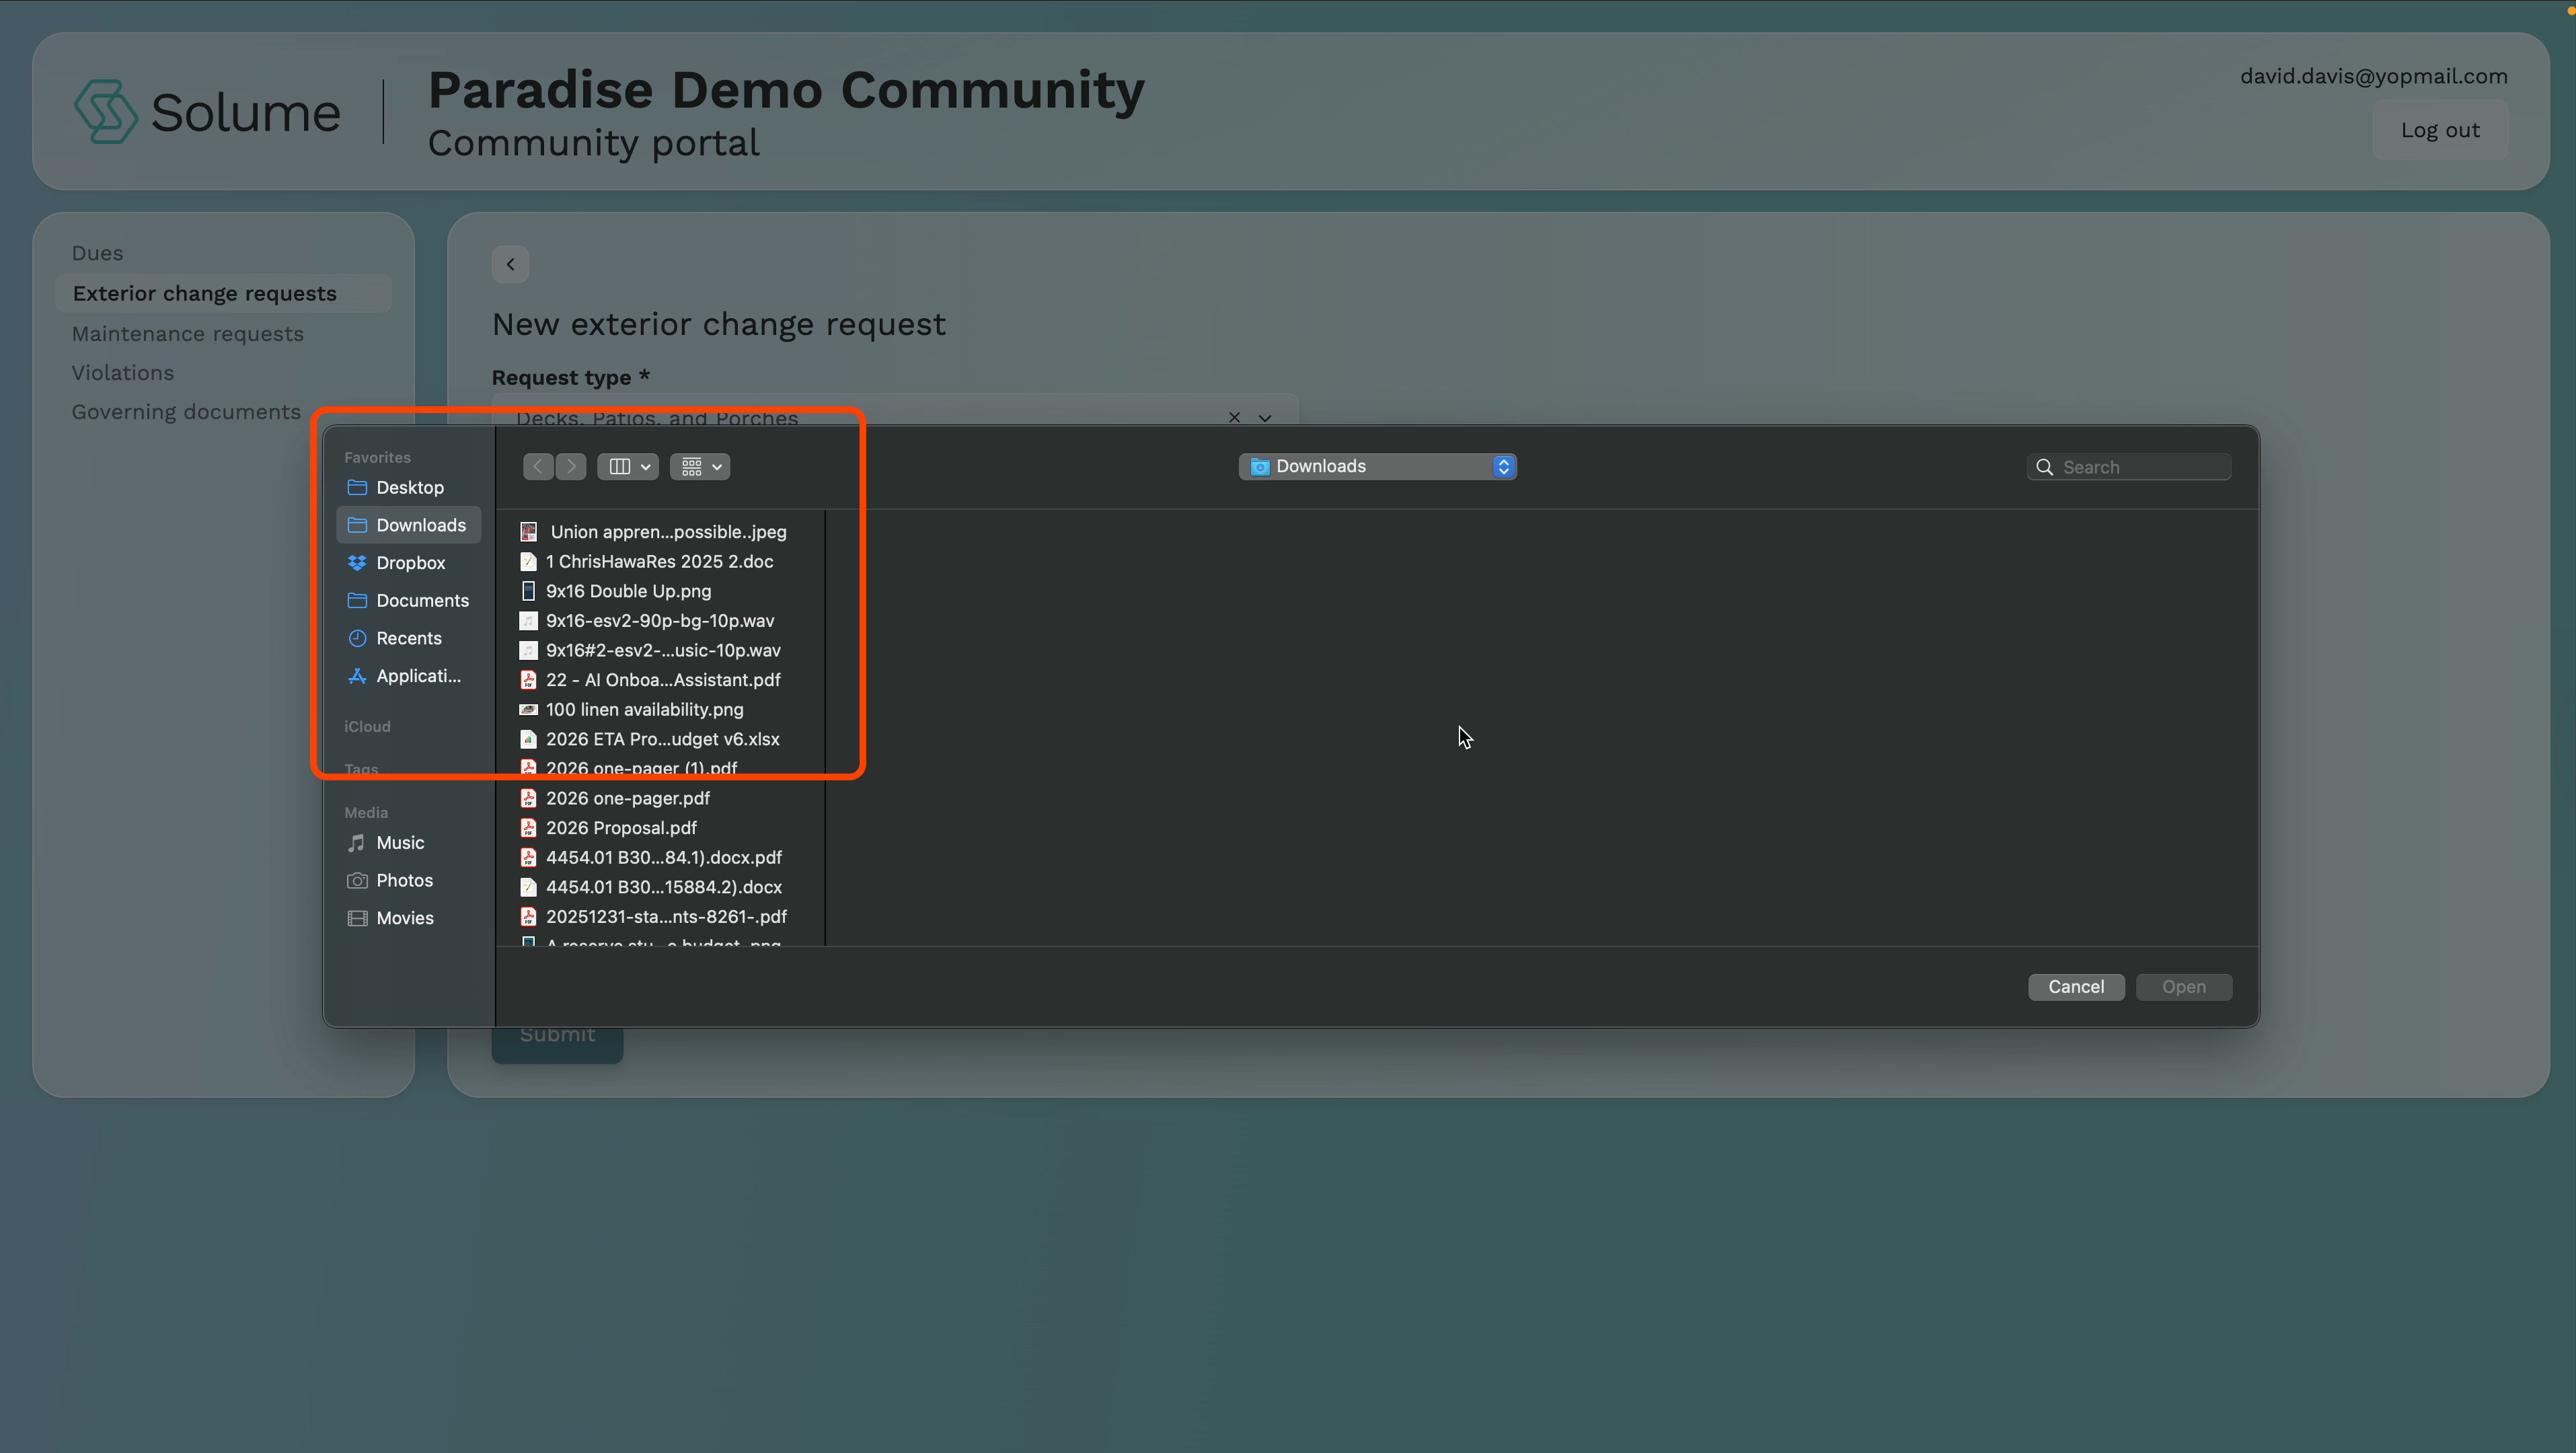
Step 7: Attach Supporting Files
Upload any required documents or photos using the file attachment option. Make sure everything listed in Step 5 is included.
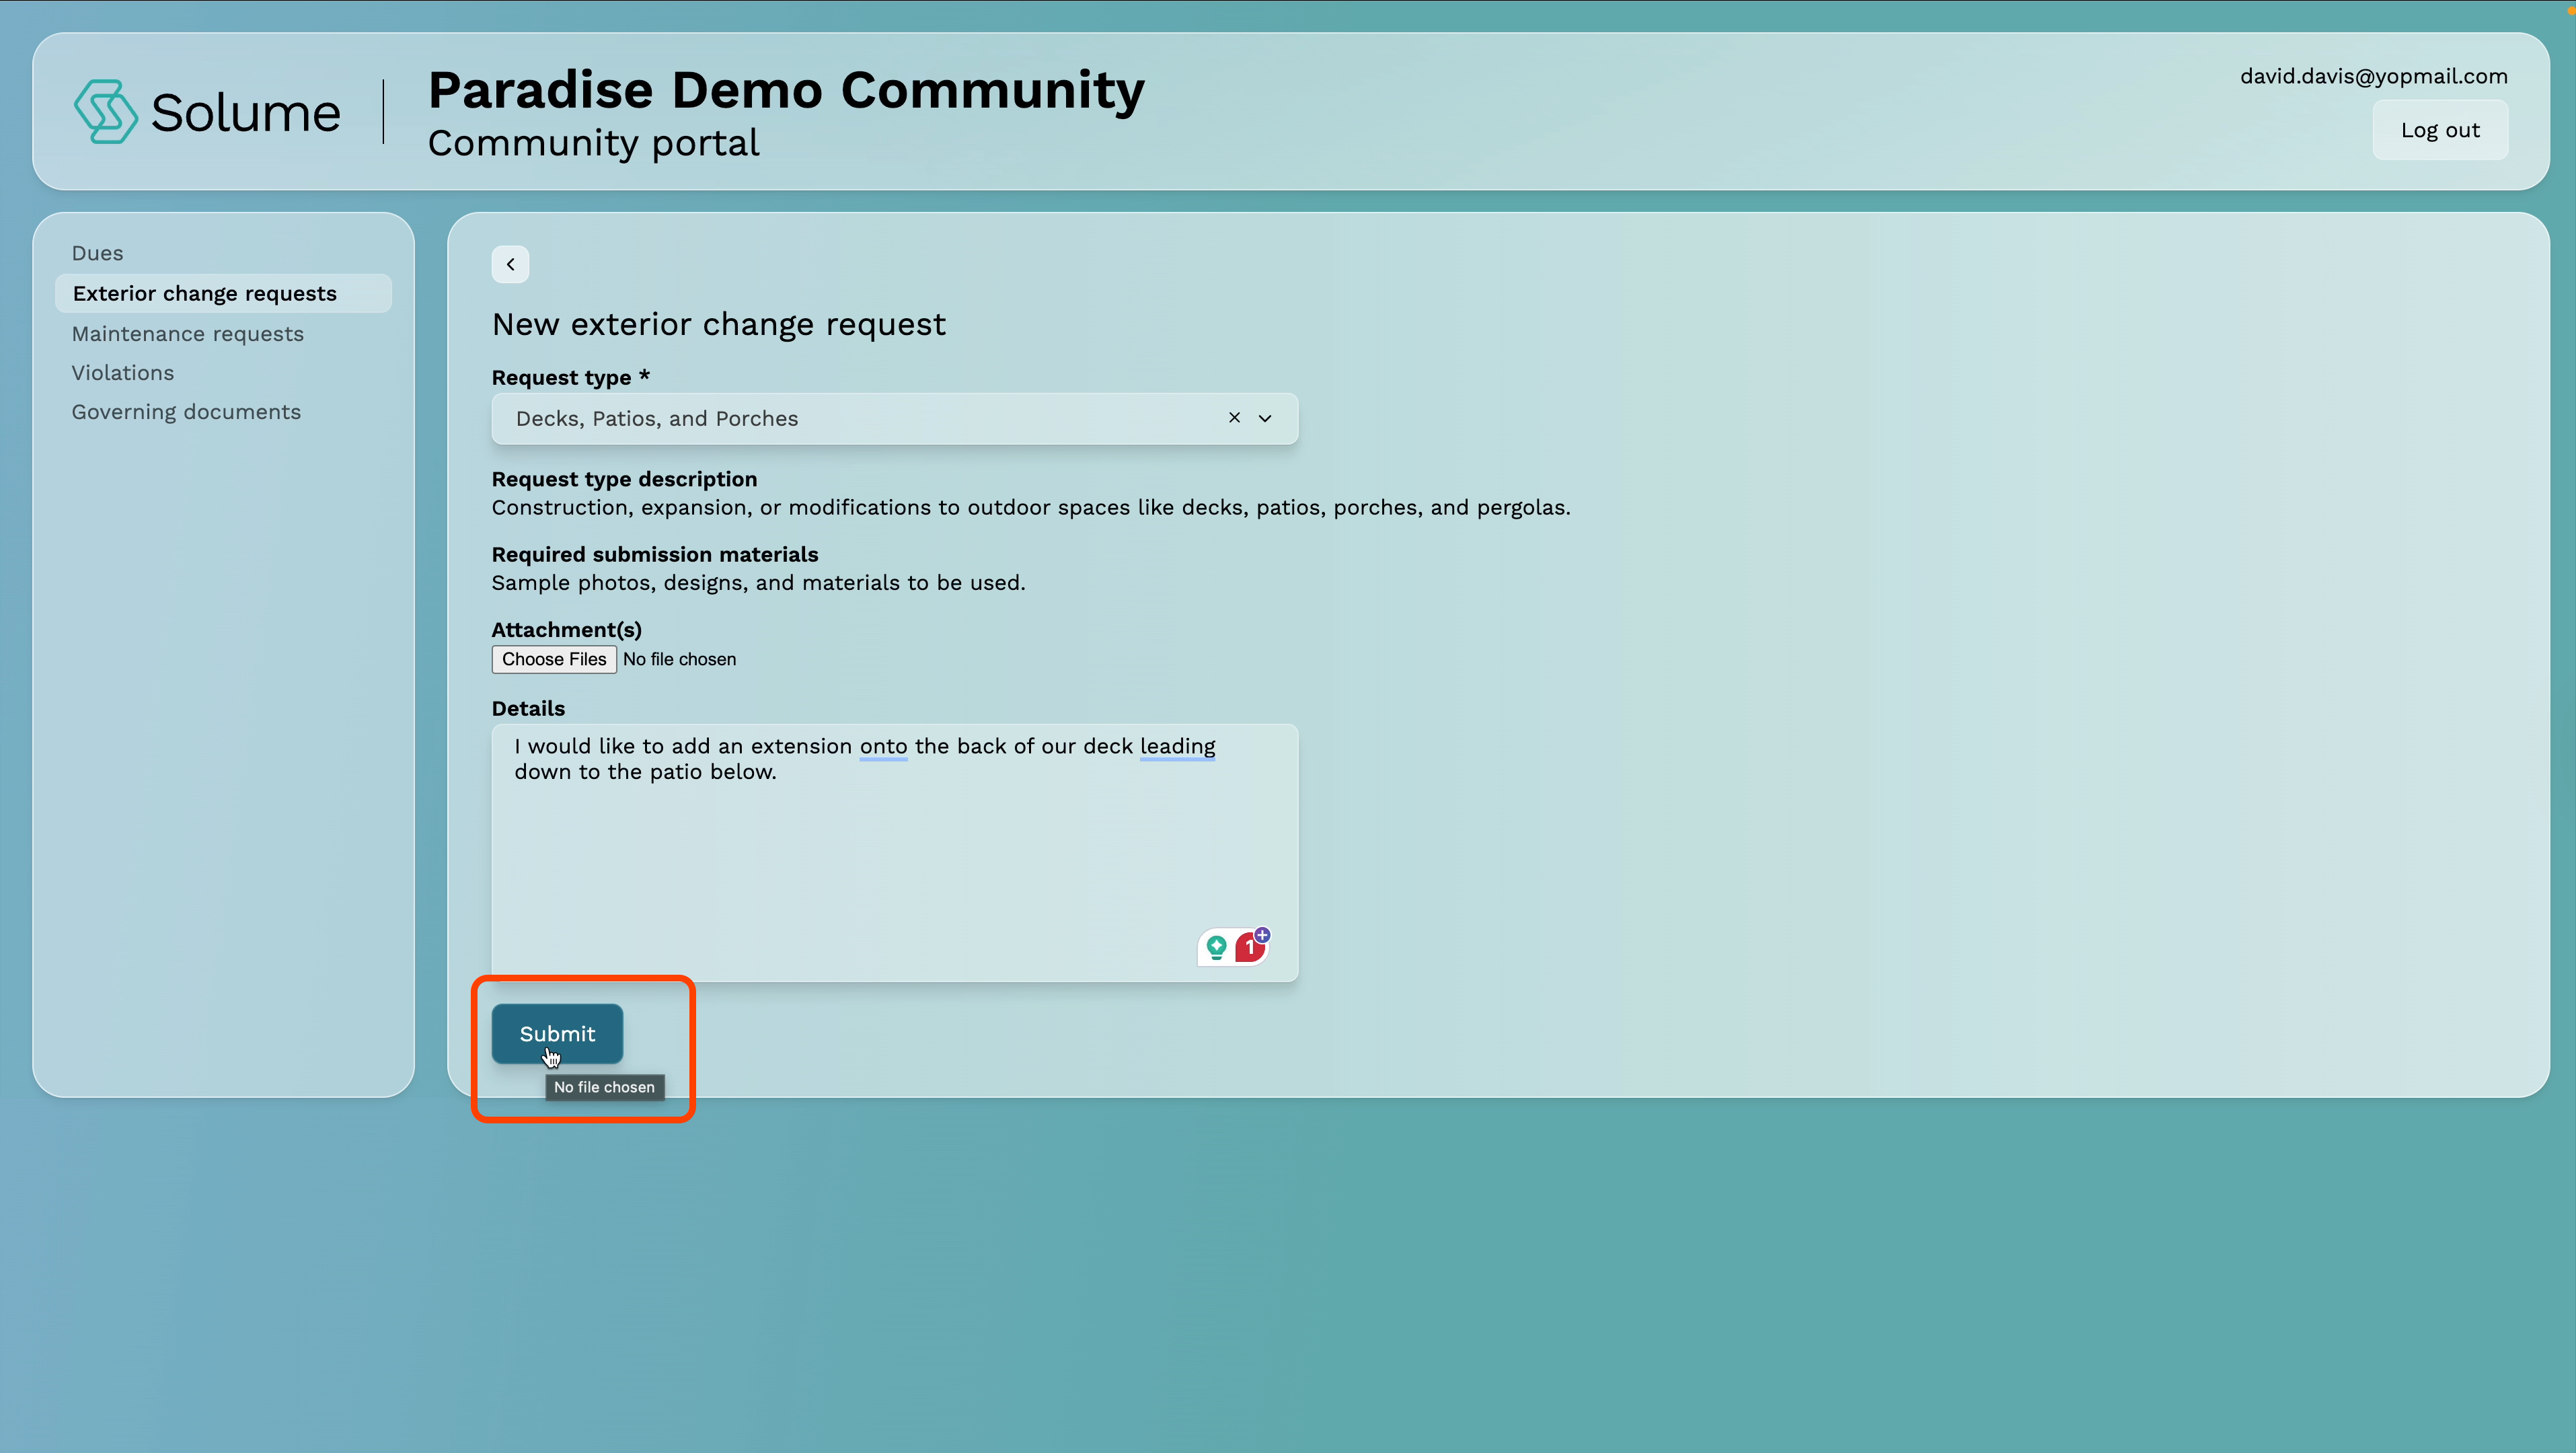
Step 8: Submit Your Request
Click Submit. Your request will appear in your request history immediately.
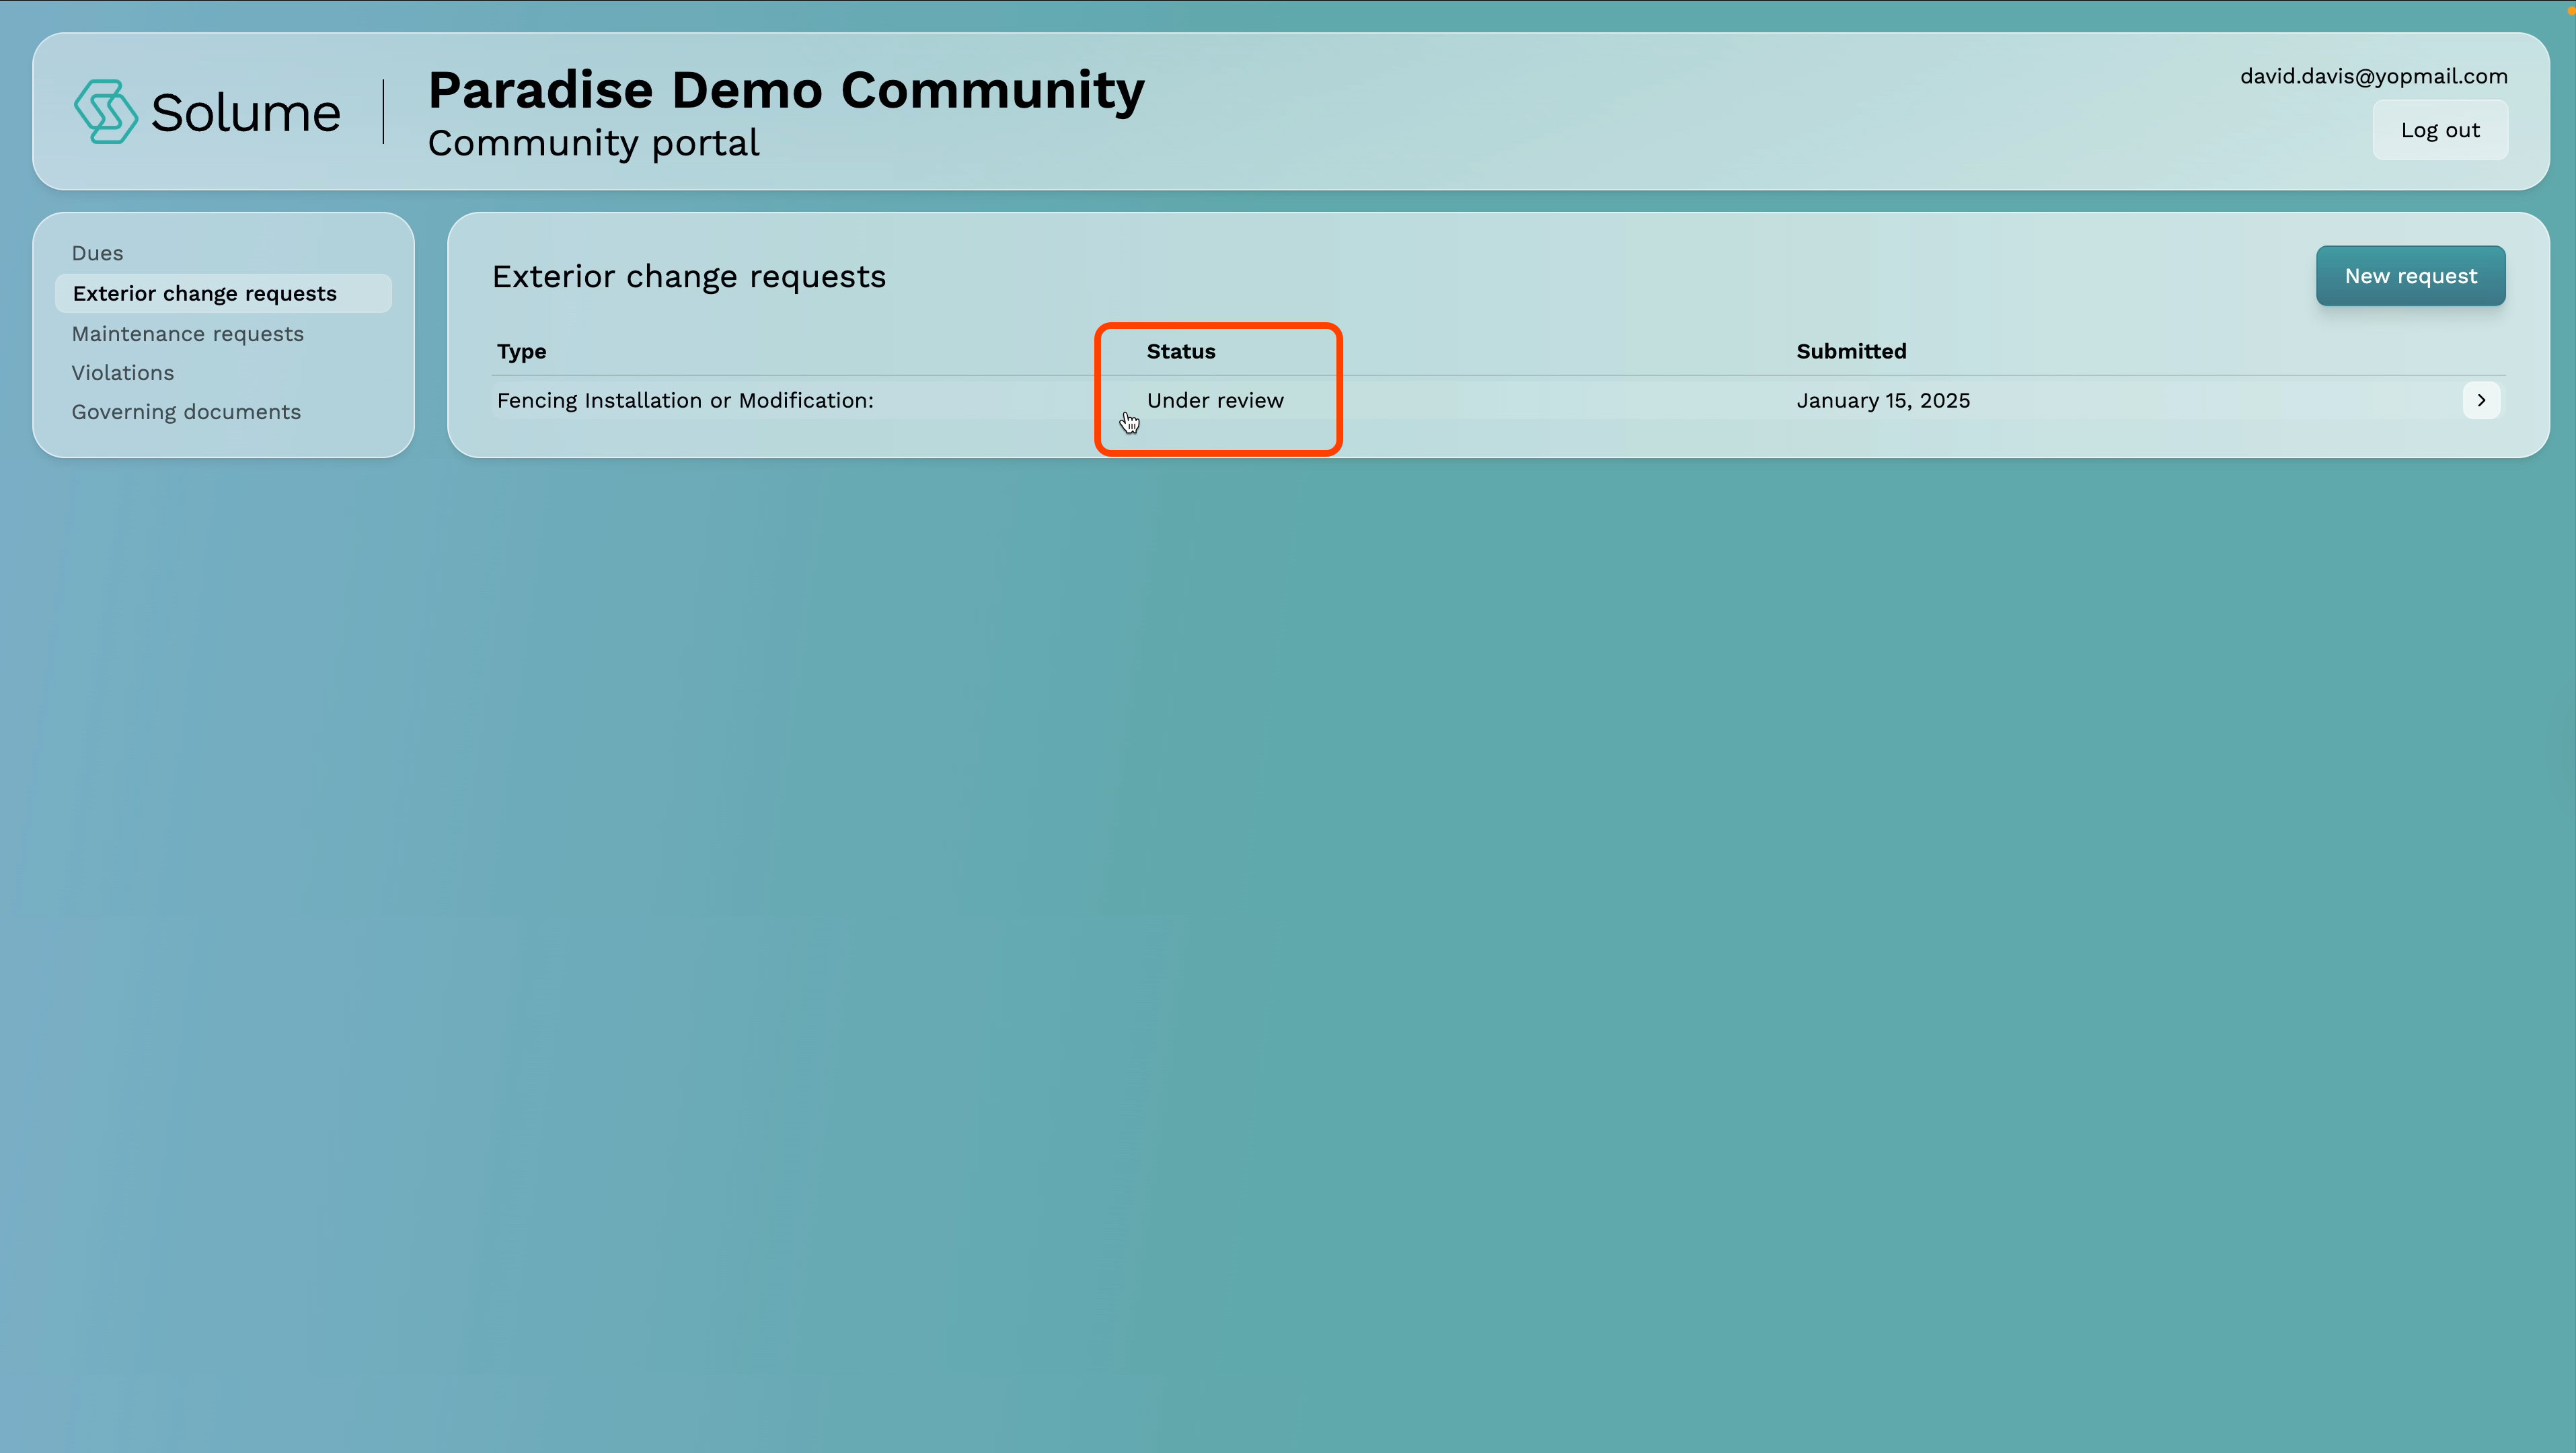
Step 9: Monitor Your Request Status
You can return to the Exterior Change Request section at any time to check the status of any submission. Possible statuses include:
- Under Review — The board is evaluating your request
- Requests Further Information — The board needs additional details from you
- Approved — Your request has been approved; you may proceed
- Approved with Conditions — Your request is approved, but specific conditions apply
- Denied — Your request was not approved
Important: Do not begin any exterior work until your request shows an Approved status. Proceeding without approval may result in a violation.
How to Submit a Maintenance Request
Maintenance requests allow you to notify your board or community management of something that needs attention — whether it's inside your unit (for items the community is responsible for) or within a shared community asset. Here's how to submit one.
Step 1: Log Into the Portal
Enter your email address and password on the login screen and click Submit.
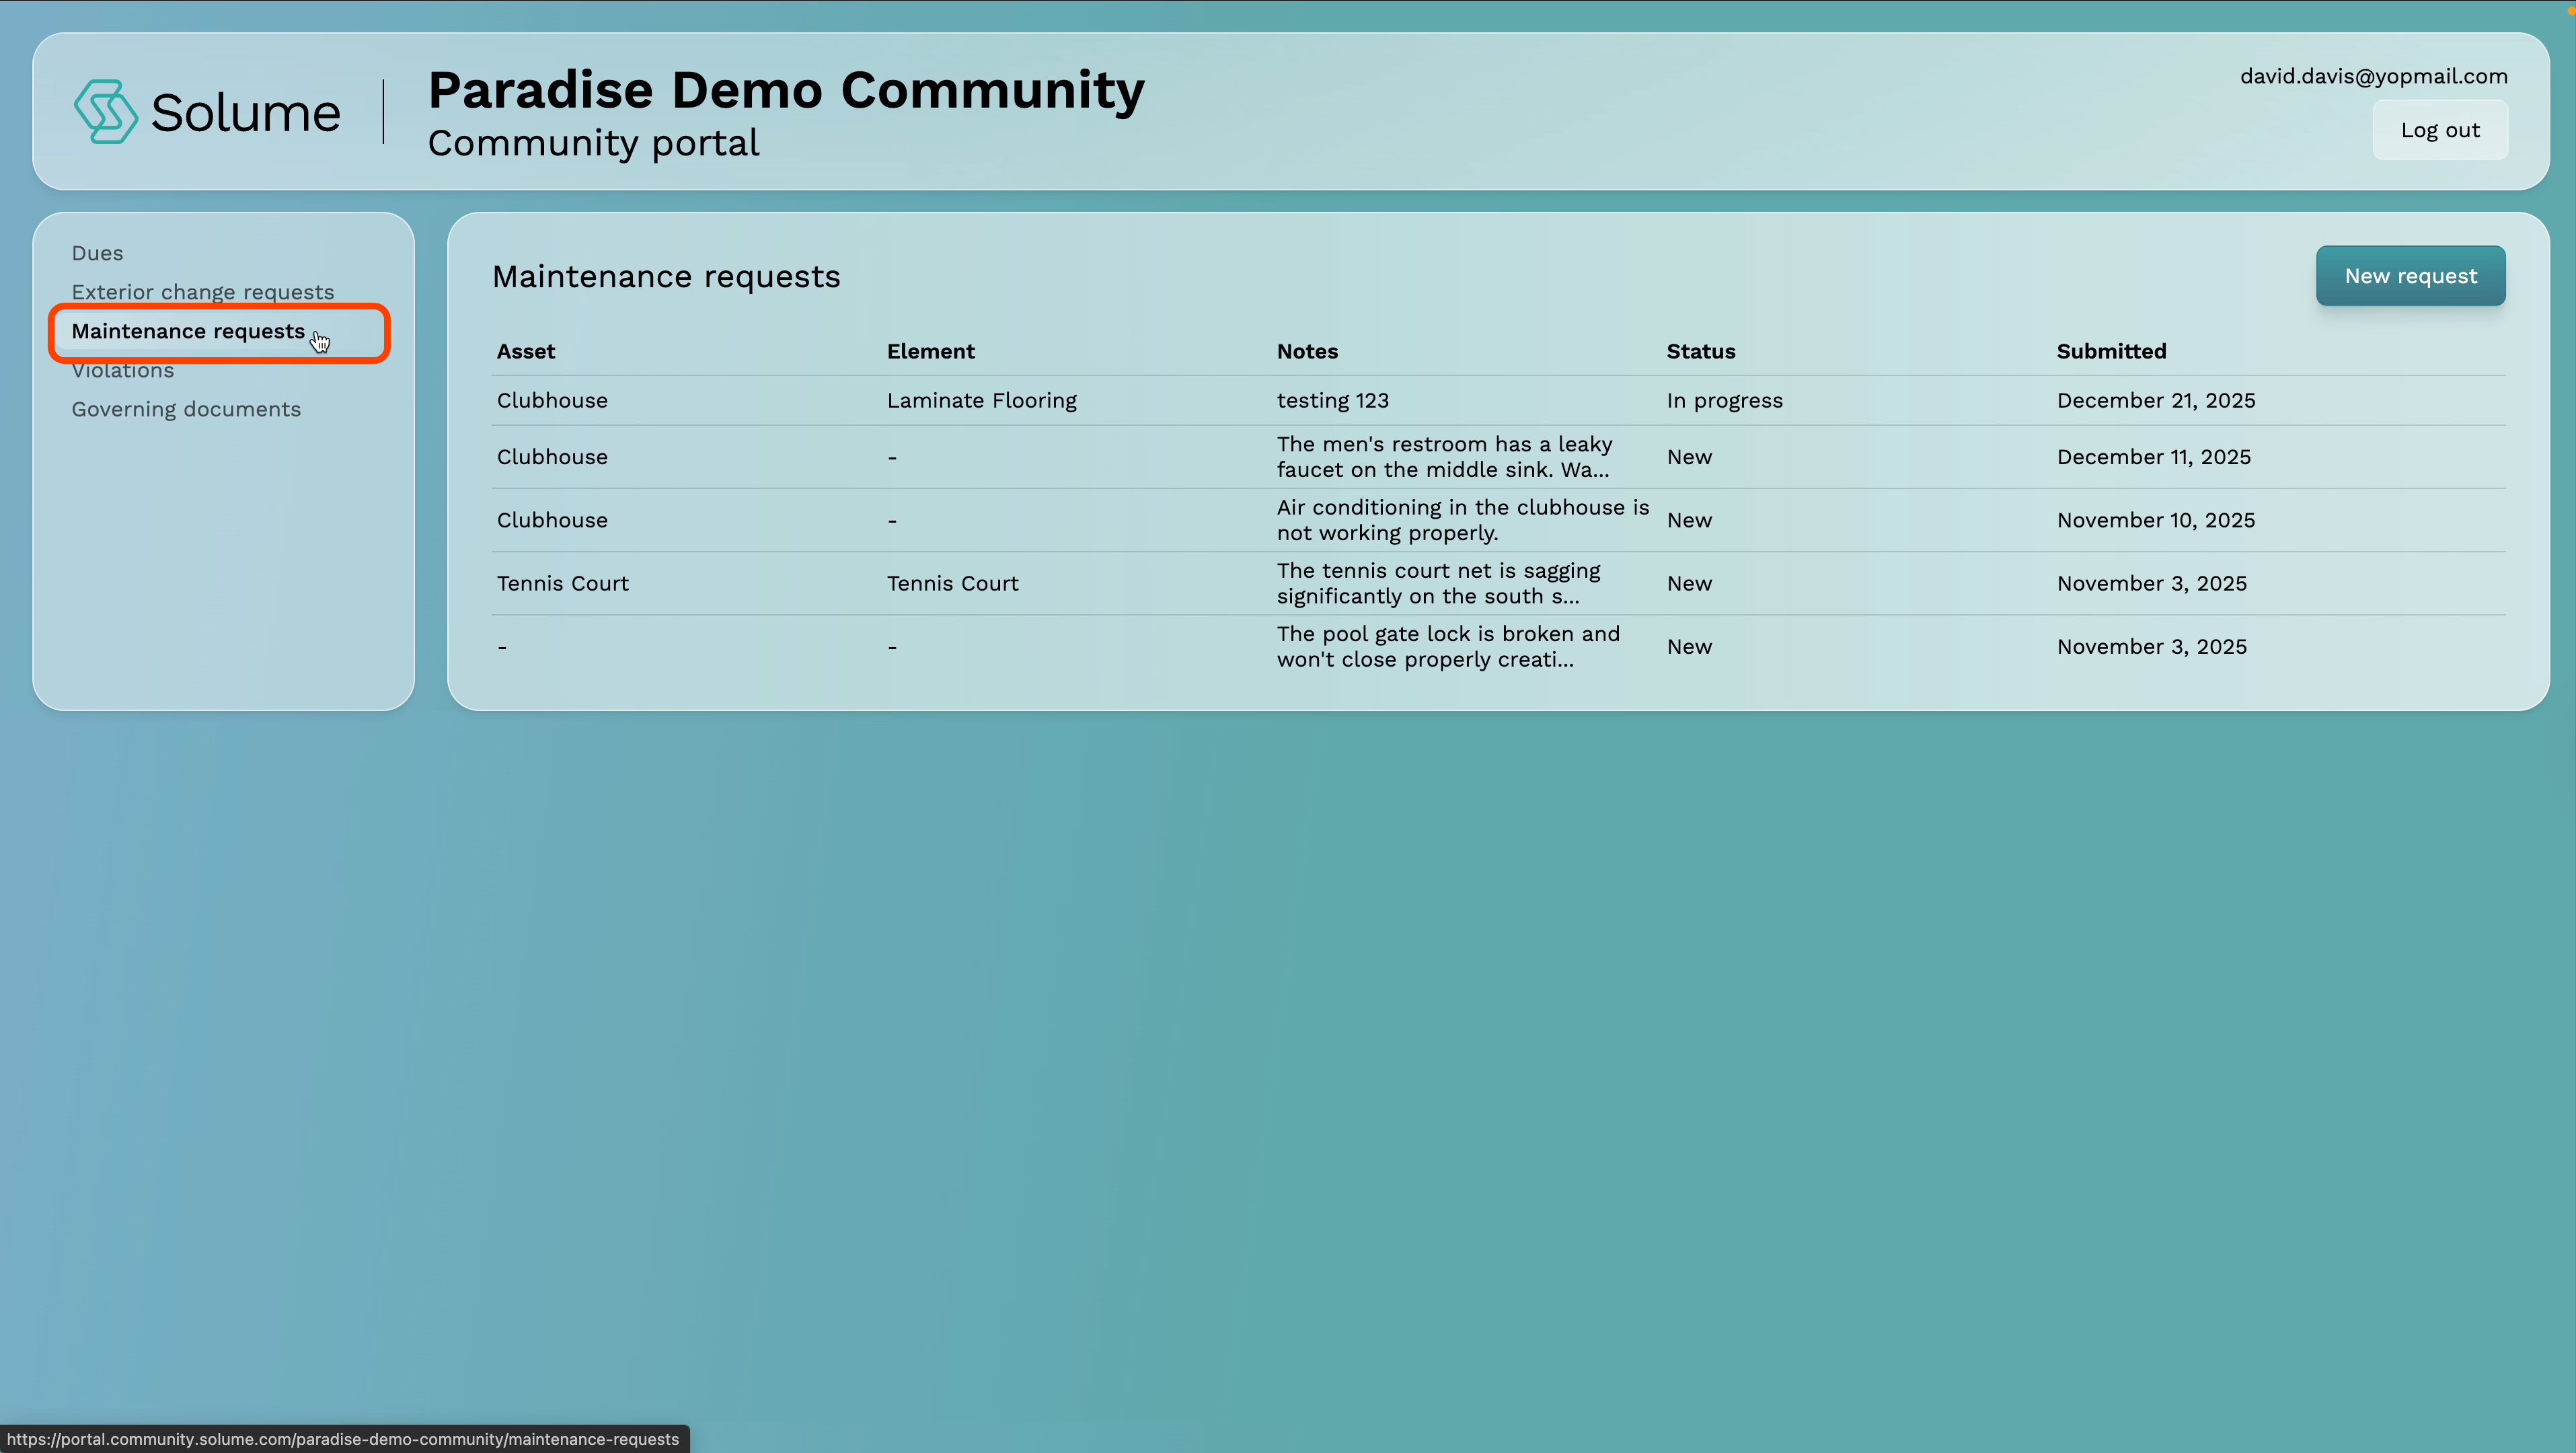
Step 2: Navigate to Maintenance Requests
From your dashboard, locate and click on Maintenance Request.
Step 3: Check for Emergency Contact Information
Before submitting, the portal will display emergency contact information if your community has a dedicated on-premises maintenance person or emergency contractor. If your situation is urgent, contact them directly rather than submitting a standard request.
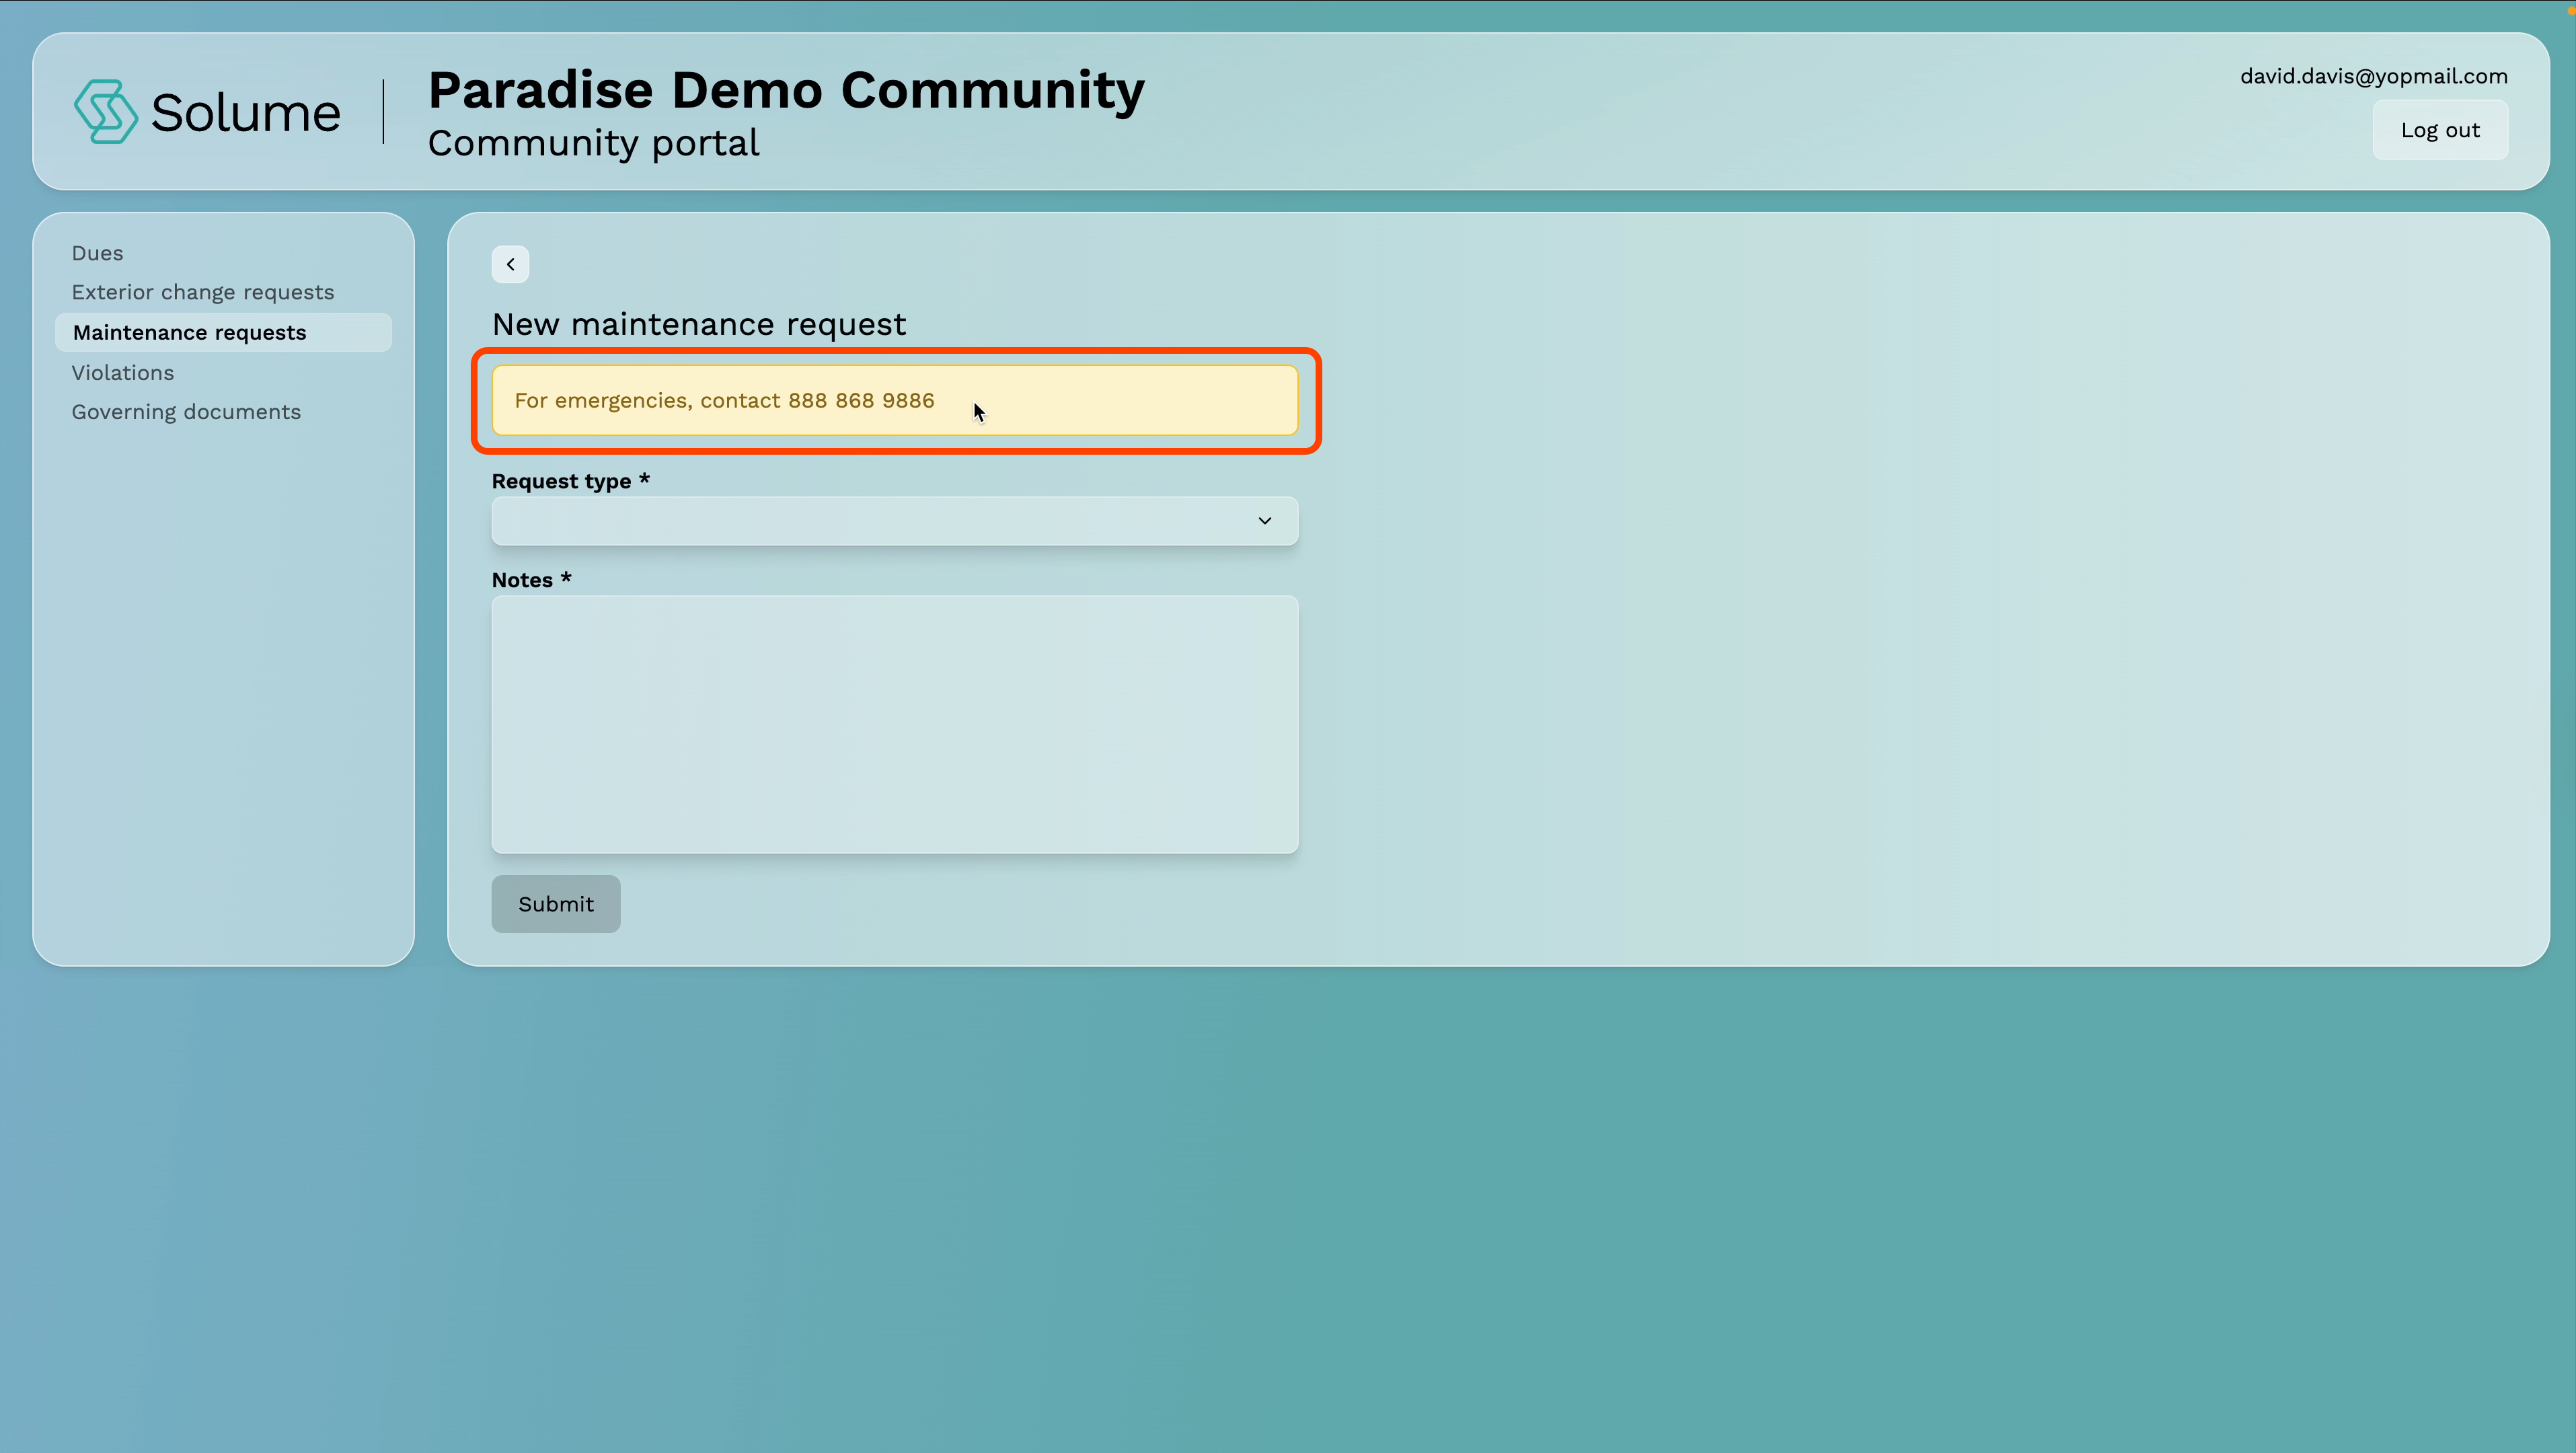
Step 4: Start a New Request
For non-emergency issues, click New Request to open the submission form.
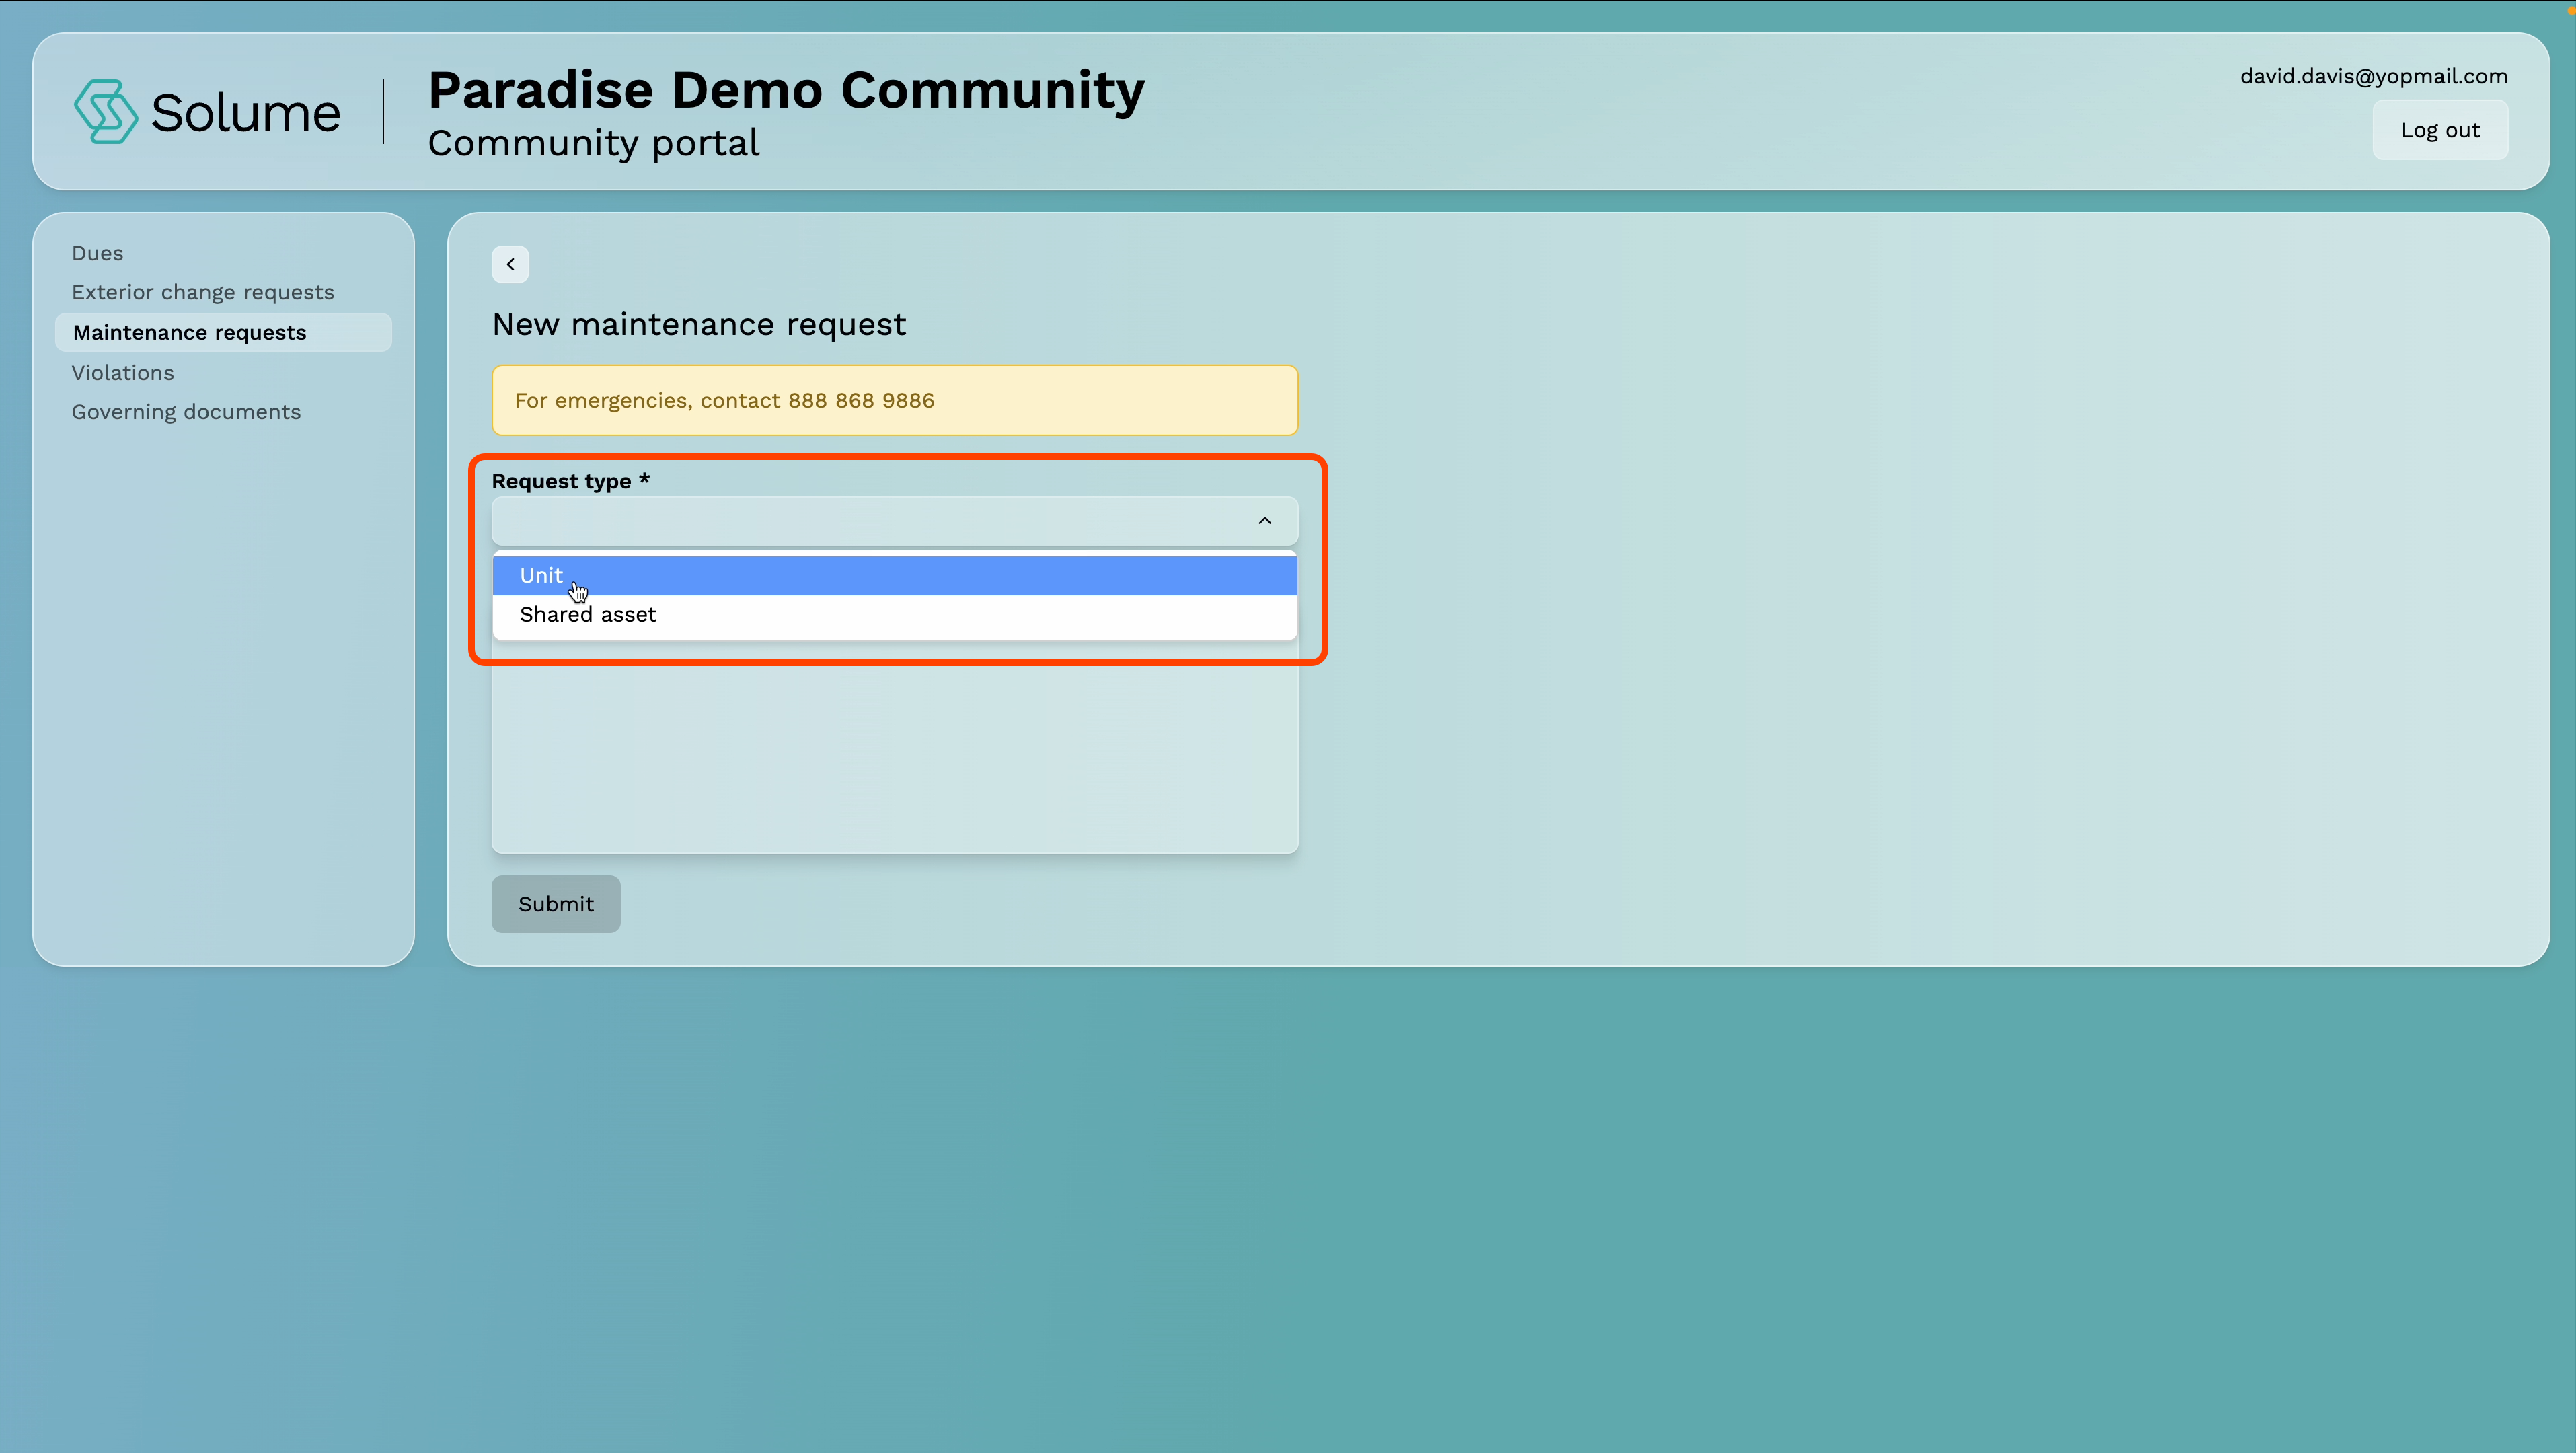
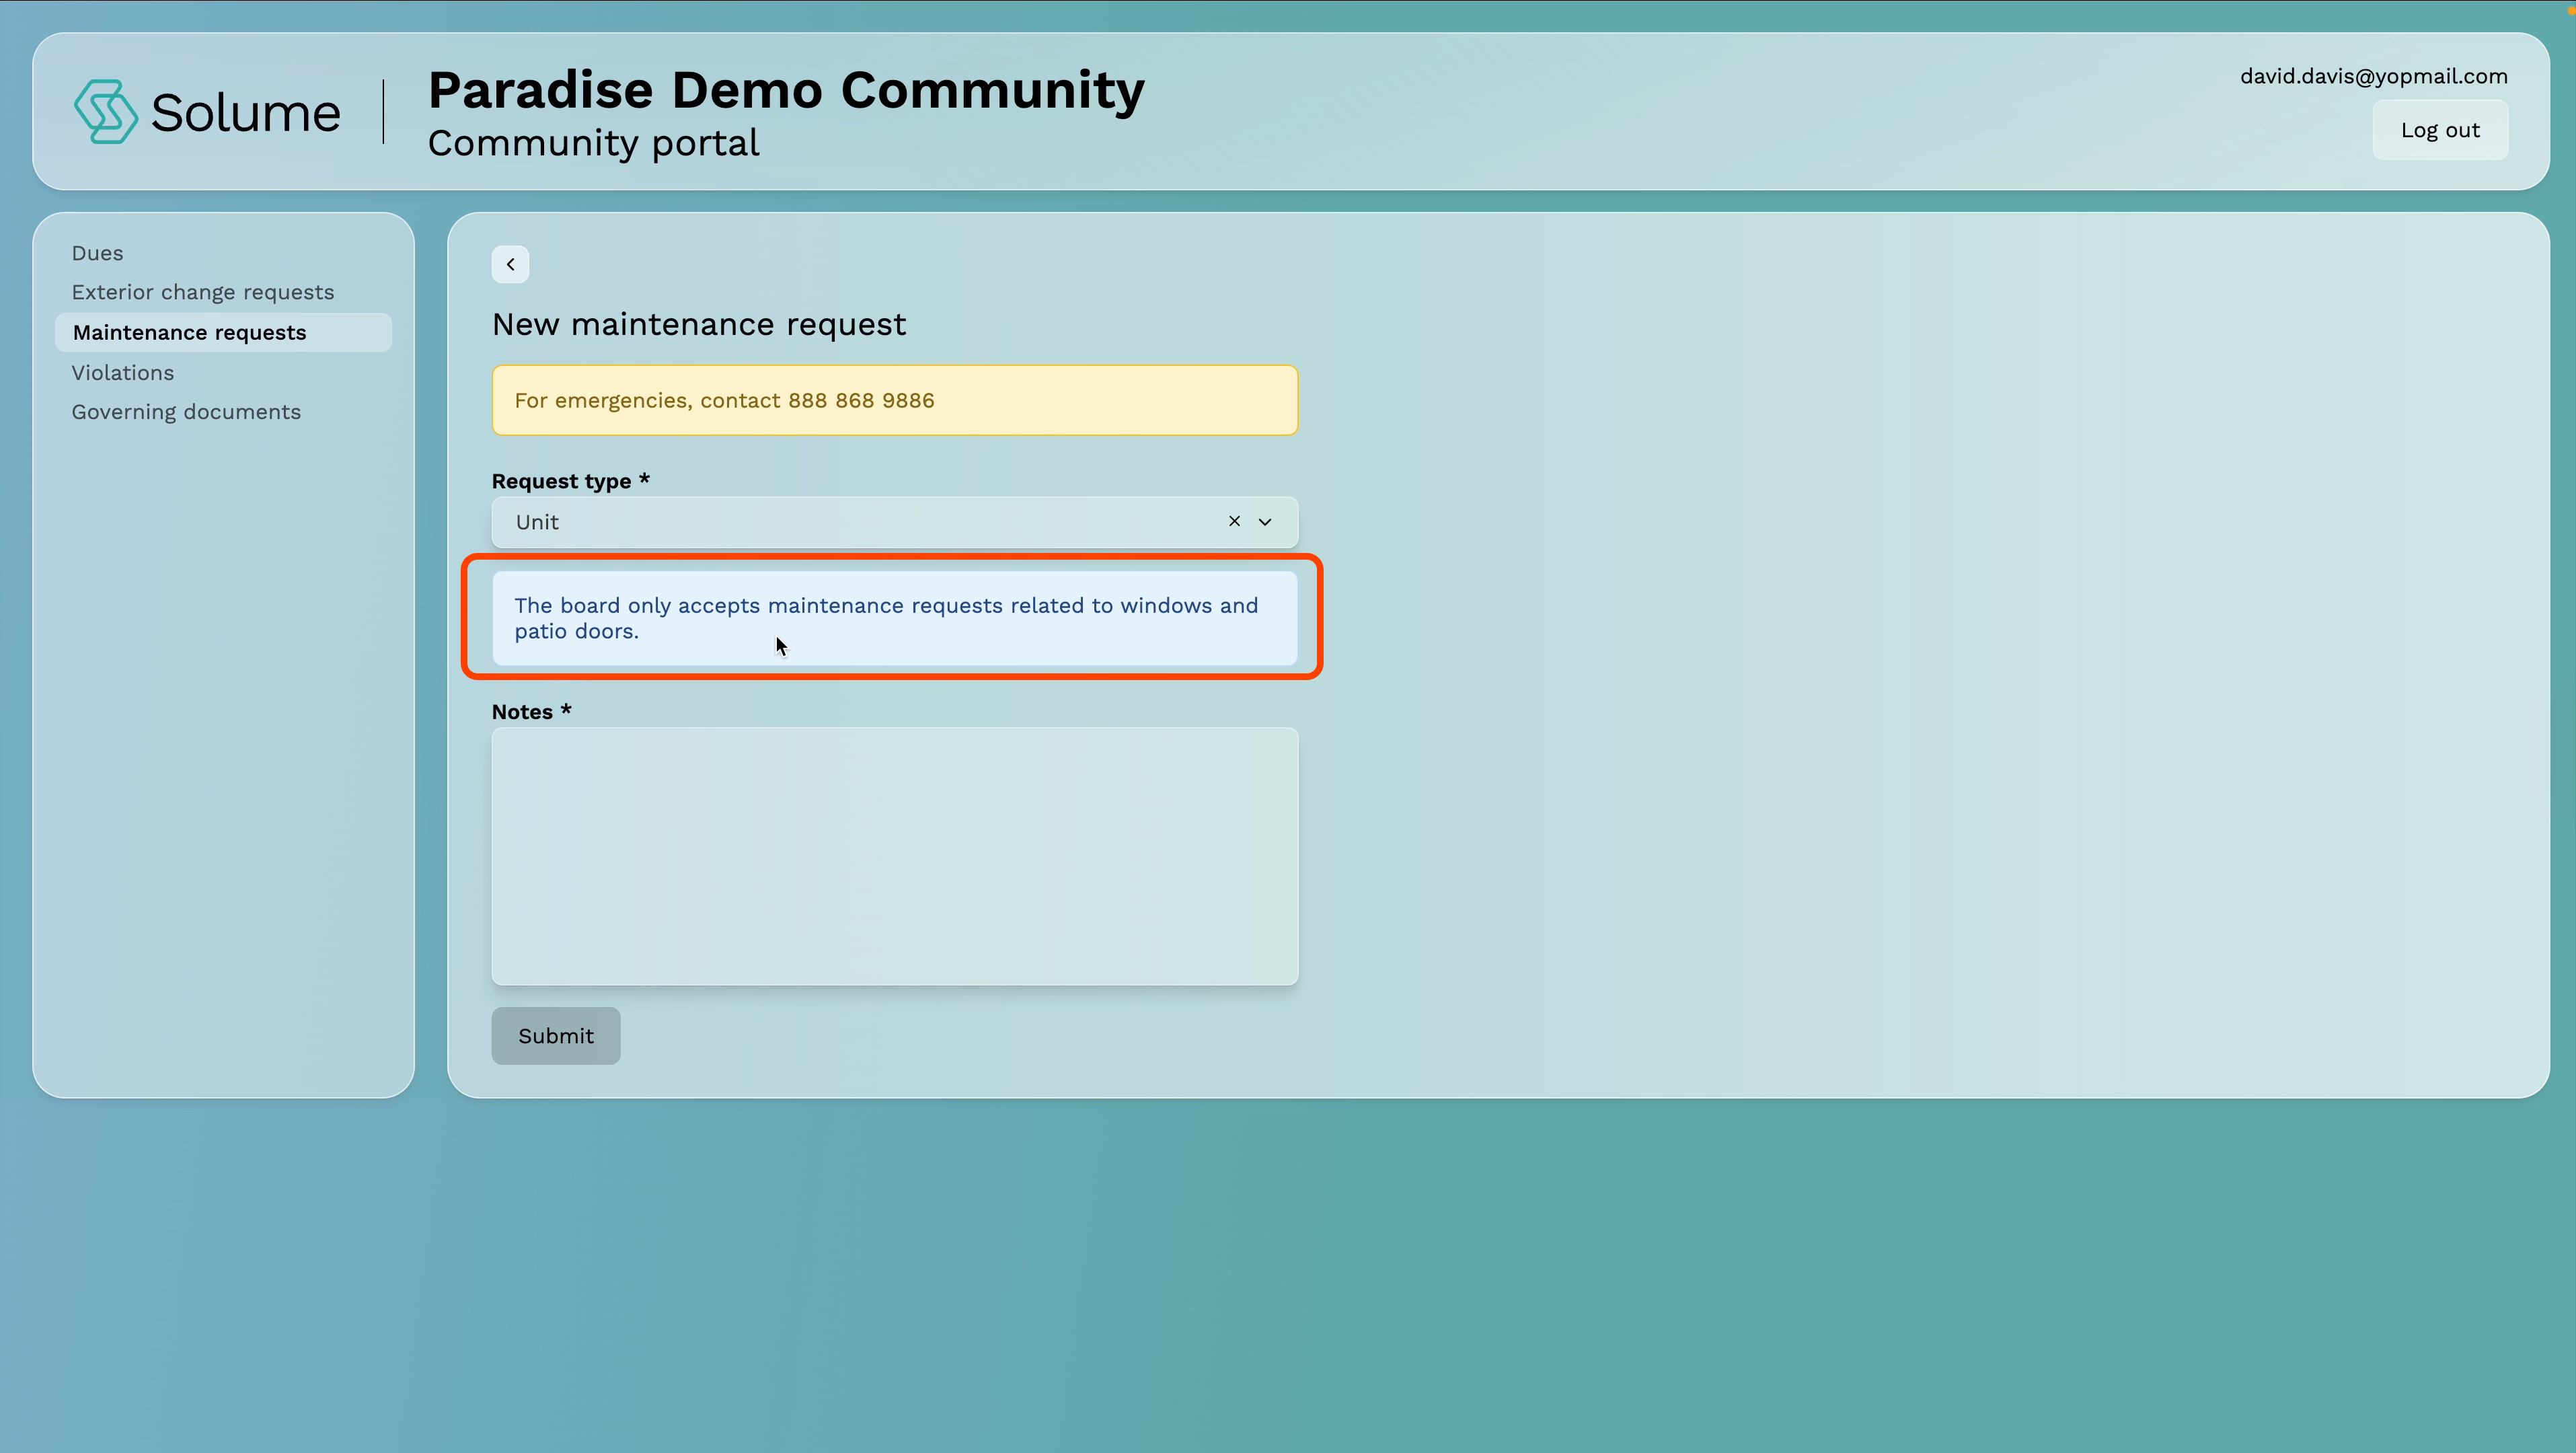
Step 5: Select the Type of Request
You'll be asked to identify whether the issue is:
- In Your Unit — For items inside your home or unit that fall under the community's responsibility. Your community will specify what qualifies. For example, some communities only accept unit-level requests related to windows and patio doors.
- Shared Asset — For issues affecting a common area or amenity that the community maintains, such as a pool, tennis court, parking area, hallway, or gym.
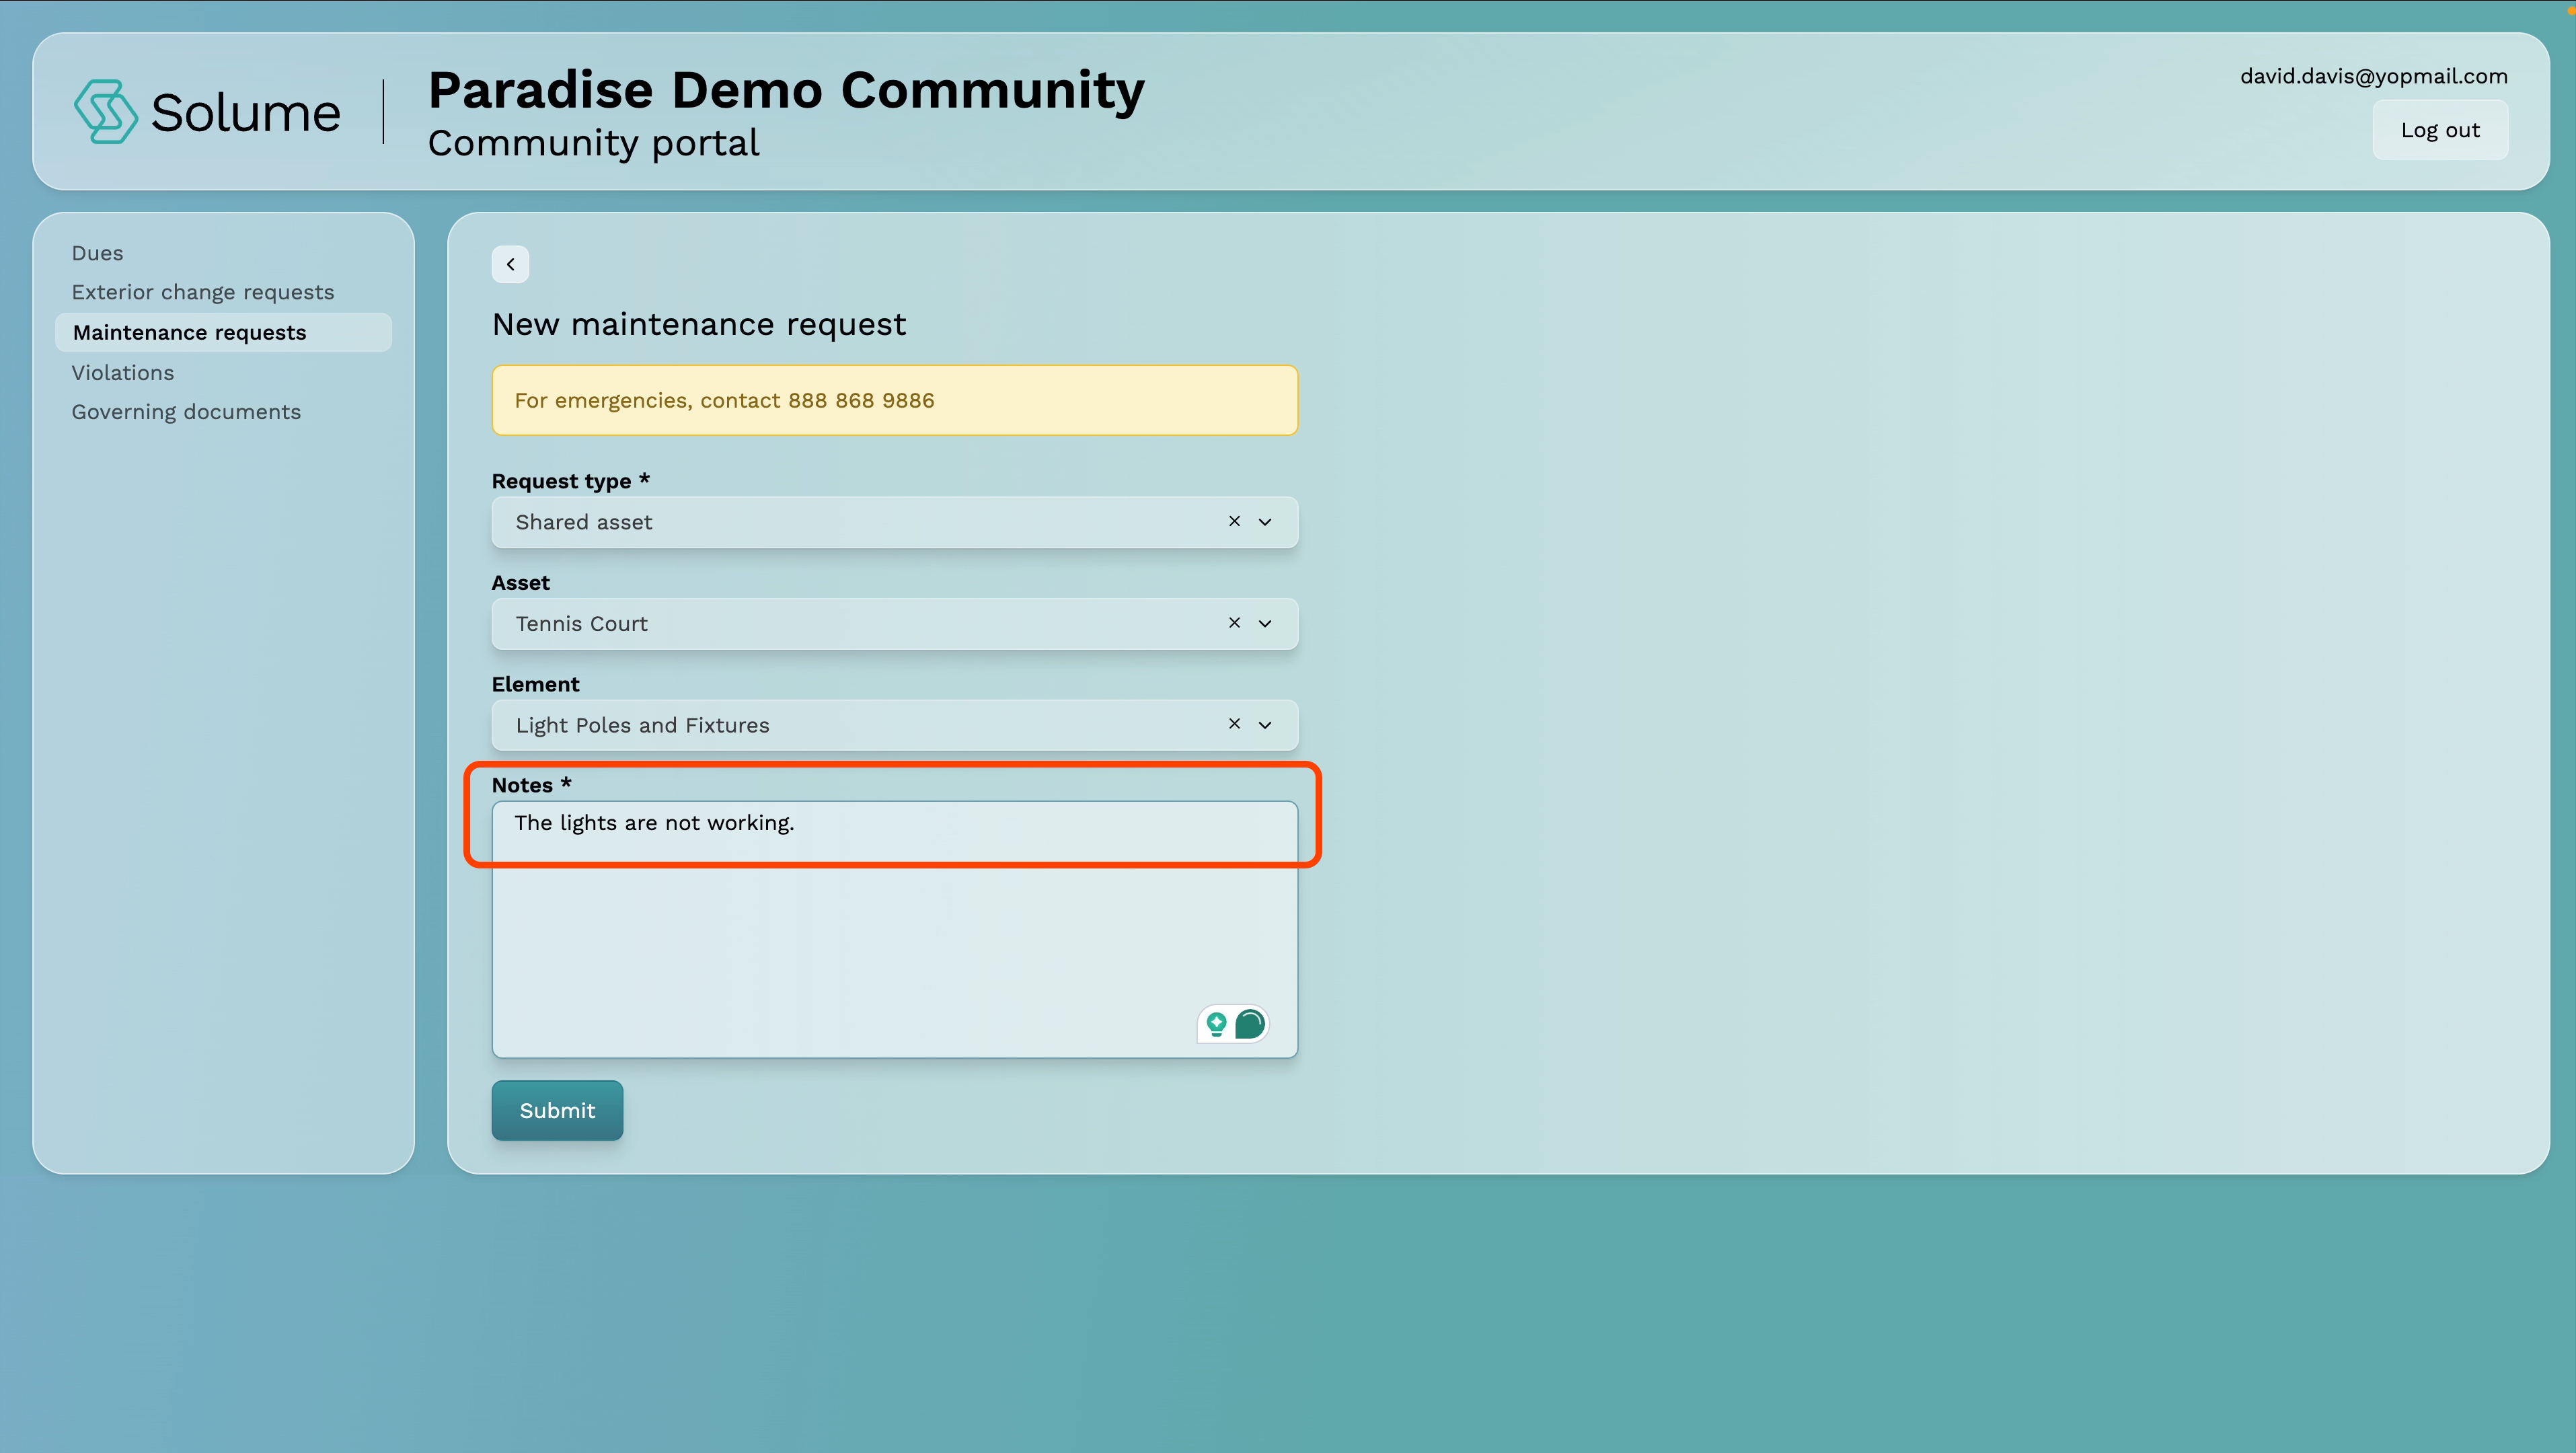
Step 6: Identify the Specific Asset (Shared Asset Requests Only)
If you selected Shared Asset, the portal will present a list of all community-owned assets. Select the one that applies to your request.
Note: This list is configured by your community, so the options you see may differ from another community's list.

Step 7: Describe the Issue
In the notes or description field, provide a clear explanation of the problem. Be as specific as possible — include the location, what you observed, and how long the issue has been present if you know.
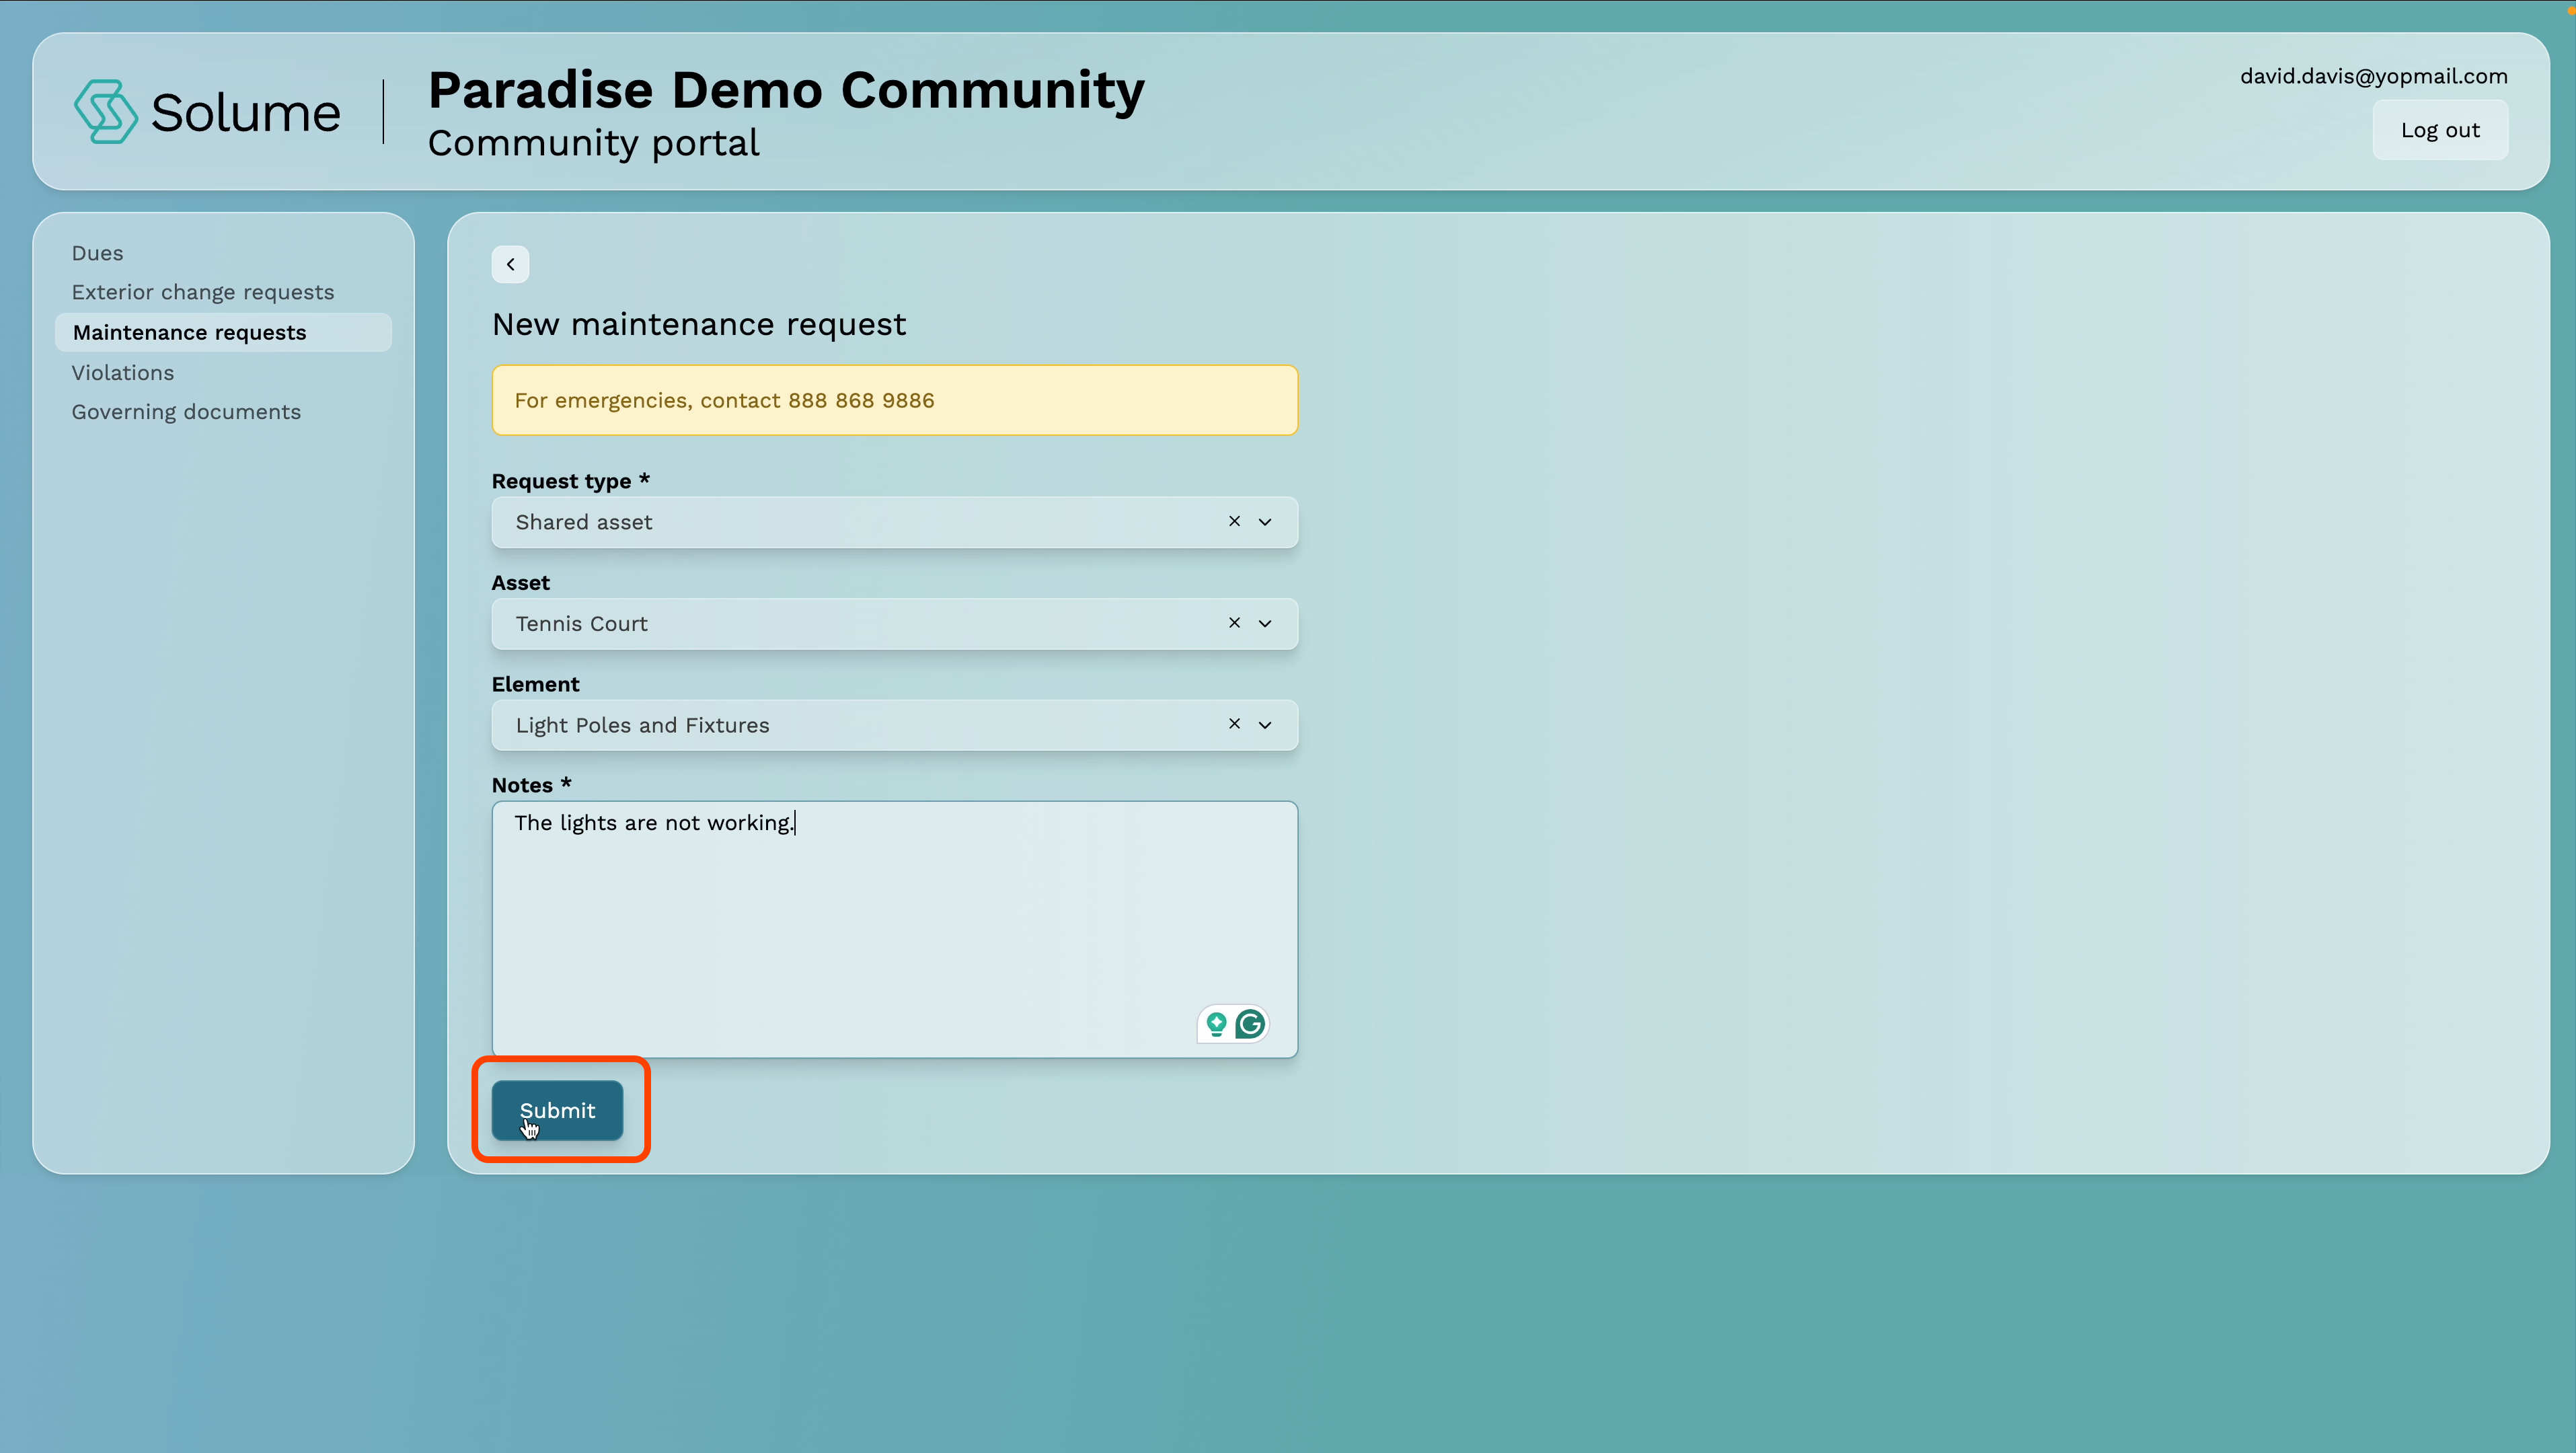
Step 8: Submit Your Request
Click Submit. Your request will be sent directly to the board. The portal automatically associates the request with your home or unit based on your login credentials, so you do not need to enter your address or unit number.
Note: Maintenance requests are intended for issues that fall within your community's defined scope of responsibility. If you are unsure whether something qualifies, review your governing documents or contact your board before submitting.
How to Access Your Governing Documents
Your governing documents are the foundational rules and guidelines that define how your community operates. The Solume portal gives you direct access to these anytime you need them — no need to contact the board or dig through old emails.
Step 1: Log Into the Portal
Enter your email address and password on the login screen and click Submit.
Step 2: Navigate to Governing Documents
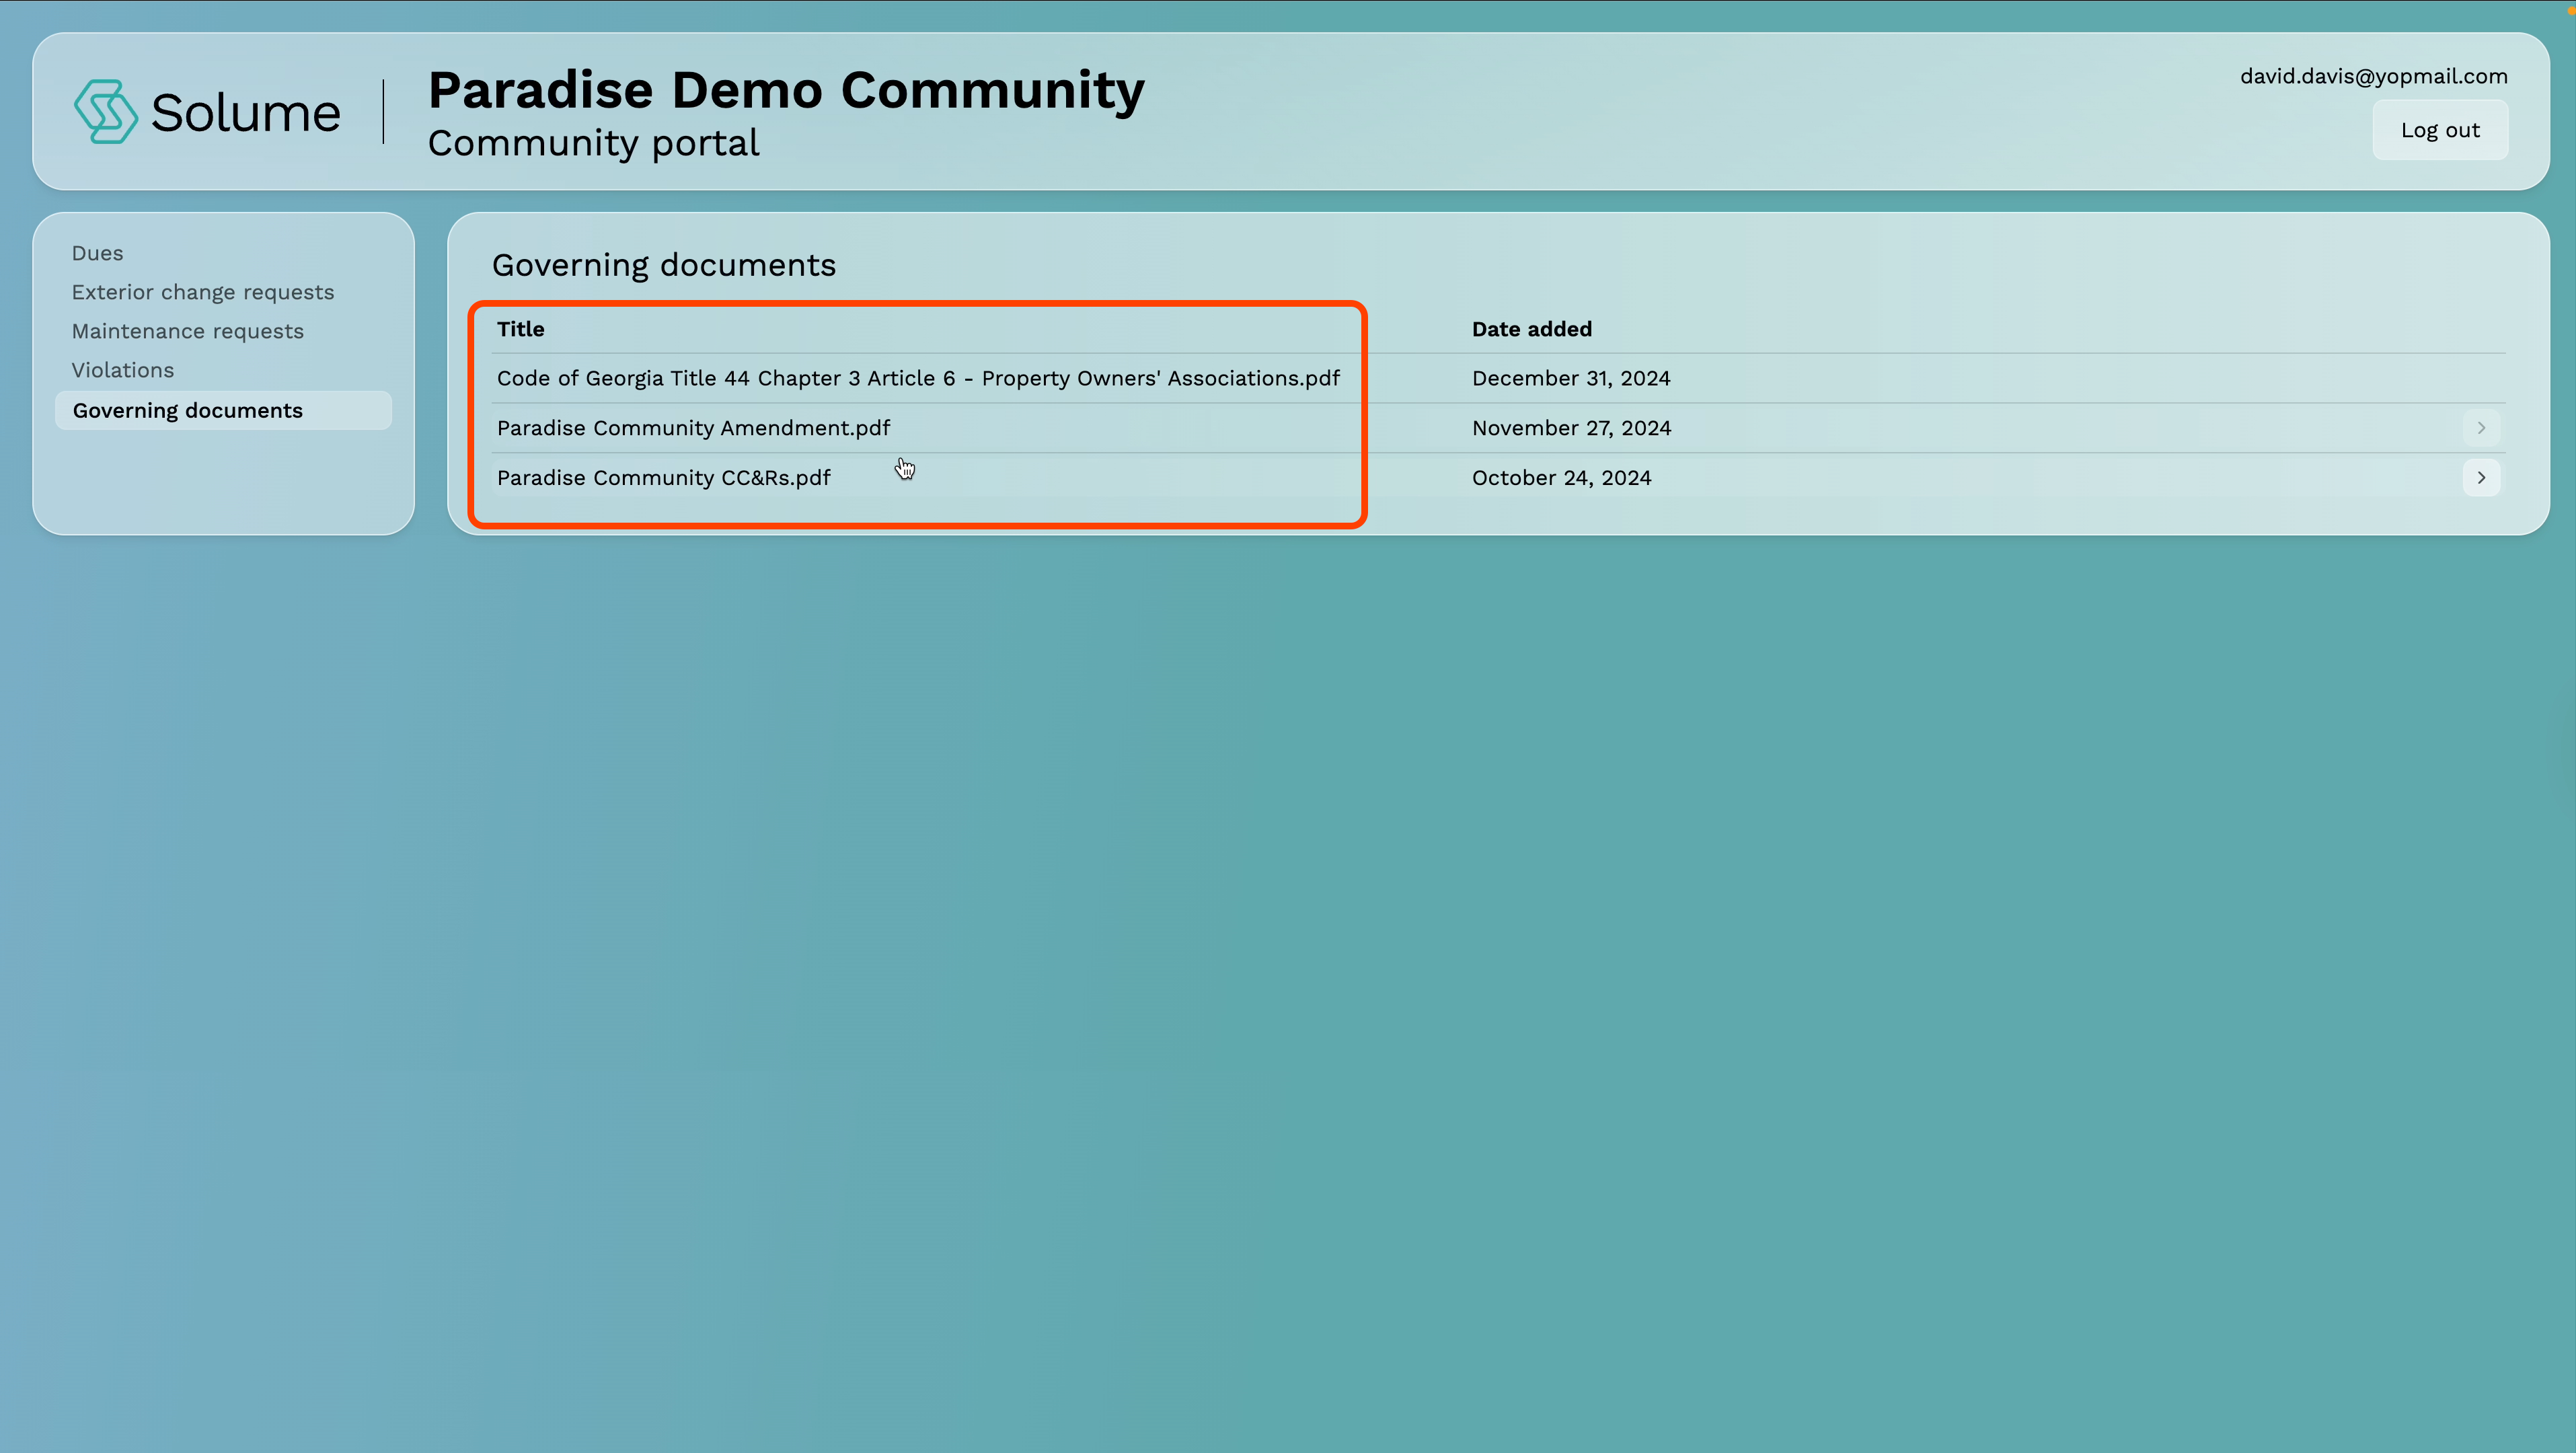
From your dashboard, locate and click on Governing Documents.
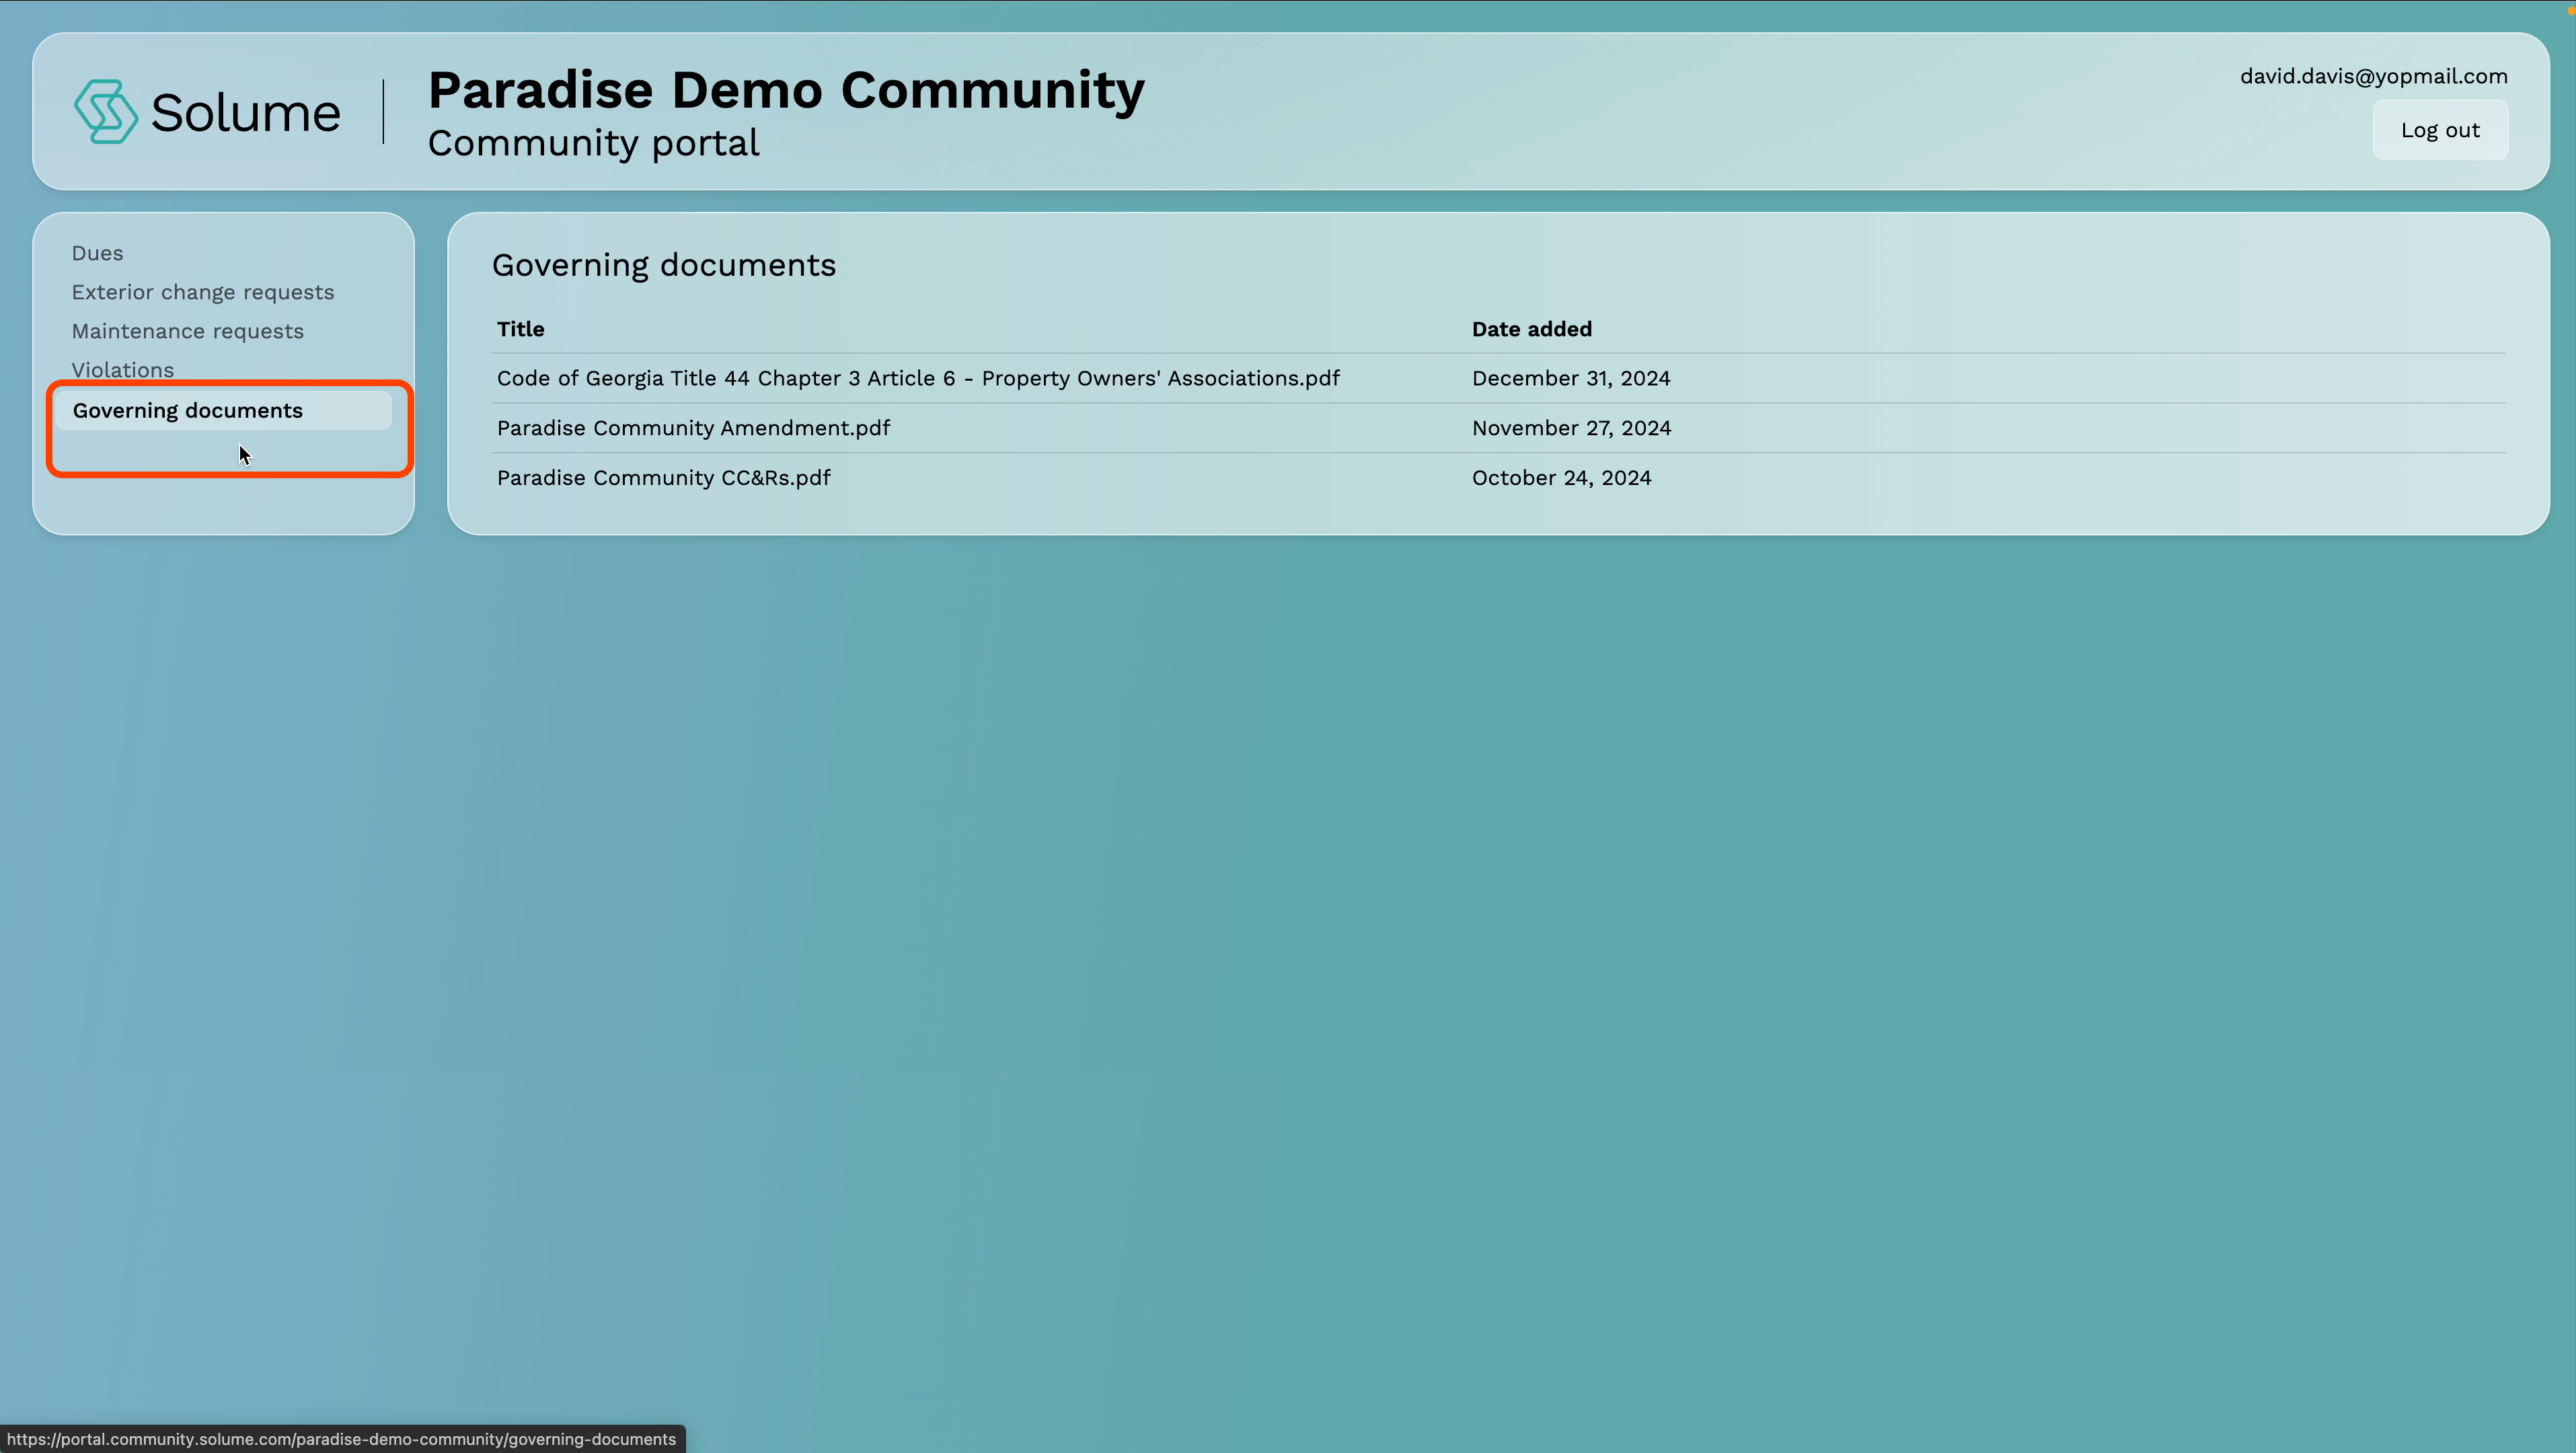
Step 3: Select the Document You Want to Review
You'll see a list of your community's governing documents. These may include:
- CC&Rs (Covenants, Conditions & Restrictions)
- Bylaws
- Rules & Regulations
- Other community-specific documents
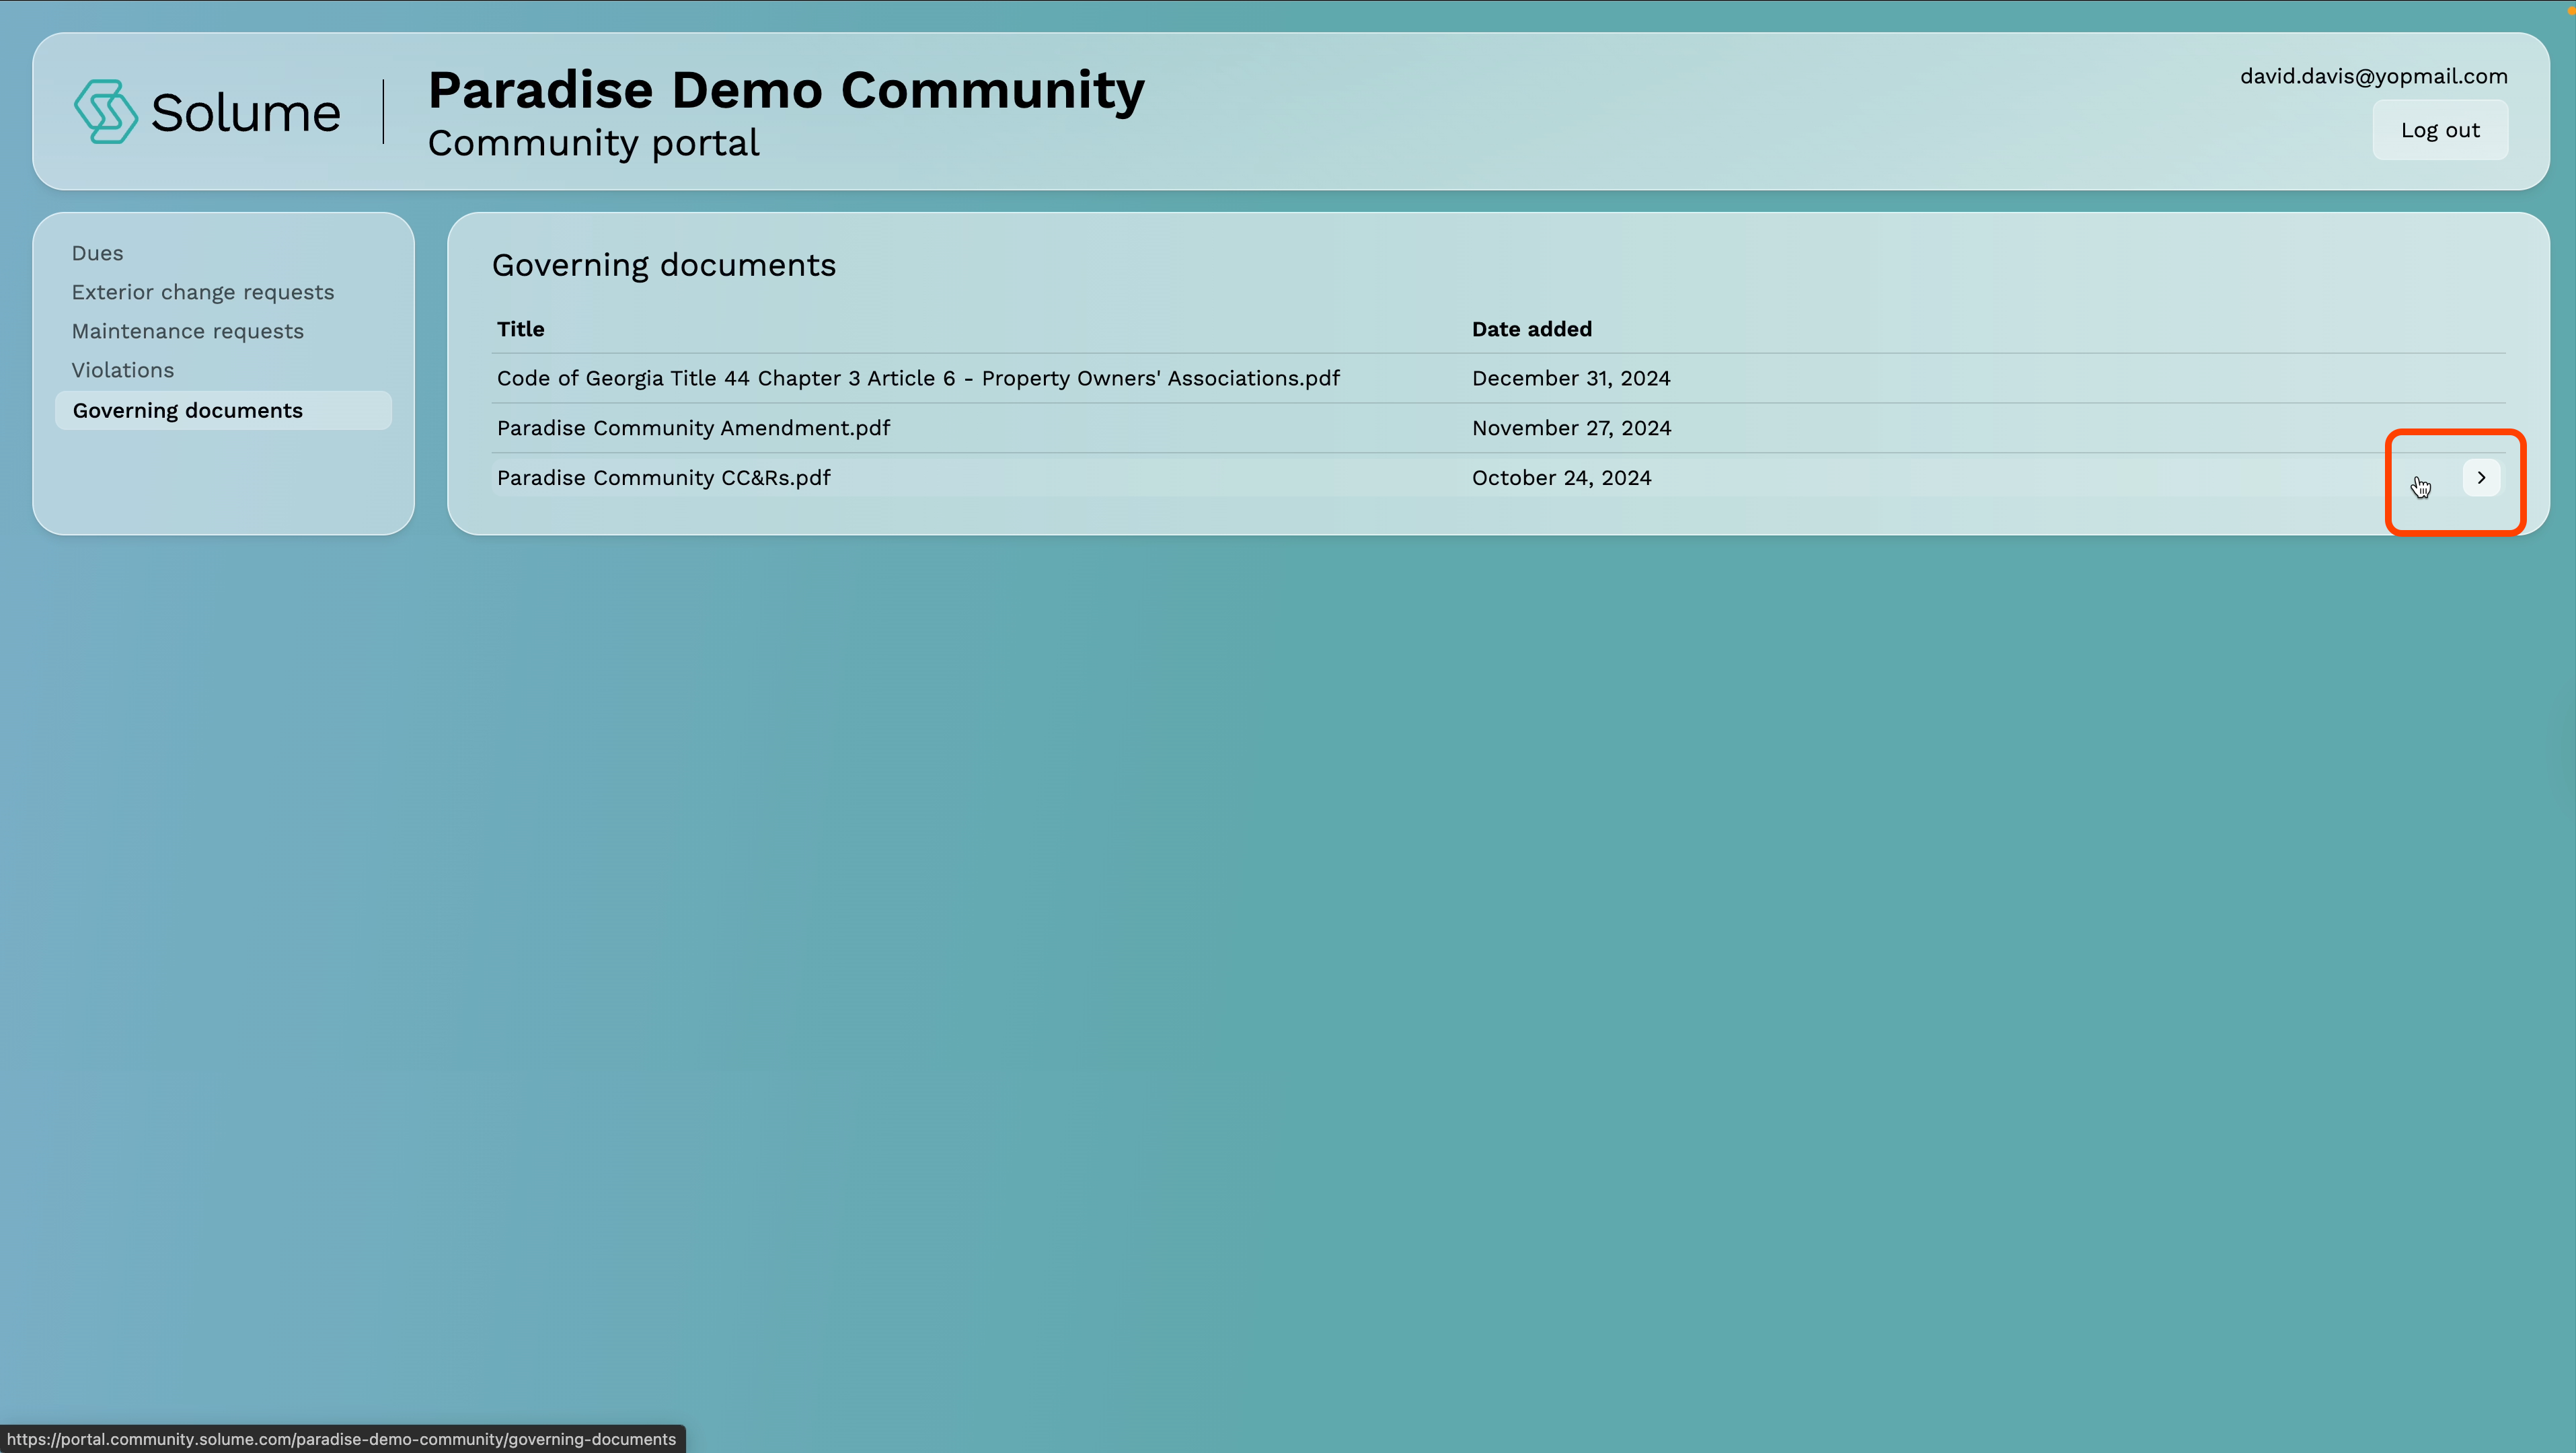
Step 4: Open and Read the Document
Click on any document to open it. The document will display directly within the portal for easy reading.
Note: The documents available in this section are specific to your community and are managed by your board. If you believe a document is missing or outdated, contact your board directly.
How to Use Solume Assistant
Solume Assistant is an AI-powered tool that answers questions about your specific community — its rules, policies, and governing documents. Instead of searching through lengthy CC&Rs or bylaws on your own, you can ask a direct question and get an answer pulled straight from your community's actual documents and applicable state laws.
Step 1: Log Into Your Homeowner Portal
Navigate to portal.community.solume.com, enter your email address and password, and click Submit.
Step 2: Access Solume Assistant
Once you're logged in, locate the navigation panel on the left side of your dashboard. Click on Solume Assistant to open it.
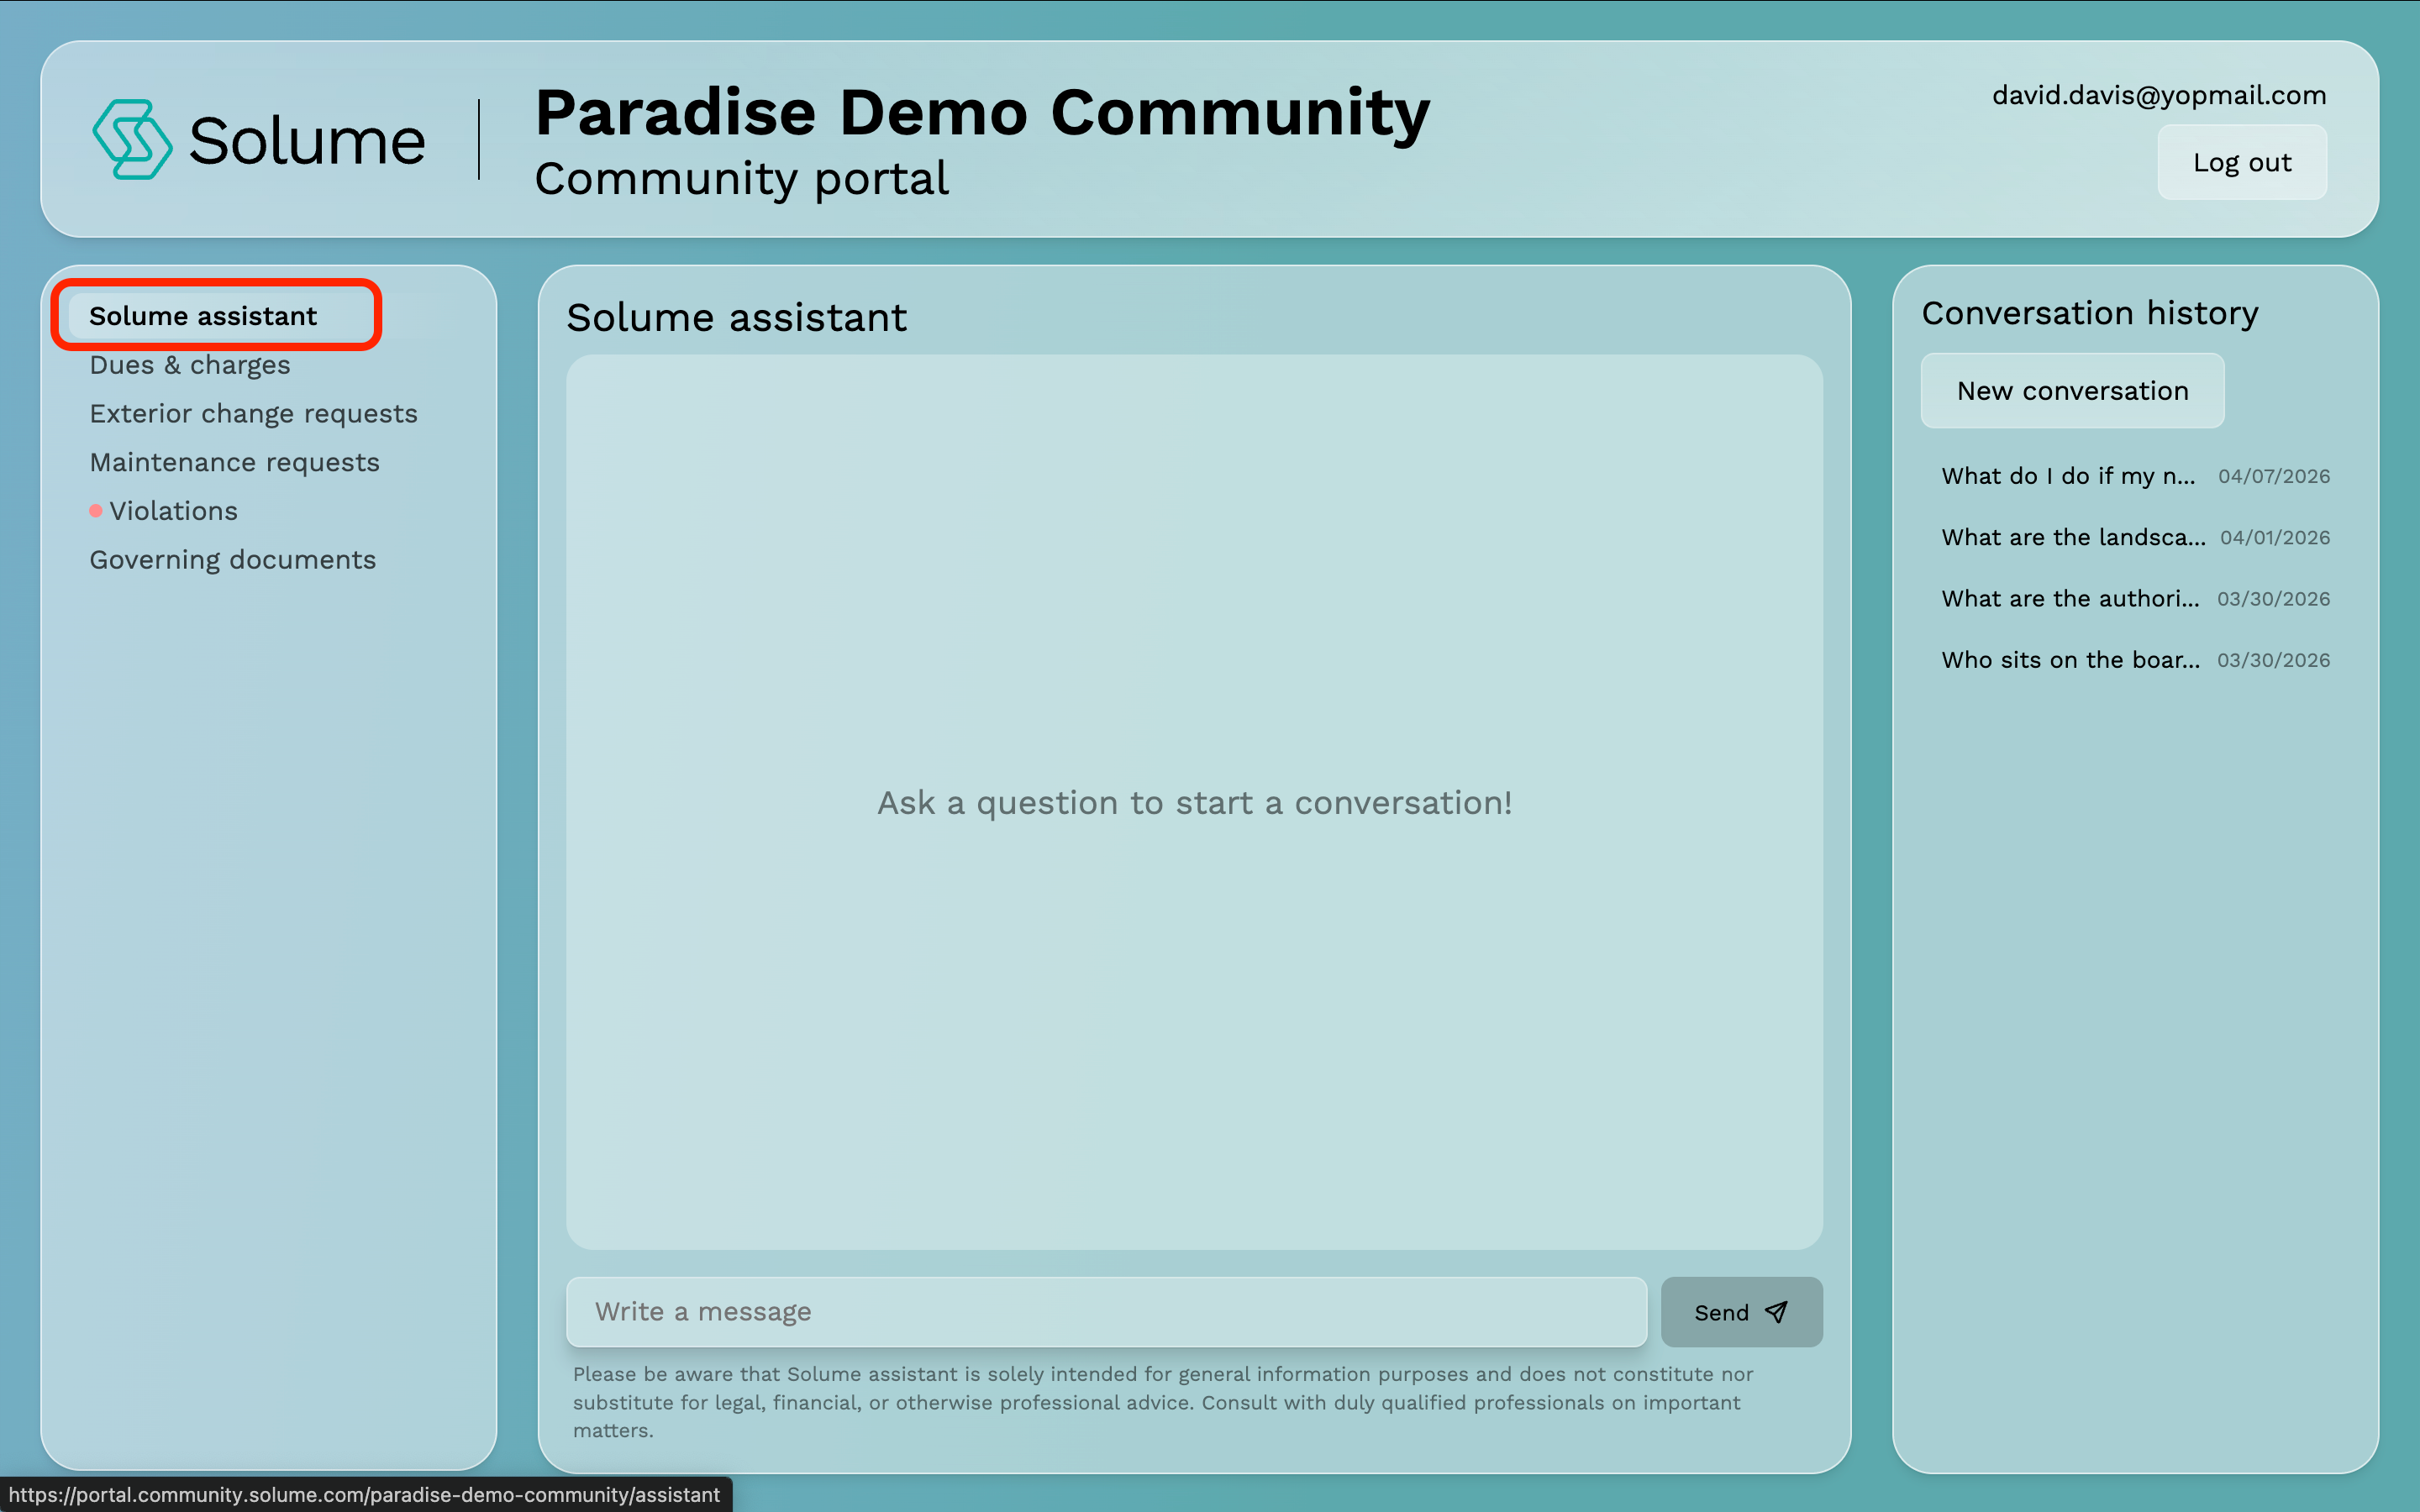
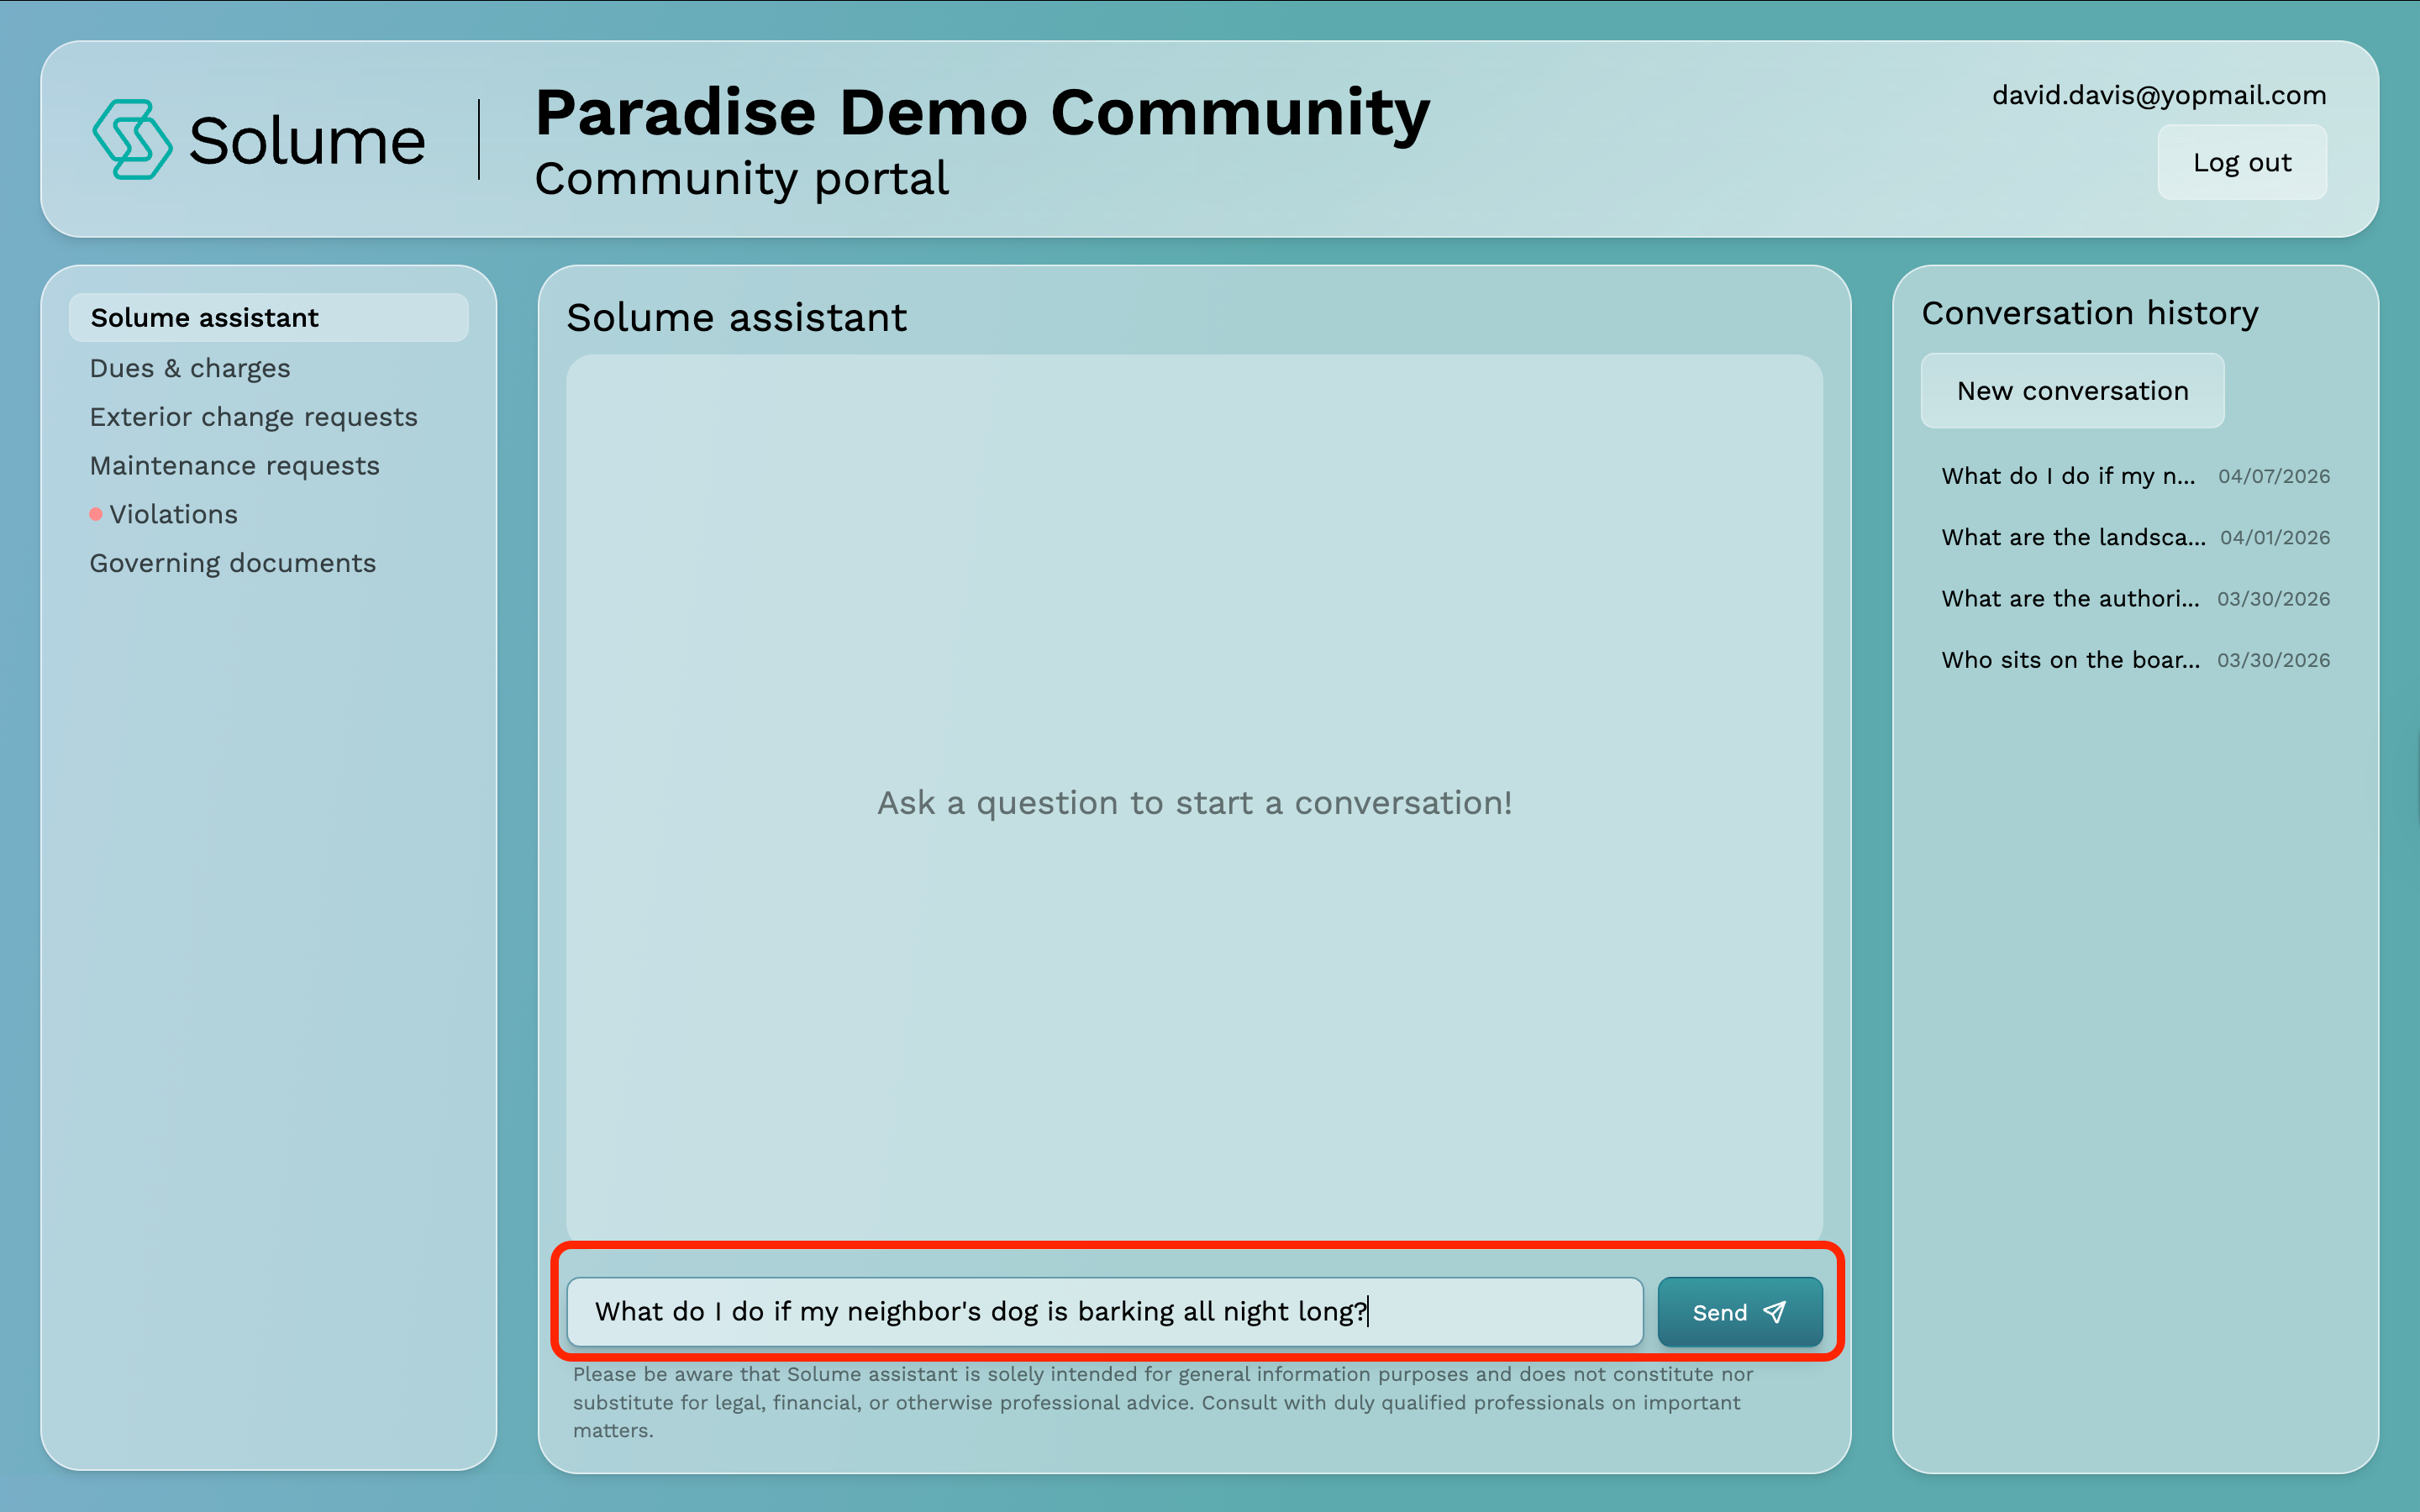
Step 3: Ask Your Question
Type any question related to your community into the text field and submit it. Solume Assistant will search your community's governing documents and applicable state laws to provide a relevant answer.
Not sure what to ask? Here are a few examples to get you started:
- What do I do if my neighbor's dog is barking all night?
- What are the policies for making exterior changes to my property?
- What are the rules for parking in our community?
- When are dues collected and what happens if I miss a payment?
Step 4: Review Your Answer
Solume Assistant will return a response based on what is written in your community's governing documents. Read through the response carefully.
Step 5: Verify When in Doubt
Solume Assistant is a powerful tool, but like all AI, it can make mistakes. Do not treat any response as absolute truth. If you have any doubt about the accuracy of an answer, verify it by reviewing your governing documents directly through the Governing Documents section of your portal.
Important Disclaimer: Solume Assistant draws its answers from your community's governing documents and applicable state laws. The accuracy of any response depends on the information contained within those documents. Always verify critical information before taking action. When in doubt, consult your governing documents or reach out to your board directly.
